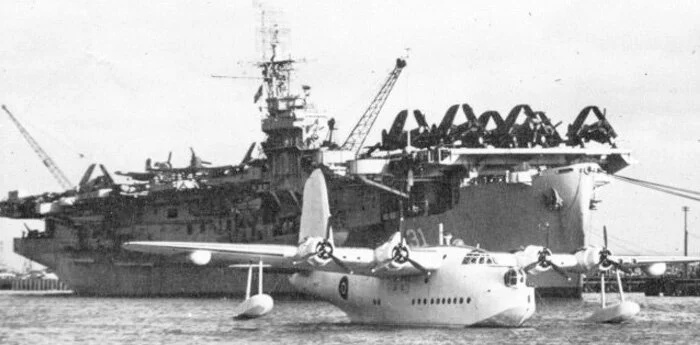
Baby Flattops of the Royal Navy’s Ruler Class

When I think of naval aviation in the Second World War, the cinema of the mind projects grainy black and white images of gargantuan fleet carriers, streaked with rust, heaving mightily in heavy seas, white foaming water streaming from gun tubs, signal flags snapping at the halyards, the silent wink of the Aldis lamp speaking like the eye of Sauron from lofty black heights. I see the burning list of USS Franklin as she faces the death she would eventually cheat. I see a kamikaze roaring like a wounded bull through the flak to drive deep into USS Essex. I see a heavy black plume of smoke rising from HMS Formidable and in front of it a white geyser of steam as she vents her system to prevent her boilers exploding.
As a young boy growing up in the shadow of the Second World War, my life was permeated with the stories and painted with the images of that massive global conflict. Our childhood games were centred on its looming presence and our drawings, readings and dreams were filled with its dark and dramatic persona. It was inescapable, but we did not wish to escape it for it was not only a world of obscenity and evil, it was a world of heroes, of pilots and gunners and captains and tank drivers—men and women who now lived in our neighbourhoods, called us home to lunch, and drove us to cub scouts.
For me, it was the imagery of warships and airplanes that seared its powerful technological brand onto my boyish imagination. When these two realms—sea and sky—came together on the windswept expanse of an aircraft carrier’s flight deck, I was gob-smacked by the spectacle of it all—the steel, the smoke, the sailors bending into the wind, the saw blade shimmer of propeller arcs, the endless bright sparkling expanse of the Pacific, the unmitigated danger of it all.

The big fleet carriers and their titanic battles in the South Pacific are surrounded by legend and drama. Images of USS Franklin’s struggle to live have set the tone for our emotional understanding of carrier warfare. Here, hundreds of sailors wait on the high side of Franklin’s list to be taken off by the cruiser USS Santa Fe. Though “Big Ben”, as she was known, survived the attack by Japanese bombers off the coast of Japan and made it back to New York, she lost more than 800 of her 2,600-man crew. Photo via Wikipedia
My picture of naval aviation is shaped by the images I found in books, by the lurid and overly dramatic box art of Revell model kits, by documentaries like Victory at Sea and Fighting Lady. The Hollywood pitch for the William Bendix B-movie classic, Battle Stations, read: “33,000 Tons of Explosive Human Emotion!” Indeed it was for a boy of 12.
Yes, these mighty flattops and their fighting squadrons took the headlines, but they deserved it. They were the prime targets of the enemy and the chess pieces in play in a gigantic and deadly board game played out across the Pacific and Atlantic Oceans and the Mediterranean Sea. But to say they were the entirety of naval aviation in the Second World War is to say you know little of the subject.
During the Second World War, there were literally hundreds of vessels on all sides that could be classified as aircraft carriers; from merchant vessels with a single catapult-launched Hurricane to seaplane carriers to merchant aircraft carriers (similar to an escort carrier but without a hangar deck) to the biggest aforementioned fleet carriers. Of these, the largest number were escort carriers, the ships we have come to know as “baby flattops”. There were an astonishing 123 escort carriers built for the United States Navy, many of which were transferred to the Royal Navy after launch. These so-called “baby” aircraft carriers were hardly small—around 500 feet in length, carrying dozens of aircraft, displacing 8,000 tons and capable of speeds up to 20 knots.
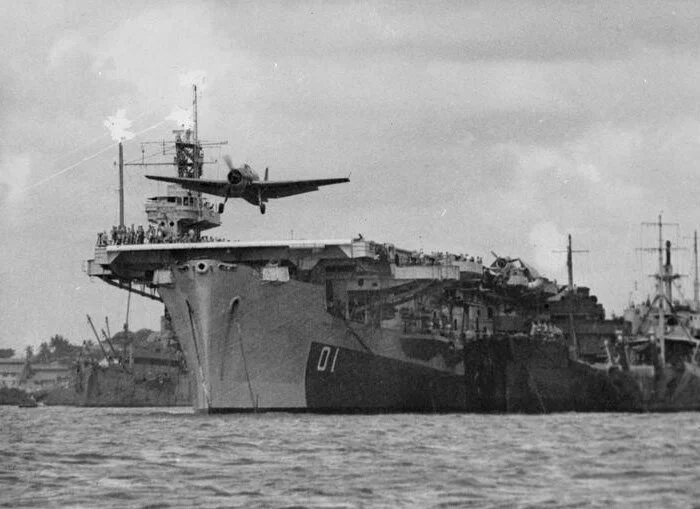
While the big fleet carriers took the fight directly to the enemy and received the attention of the folks back home, the escort carriers did a myriad of necessary tasks that underpinned the very concept of carrier aviation—ferrying aircraft, replenishing aircraft, fuel and stores and carrying troops, as well as taking the fight to the enemy with anti-submarine sweeps, convoy escort, “spare deck” duty, and attacks on enemy shipping and land installations. They were the true all-purpose aviation vessels of the Second World War. The big boys made history in such battles as Leyte Gulf, Midway, Coral Sea, Santa Cruz, Taranto and Pearl Harbor, but the baby flattops supported, supplied, and suffered along with them from Operation TUNGSTEN to Operation ICEBERG. In fact, the first warship to be sunk by a kamikaze attack was the Casablanca-class escort carrier USS St. Lo in the battle of Leyte Gulf.

This lineup of Third Fleet Essex-class carriers at Ulithi Atoll during the Second World War, sometimes called Murderer’s Row (named after the name given the six big hitters of the 1920s New York Yankees—Earle Combs, Mark Koenig, Babe Ruth, Lou Gehrig, Bob Meusel and Tony Lazzeri), demonstrates the ascendency of American naval aviation near the end of the Second World War. From front to back, we have USS Wasp (CV-18), USS Yorktown (CV-10), USS Hornet (CV-12), USS Hancock (CV-19) and USS Ticonderoga (CV-14). To the far left is the escort carrier USS San Jacinto (CVL-30), above that USS Lexington (CV-16) and the older USS Langley (CVL-27).
Most of the escort carriers (CVEs) that served with the United States Navy and the Royal Navy were built by shipbuilding companies on the Northwest Coast of the United States, like the Seattle–Tacoma Shipbuilding Corporation, Kaiser Shipyards, and Western Pipe and Steel. Seattle–Tacoma, with its eight massive launching ways and Kaiser of Vancouver, Washington with 12, were two of the largest. Both of these companies were building standardized mercantile hulls, most of which were built as cargo vessels, but scores were requisitioned by the US Navy at the time of their keel laying or slightly later during construction and set on a different course to be finished as escort carriers in one of three different classes: Bogue, Casablanca and Commencement Bay. There were other minor classes, but these three types made up the vast majority of CVEs.
Though all of these carriers were launched with American names, many did not serve with the United States Navy. Instead, 44 escort carriers were transferred to the Royal Navy after launch and completion under the Lend-Lease program and renamed. Most of these were built at the Seattle–Tacoma Shipbuilding.
Most of these carriers, but not all, followed a well-traveled path to service with the Royal Navy. After sliding down Seattle–Tacoma’s or Western Pipe and Steel’s launching ways, they were completed dockside, sometimes at another facility. Following completion they underwent sea trials, then were transferred to and commissioned in the Royal Navy with a Royal Navy Captain taking command with a new crew. Then they would all sail north to Vancouver, British Columbia for modifications to suit Royal Navy standards—a long list of nearly 150 different mods to the hangar and flight decks, fuel handling systems, communications equipment and much more. This was done at the Burrard Dry Dock Co. in North Vancouver. Once this was completed, many had further work done in Esquimalt followed by a shakedown cruise, a short ammunitioning trip to Bremerton, Washington, then a maiden voyage that usually took them to San Francisco, San Diego, through the Panama Canal, and then up to Norfolk, Virginia where they would most often pick up Lend-Lease airframes (Corsairs, Hellcats, Avengers and other types built in the USA) and fill their hangar and flight decks for the ferry trip across the Atlantic. Sometimes it was both the aircraft and personnel of new Fleet Air Arm squadrons that had trained and formed in America. The crossing was invariably made in convoy from New York to Liverpool and on to Scotland. Once in the Clyde, their Royal Navy careers would begin.
Related Stories
Click on image


Some were relegated to the drudgery of aircraft ferrying and one or two never even launched a single aircraft, but most saw some combat activity either in the high arctic waters off Norway, in the swelter of the Indian Ocean or with the Royal Navy’s Pacific Fleet.
Unlike fleet carriers, escort carriers of both the United States and Great Britain had lives after their fighting careers were over. Nearly all of them sold to commercial shipbuilders after the war and were stripped down to their base mercantile hulls, then rebuilt as cargo vessels, many of which, at nearly 500 feet long, were the largest of their day. A few of them even became luxury ocean liners. These often-beautiful merchant vessels continued on for another 20–25 years or more, with most going to the breakers in the 1970s.
A year ago, I decided that I would do a story on these escort carriers and their role in the expedition of the war. I chose to write a story on one particular class—the Ruler Class of the Royal Navy, named not for the first ship of the same design, but rather for the naming convention from which most of these ships took their titles. Ruler-class carriers all carried short names of royal title or perhaps political leadership—Ameer, Arbiter, Atheling, Begum, Emperor, Empress, Khedive, Nabob, Premier, Queen, Rajah, Ranee, Ruler, Shah and Thane. I thought this was the entirety of the class, but I was wrong. Included in this group are also Patroller, Puncher, Ravager, Reaper, Searcher, Slinger, Smiter, Speaker, Trouncer and Trumpeter—25 carriers in all.
Once I started into this, I sort of regretted it, for it soon turned into a massive project—about five times the size of an average story put out on this site. But I kept working on it over many months and despite its 33,000 word length, I think it offers, through photographs and words, a broad glimpse into the role of the escort carrier in the Second World War as well as the lives of the sailors and aircrews that laboured on their steel decks. I offer it here; this homage to the oft-forgotten escort carrier, for your edification and enjoyment, so very grateful that it is over. If you just view half the images, you will have learned much.
In writing their stories and collecting their images, I used many websites on the internet, but particularly four outstanding websites, run by passionate naval historians whose collected works now represent a window on that world to anyone who might want to look through it. Every time I come across sites like these, I am humbled by the scope of their knowledge and the depth of their commitment to building this knowledge base and sharing it with the world.
The first is the RoyalNavyResearchArchive.org.uk—a broad and deep website dedicated to telling the stories of the Royal Navy and its ships. Their website claims that “The Royal Navy Research Archive aims to provide a virtual museum, giving access to a range of web materials related to RN ships, establishments, units, and personnel, primarily from the start of World War One through into the 21st century. Content includes articles, short histories and the reminiscences of the men and women who served in the Royal Navy, WRNS, and Royal Marines.” This belies the depth of the passion found in its many pages, and the access to story and image offered the visitor.
The second site is the brief-yet-informative logs of individual ship movements and assignments found in the pages of Naval-History.net. This wonderful site is an excellent resource to corroborate movements and tasks of each of the Ruler-class carriers. The site makes it very easy to understand the chronology of events from a ship’s launch to its breaking. As well, the photo galleries of Nav-Source.org, which outlines the history of all American ships, were a superb place to find descriptive images. Since all of the Royal Navy’s escort carriers were at one time American ships (albeit very briefly), their stories and images are included in the site’s pages. Lastly, one of my go-to sites is that of the Imperial War Museum in Great Britain. Though their photos have only brief descriptions accompanying the photos, the sheer volume of photographs on their site guarantees that you will find something interesting for every ship.
Here now are the brief histories of each of the Ruler-class escort carriers. Please enjoy what you will of these images and texts. I’m going to bed.—Dave O’Malley
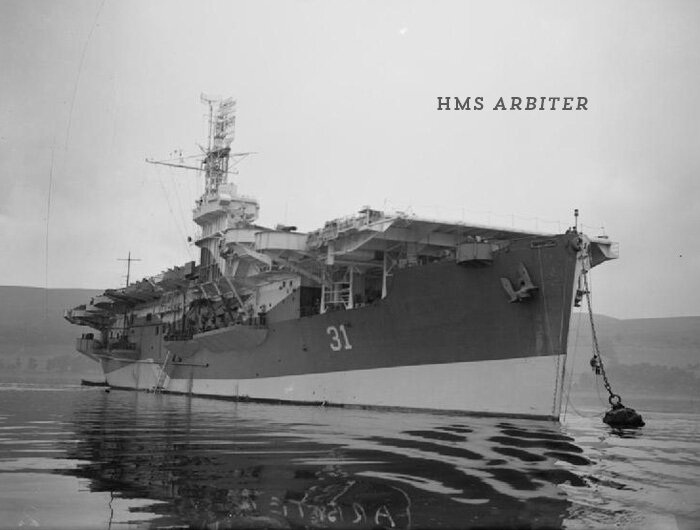
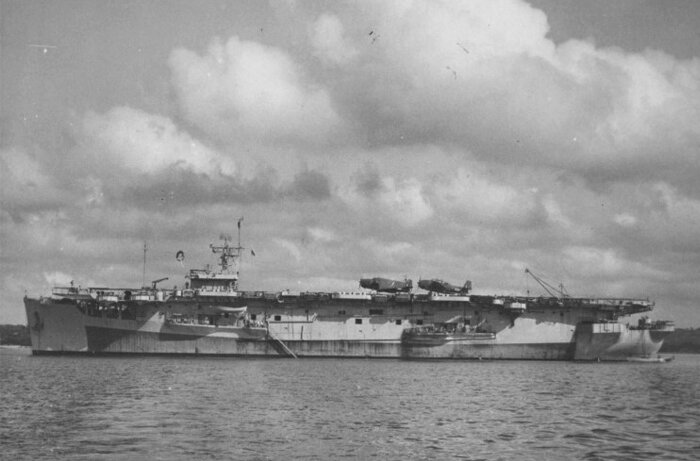
HMS Arbiter (Pennant Number D31)
When HMS Arbiter was first launched, she did not come down the ways as Arbiter or even as a Ruler-class carrier in the service of the Royal Navy, but rather as USS St. Simon (CVE-51), an American Prince William-class escort carrier. While nearly all the ships of the Ruler Class were named after cultural heads-of-state (a Scottish Thane, an Arabic Ameer, and an Egyptian Khedive), her name was more a synonym than a title, referring to someone with the power to make a decision or judgment. I suppose that if she was launched in the time of President George W. Bush, she might have been named HMS Decider! She was launched at the Seattle–Tacoma Shipbuilding Corporation on 9 September 1943 and went straight away to the Portland Iron Works for completion. While there she was transferred to the Royal Navy on the last day of 1943, under the command of R.C. Harry. Following this work, Arbiter sailed for Vancouver for modifications to Royal Navy standard. While awaiting her turn in the Burrard Dry Dock Co., Ltd. yard, she was in the company of sister ships Queen, Speaker, Ruler, Nabob and Premier, all at various stages of completion.
HMS Arbiter moored at Greenock at the Tail o’ the Bank anchorage in the Upper Firth of Clyde, Scotland. The Tail o’ the Bank was an anchorage for the Royal Navy’s Home Fleet in the Second World War as well as a major assembly point for westbound Atlantic convoys. She appears to have been given a fresh coat of paint with an uncomplicated dazzle scheme—possibly after refit for Pacific duties. Note the seaman on a bosun’s chair scraping rust from the anchor chain. Photo: Imperial War Museum
As with all the ships of her class, Arbiter’s modifications included a lengthening of her flight deck, hangar accommodations, stores as well as safer fuel stowage and at-sea refuelling systems. Also added were modifications to internal communications systems and improvements to the “darken ship” system.
After completion of Royal Navy modifications, Arbiter embarked the 12 Grumman Avengers of 853 Naval Air Squadron from RCAF Station Sea Island, trained up her air department crews over the next week, and then set sail on her maiden voyage to Panama via San Diego. She had engine trouble near Balboa (the Pacific entry point for the Panama Canal), had to be towed to port and could not enter the canal for another 8 days. Finally, emerging at Colón, she sailed for New York via Norfolk, Virginia, training all the way. In New York, she stowed the 853 Squadron Avengers and loaded a deck full of Corsairs for Great Britain. She made it to Glasgow on 20 June 1944 where she offloaded her Corsairs and bid goodbye to the pilots and crew members of 853 Squadron and their Avengers. In June and July of 1943, Arbiter sailed back to New York and Norfolk, loaded Hellcats, Corsairs, Martlets and a Cadillac and brought them back to Liverpool. She made one more Liverpool–Norfolk–Liverpool ferry trip that year before being sent to the Harland and Wolff Shipyard in Belfast, Northern Ireland (the same shipyard where Titanic was born) for refit to make her ready for work in the tropical climes of the South Pacific.
HMS Arbiter dockside with a deck full of Corsairs. The large cranes lead this author to believe this was possibly the offloading of her cargo of Corsairs at Glasgow. In the foreground floats a white painted Short Sunderland of Coastal Command, also suggesting Glasgow. Anyone knowing for sure is encouraged to write me. Photo: Imperial War Museum

HMS Arbiter gets underway on the choppy windswept waters of Greenock without her complement of aircraft. Note that the simple camouflage paint scheme offers the profile of a much smaller ship. This was intended to give a U-boat captain, under certain sun and cloud conditions, the idea that the target was not a carrier. There is no proof this camouflage device ever worked. Photo: Imperial War Museum

A nice photograph of HMS Arbiter underway at speed with her decks cleared, followed by an escort ship—standard practice for defence and for rescuing downed pilots. Photo: NavSource.org

HMS Arbiter tied up at Greenock in a photograph likely taken at the same time as the first image in this section on Arbiter. The date was 29 July 1944. The dazzle paint camouflage on her starboard side was more fluid that that on her port side. With many of the Ruler-class escort carriers painted in similar fashion, the ship’s number (31) is the best way to identify her. Photo: Imperial War Museum
After January sea trials near Belfast, Arbiter embarked the Corsairs of 1843 Naval Air Squadron and began immediate flight training in preparation for work in the Far East and South Pacific. This did not have an auspicious start, with three major accidents in four days, one fatal. During the entire training period, there were 17 incidents aboard Arbiter, the bulk of which were crashes into the barrier.

A Corsair (KD578) of No. 1843 Squadron, Fleet Air Arm rests pointed the wrong way after crashing on board HMS Arbiter on 13 March 1945, en route to Port Said from Gibraltar. The pilot, Sub-Lieutenant W. Noble, struck the round-down on landing, ripping off the tail wheel oleo and then crashing through two barriers, finally coming to rest pointing in the direction from which he came. Photo: Royal Navy Fleet Air Arm
Following this period of workup, Arbiter left her berth at Greenock on the Clyde and made course for Gibraltar and then on to Port Said at the mouth of the Suez Canal. Transiting the canal, she sailed to Bombay via the Aden Protectorate (today’s Yemen) and eventually to Trincomalee, Ceylon and then finally to the Woolloomooloo docks of Sydney, Australia on 2 May 1945, where she readied for service with the British Pacific Fleet.
For the next few months, Arbiter would serve as a ferry and replenishment (aircraft, stores and fuel) ship as well as keeping and maintaining a selection of combat aircraft used by fleet carriers in theatre (Corsairs, Hellcats, Seafires, etc.) 1843 Squadron, which had departed Arbiter when she arrived at Sydney, now rejoined her for Pacific duties. Their Corsairs were moved down to the hangar deck, with a single Corsair ranged and ready for action on the deck should it be needed. This Corsair would not have been able to return to Arbiter as her decks were covered in crated stores and vehicles bound for Manus, Papua New Guinea.
Beginning in July of 1945, Arbiter began her replenishment duties. Her first cargo of spare aircraft included a typical mix—9 Supermarine Seafires, 7 Grumman Avengers, 6 Chance Vought Corsairs, and a single Grumman Hellcat and Fairey Firefly. She would join a task force of sister carriers HMS Chaser, HMS Speaker and HMS Striker as well as defensive escorts HMS Nizam and HMS Napier.

In the last months of the war, HMS Arbiter served with the British Pacific Fleet as a replenishment carrier, standing by with a selection of Fleet Air Arm aircraft ready to supply fleet carriers to freshen stocks after damage or loss. In the foreground, mechanics fasten a cowling to a Grumman Hellcat with South East Asia Command Type C roundels, while behind can be seen a Corsair. Sailors can be seen hauling on a line to bring aboard cables to facilitate a replenishment at sea. The destroyer doing the replenishment can be seen just over the port side rear quarter. Photo: RoyalNavyResearchArchive.org.uk
During this first replenishment voyage she issued her aircraft as required and took on board five flyable Corsairs in need of repair. This was not without incident however, as she lost one new Corsair on takeoff and two of the Seafires were rendered unserviceable after a collision on deck. Another Seafire coming aboard was heavily damaged when it struck the island superstructure. After supplying stores to several escort ships, she withdrew to Manus to replenish her stock of aircraft.
On her second replenishment voyage in August, she dispersed 10 Seafires, 6 Corsairs, one Avenger and one Firefly while landing on an Avenger and 2 Seafires in need of maintenance that could not be carried out on fleet carriers. On this mission, Arbiter also carried out at-sea oiling duties. When her supplies were dispensed, she withdrew from the area and made course for Sydney, Australia.
En route to Sydney, Arbiter spent a month off the coast of Brisbane carrying out flying training for No. 2 Seafire Conversion Course—with 899 Squadron pilots practicing landing on Arbiter and operating from her deck. This training began on 15 August, the same day that the war against the Japanese ended. After this period she continued on south to Sydney. She remained in Sydney Harbour for a few days and after resupply left for Hong Kong to bring much needed humanitarian stores and medical supplies. After a short stay there, Arbiter boarded both military and civilian Australian prisoners of war, slipped her moorings and brought them safely home to Sydney.
Arbiter returned to Hong Kong with more relief supplies on 3 December 1945. She left Hong Kong with former POWs, military personnel and civilians, and began her long journey back to Great Britain via the Suez Canal. She finally dropped anchor at the Tail o’ the Bank moorage on 10 January 1946 and offloaded her passengers. Her war career ended thus.
By the end of February 1946, Arbiter was back in Norfolk where she was decommissioned and handed back to the US Navy. By April, she was struck off charge and sold to a civilian shipyard where she had her flight deck stripped off and her guts redesigned as a cargo ship called Coracero for an Argentinean shipping company. She would pass through two more shipping companies before she was scrapped in 1973 in Taiwan.

Many of the first escort carriers were built on the hulls intended for cargo or actually from old cargo ships. The Ruler-class ships were all purpose-built as aircraft carriers, but following their military careers, many were converted to civilian transport use. After the end of the Second World War, HMS Arbiter was stuck off charge and sold to Argentinean shipping line Lineas Dodero. Following a rebuild at Newport News she became a passenger/cargo ship known as Coracero. Coracero was the second to bear that name, the first having been sunk by U-384 during the Second World War. Photo: histarmar.com.ar

In 1965, following seven years with Lineas Dodero, she was sold to Philippine President Shipping Lines (PPSL) and was renamed President Macapagal and was the largest ship to fly the Philippine flag at the time. Her namesake, President Macapagal, was the Philippine president prior to Ferdinand Marcos. Under his name, she laboured on for another seven years. Here we see her tied up in Vancouver in November 1966. After serving with PPSL, she was sold and renamed Lucky Two for her last journey to the scrapyard in Taiwan. Photo: Walter E. Frost via seaarchives.vancouver.ca
HMS Ameer (Pennant Number D01)

HMS Ameer, with a deck loaded with Lend-Lease Hellcats and Avengers, is seen anchored at Greenock, Scotland on 10 January 1944 after her first Atlantic crossing. Photo: Imperial War Museum
The name Ameer is but one of many spellings of the word we now spell Emir, as in the United Arab Emirates. This is the traditional name of the tribal or royal head of state in one of several Arab city-states, such as Dubai, Sharjah, Ajman, Umm al Quwain, Abu Dhabi, Al Fujairah and Ras al-Khaimah or the traditional leader of Afghanistan.
There were two aircraft carriers named HMS Ameer that were built on the West Coast of Washington in the Second World War. The first was built on the template of a Casablanca-class escort carrier in Vancouver, Washington and launched in April 1942. Originally intended for Lend-Lease service with the Royal Navy, the US Navy decided to keep her to meet their own requirements and renamed her USS Liscome Bay. As Liscome Bay, she was torpedoed and sunk by a Japanese submarine near the Gilbert Islands the following November with the loss of 644 men.
The second HMS Ameer fared much better. She was built in Seattle on the Bogue-class standard and was launched in October 1942 and, after completion in the yard, was commissioned the following June for US Navy service as USS Baffins. Baffins’ only voyage was to Vancouver, British Columbia, where she was handed over to the Royal Navy and commissioned immediately as HMS Ameer.
As with most future West Coast-built escort carriers, Ameer was heavily modified in Vancouver to meet Royal Navy requirements. There was a list of 150 mods that needed to be carried out including the lengthening of the flight deck, safety measures for oil and fuel storage.
Following her modification, Ameer worked up her new crew, made a quick voyage to Bremerton, Washington to ammunition the ship and then spent a trials period on the Strait of Georgia, practicing steaming, gunnery, radar, ASDIC and other systems.
In November of 1943, Ameer left for the Panama Canal, stopping in San Diego for stores and more equipment. After transiting the canal, Ameer dropped anchor at the Port of Cristóbal in the city of Colón, awaiting her sister carrier HMS Atheling, before journeying together to Norfolk, Virginia. Here, both carriers embarked a large number of Lend-Lease aircraft and then sailed for New York to await an eastbound fast convoy. Both carriers sailed on 29 December 1943, Ameer arriving without incident at Greenock.

A fine view of the stern quarter of HMS Ameer (at the same anchorage as the previous photo) with her twin gun tubs, the starboard one with a 5 inch gun and the other a 40 mm anti-aircraft piece. Her deck edge is lined with Fleet Air Arm (FAA) Grumman Hellcats. Initially, the FAA had proposed that the Hellcat be called the Gannet after its penchant for renaming ship-borne aircraft from the USA. The Grumman Wildcat became the Martlet (a heraldic symbol of a bird, not actually a bird) and that stuck, but the name Gannet did not. The FAA took to calling them Hellcats for simplicity, but really… it was a far cooler name. Photo: Imperial War Museum
Ameer remained at Greenock until May of 1944, undergoing conversion to become an “assault carrier” capable of supporting amphibious landings with air support. Following the installment of these improvements (better communications gear, radars and command and control spaces and equipment), Ameer embarked a number of aircraft to be ferried to Ceylon and set sail, having been assigned to join the Eastern Fleet and the 21st Aircraft Carrier Squadron.
Ameer made Trincomalee on 27 June 1944 where she offloaded her cargo of aircraft. Following this, she took up ferrying duties in support of Eastern Fleet operations in the Indian Ocean. Thereupon, she was joined by the Avengers and Wildcats of 845 (Composite) Squadron, Fleet Air Arm and took up convoy escort duties in the Indian Ocean until October when she was released from “trade protection” duties and said goodbye to 845 Squadron.
Ameer spent a month or so in repair and rectification in Ceylon, then sailed for Cape Town to embark the Grumman Hellcats and crews of 804 Squadron. Whilst traveling back to Trincomalee, she conducted deck landing training and in the process lost five of 804 Squadron’s Hellcats to barrier crashes. These were offloaded for repair and she then took passage to Colombo where she disembarked the remnants of 804 Squadron.
A Grumman Avenger is “squirted off” the flight deck of Ameer while she lays at anchor in Trincomalee harbour in Ceylon (Sri Lanka), the home to the East Indies Station and the Eastern Fleet of the Royal Navy during the Second World War. Flying off while in a crowded harbour was not a normal practice, with squadrons usually transferring to a land station from deep water before any long stay. Photo: Imperial War Museum
She spent a week with her old 845 Squadron, then back to Trincomalee where she met up with 804 Squadron once more (see photo below), taking part in a number of amphibious operations in the month of January: Operation LIGHTNING in Burma, Operation MATADOR and Operation SANKEY (both operations supporting the Battle of Ramree Island, Burma).

A fantastic shot of a gaggle of HMS Ameer-bound 804 Squadron Hellcats making a practice attack/close quarter fly-by off the coast of Cape Town, South Africa on 6 December 1944 before landing on her deck for the first time. Photo: Imperial War Museum

Caught at the moment of impact, a Royal Navy Grumman Hellcat (JW723) of 804 Squadron pitches hard up onto its nose after tangling with the barrier aboard HMS Ameer on 12 December 1944. The lucky pilot, Lieutenant W.M. Barr, can be seen holding onto the canopy rail to avoid head injuries. This aircraft will likely be a writeoff—the crumpled fuselage skin suggests severe structural damage. The South East Asia Command (SEAC) roundels without the normal red centres found in northern theatres of war can clearly be seen. The red centres were removed so that there would be no confusion with the red Hinomaru roundel of the Japanese Army and Navy. Photo: Imperial War Museum
In February and March, as part of Operation STACEY a photo recce operation over Sumatra, Ameer’s 804 Squadron Hellcats provided fighter cover for reconnaissance Hellcats from 888 Squadron. Whilst thus employed, 804 shot down the first Japanese aircraft by fighters from Royal Navy escort carriers (a Dinah and an Oscar).
Four Royal Naval Volunteer Reserve Grumman Hellcat fighter pilots of 804 Squadron, Fleet Air Arm beam with victory immediately after landing aboard Ameer in 1945 and having just shot down a Japanese twin-engine Mitsubishi Ki-46 “Dinah”. Left to right: Sub-Lieutenant (A) Peter William Talbot, RNVR, of North Harrow, Middlesex; Sub-Lieutenant (A) Clive Donald Mortimer Barnett, RNVR, of Hereford; Lieutenant (A) Oscar Frank Wheatley, RNVR, the sub-flight leader, of Kenilworth; Sub-Lieutenant (A) James Scott, RNVR, of Stroud. Wheatley was killed in action in June, at which time he was Commanding Officer of 808 Squadron aboard HMS Khedive. Photo: Imperial War Museum

A very busy scene aboard HMS Ameer in January of 1945 as the Hellcats of No. 804 Squadron begin an operation in support of the amphibious landings by British and Indian forces against the Japanese on the Burmese islands of Ramree and Cheduba—known as the Third Battle of Arakan. The Hellcats of 804 have no centreline fuel tanks or bombs, as they were used to spot artillery fall from the battleship HMS Queen Elizabeth. One Hellcat is in its takeoff roll (note propeller tip spiral contrail), while another is ranged and ready to follow and half a dozen others warm their engines on the starboard deck edge. Being a short escort carrier of 500 feet, Ameer and other Ruler-class ships required that the takeoff run begin at the round-down on days of little wind. Photo: Imperial War Museum

During the Third Battle of Arakan, an 804 Squadron Hellcat comes to a stop over the deck edge and into the catwalk of HMS Ameer. Armourers on both wings extract the aircraft’s ammunition while white-capped officers decide the best way to salvage the aircraft and get the deck back in operation. Photo: Imperial War Museum

An 804 Squadron Hellcat (B8-W), which had been seriously damaged when it spun around and went over the edge of the flight deck on the port, getting tangled in Ameer’s Oerlikon gun sponsons. Before she was sent into the water, her ammo compartments were opened and emptied. Photo via Mission4today.com
Not all sailors were aboard Ameer for the care and feeding of aircraft. Some, like these anti-aircraft gunners, were there to bring down aircraft—of the Japanese variety of course. Every gunnery rating in this photograph was from Newfoundland, which was its own country during the Second World War—one with a deep maritime tradition. Front row, left to right: A. Blundon, Musgrave Town; Leading Seaman N. Hodder, Gander Bay; P. Downey, White Bay. Second row: P. Dinn, St John’s West; R. Davis, Grand Falls; F. Philpot, White Bay; N. Rideout, Conception Bay. Third row: M. Tucker, Thornburn Road, St John’s; C. Connors, Grand Falls; J. Murphy, Kilbride, St John’s West; M. power, New Gower Street, St John’s; W. Morgan, Port de Grave; F. Puddester, Northern Bay. Back row: W. Russell, Bonavista; J. Barry, St John’s West; N. Webster, Popes, Higher Trinity Bay; H. White, Godroy Valley; M. Wright, Deer Lake; K. Janes, Deer Lake. Photo: Imperial War Museum
From March through June, she undertook a period of training and then continued her extraordinary combat career, participating in Operations BALSAM (southern Malay Peninsula), COLLIE (Malay Peninsula with 896 Squadron), LIVERY (Kraa Peninsula, Malaysia with 804 Squadron) and Operation CARSON (attacks on airfields on Penang and Medan areas.
On 15 August, the crew of Ameer got the messages to suspend operations, while in harbour at Trincomalee. Following enthusiastic celebrations in Trincomalee’s harbour, she returned to operations covering landings (unopposed Operation ZIPPER) to take Malayan targets and the surrender of the Japanese.
Ameer’s combat career was extensive compared to the average Ruler-class escort carrier, but when it was over, it was over. Following her last sorties as part of ZIPPER, she was sent home to the Clyde, arriving there mid-November. By mid-January 1946, Ameer returned to Norfolk and was returned to the US Navy.
She was sold in September of that year to be converted to mercantile service with the Robin Line as SS Robin Kirk, serving well until she was broken up at Taiwan in 1969.
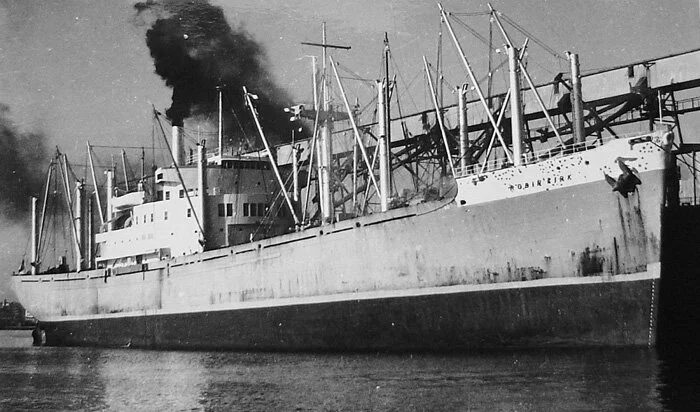
After her decommissioning, the hull that once went to war as HMS Ameer was rebuilt in 1948 as SS Robin Kirk of the Robin Line. She was stripped down to the bilges and built up again as a passenger/cargo ship. She went to war four more times as Robin Kirk between 20 August and 27 December 1950—bringing supplies in support of the Inchon Landing and the Hungnam redeployment in the Korean War. The Robin Line was later purchased by the Moore McCormack Line in 1957 and she ended her days on general cargo routes from the East Coast of the United States. She was broken up for scrap in Kaohsiung, Taiwan in 1969. Photo: NavSource.org
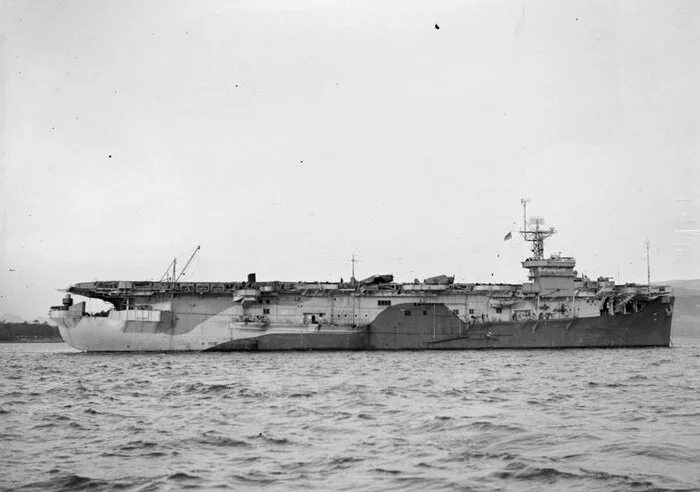
HMS Atheling (Pennant Number D51)

HMS Atheling anchored in the Firth of Clyde after her first crossing of the Atlantic. Photo: Imperial War Museum
In early June 1942, welders and rivet men of the Seattle–Tacoma Shipbuilding laid down the steel for the keel of a new C3 freighter hull, which was purchased by the United States Navy for completion as an escort aircraft carrier to be named USS Glacier Bay. Glacier Bay was launched three months later and began dockside completion work at the Bremerton Navy Yard. She was offered to the Royal Navy during this work period under the Lend-Lease program, but work continued and she was commissioned USS Glacier Bay ten months after she had slipped down the ways. She sailed for Vancouver, British Columbia where, two weeks later, she was handed over to the Royal Navy. Three months after that she was commissioned as HMS Atheling, the Middle English name given to a prince or nobleman in Anglo-Saxon England.
Before she left Vancouver, Atheling went through a series of modifications to make her fit for service in the Royal Navy. This took until late November 1943. She then shaped a course from the Panama Canal, entering the locks at Balboa on 6 December. By 18 December, she was in Norfolk, Virginia taking on a large number of both Lend-Lease and squadron aircraft. Of the former, she had 18 Avengers, 8 Hellcats and 10 Harvards (nearly all on her flight deck), while of the latter she had the 18 Corsairs of 1836 Squadron, all bound for the United Kingdom.

HMS Atheling underway with a deck load of Lend-Lease aircraft en route from Norfolk, Virginia to New York City to join a convoy for the first crossing. Her deck holds 17 Grumman Avengers (already in South East Asia Command roundels), 8 Hellcats at her stern and 10 North American Harvards forward, while in her hangar deck spaces she carries the 18 Corsairs of 1836 Squadron—all bound for Great Britain. Photo: US Navy via Wikipedia

HMS Atheling moored at Greenock on a sunny day on the Clyde. This would have been after 10 January, when having disposed of her cargo of Lend-Lease aircraft in Belfast, Northern Ireland, she dropped anchor in the Clyde for the first and only time. Photo: Imperial War Museum
She then moved up to New York and awaited departure of the next fast convoy which left on New Year’s Day 1944. Eight days later, she made Belfast, Northern Ireland where she craned off her aircraft. Once these were dispatched, she crossed the North Channel and entered the Firth of Clyde where she would undergo additional modifications as a fighter carrier. A month and a half later, Atheling embarked the aircraft for Royal Navy Fleet Air Arm squadrons for transit to the East Indies—822 Squadron (12 Fairey Barracudas), 823 Squadron (12 Fairey Barracudas), 1837 Squadron (14 Corsairs and pilots) and 1838 Squadron (10 Corsairs and pilots). Atheling raised anchor at the beginning of March, and made Colombo, Ceylon via the Suez Canal late in April, having deposited the Barracudas at Madras, India and the Corsairs elsewhere in Ceylon.

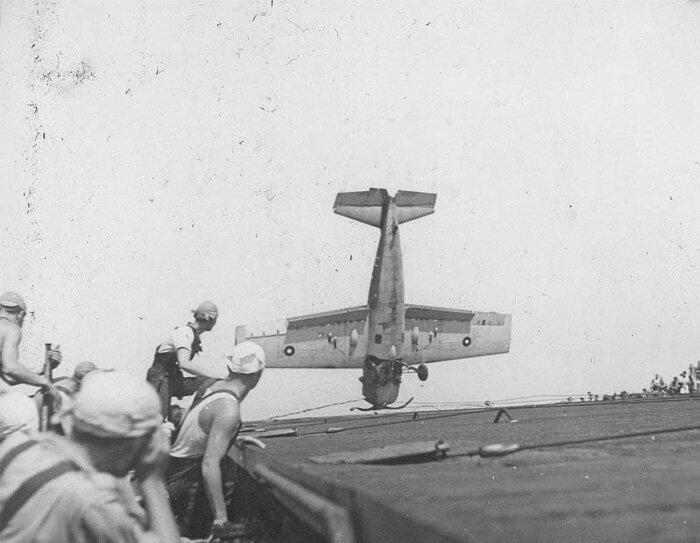
A Fairey Barracuda (from either 822 or 833 Squadron) leaps from the very end of Atheling’s flight deck, recently painted with her new “A” deck code. With its odd Fairey–Youngman flaps/dive brakes and high T-tail, the Barracuda was unique among British-designed naval aircraft. However, like all British carrier aircraft, the Barracuda was not capable of being catapulted from Atheling’s accelerator. After the war, Barracudas saw service with the Royal Canadian Navy aboard HMCS Warrior. Photo: RoyalNavyResearchArchive.org.uk
Once in Colombo, Atheling was assigned to the 21st Aircraft Carrier Squadron, conducting operations protecting convoys in the Bay of Bengal. To do this, she embarked the Seafires of 889 Squadron and the Grumman Wildcats of 890 Squadron. She carried out Combat Air Patrols and Spare Deck duty during Operation COUNCILLOR in concert with HMS Illustrious, but not long into the operation, she was deemed too slow to work with the big fast fleet carrier. She disembarked her fighters by the end of July and returned to convoy or trade protection duty, this time with the Fairey Swordfish of 818 Squadron. During this time, she had undertook aircraft carrying duties between Ceylon and South Africa—taking the Corsairs of 1838 Squadron to Cape Town and bringing back Hellcats and Avengers to Ceylon.

On June 29 1944, a Seafire piloted by New Zealander Sub-Lieutenant John D. Chittenden struck and broke through Atheling’s wire barrier and collided with another parked Seafire, taking both over the side. The accident also killed another pilot, New Zealander, Sub-Lieutenant Royden T. Bisman, and three other maintenance men (Norman Brechin, Ronald Milton and Herbert Patrick) who were working on aircraft forward of the barrier. Here, Atheling’s commander, Captain Agnew oversees the burial at sea of two of the dead later that day. Photo: Charles Kelly via RoyalNavyResearchArchive.org.uk
A Grumman Wildcat (JV508) of 890 Squadron, Fleet Air Arm, misses the arrestor wires aboard HMS Atheling and strikes the wire barrier, pitching hard up on its nose. The carrier was operating as part of the East Indies Fleet at the time—15 May 1944—working up as a fighter carrier. The Wildcat had arrived on board just two days before from RNAS Puttalam near Colombo, Ceylon. Photo: John Vallely Collection via RoyalNavyResearchArchive.org.uk

A superb shot of HMS Atheling steaming along somewhere in the Far East, with a Corsair just coming up on the aft elevator. This is the last of a series of images taken from an orbiting Fairey Swordfish aircraft. In all of them the aft elevator shaft is open, with the sailor in the whites standing by the forward elevator. Note her Deck Code “A”. Photo: Charles Kelly via RoyalNavyResearchArchive.org.uk

Sailors cheer on crew mates in a potato sack race during a sports day aboard HMS Atheling, obviously in southern climes. Not sure which is the finish line, but the fellow at the back has tripped and looks to be heading for some sort of physical punishment and hilarity for the spectators. Photo: RoyalNavyResearchArchive.org.uk
It seems ferrying was what she was best suited to, and in early October 1944, she was nominated as the East Indies Fleet ferry carrier, likely because of her slow speed. In early December, she sailed for Sydney, Australia in company of HMS Battler and other escorts, with a load of aircraft. At this time she was on loan to the United States Navy specifically for ferrying and she left Sydney for Pearl Harbor, arriving there on Valentine’s Day 1945.
For the next six months, Atheling ferried aircraft and personnel across the Pacific from the US West Coast and transported wounded servicemen and other passengers home to the USA. Following this and the surrender of the Japanese she was returned to the Royal Navy in September of 1945, returning to Plymouth, England on 16 September for conversion to a trooping vessel. This meant converting the hangar deck to barracks, complete with messes and other facilities not normally found on a carrier. Her first trooping voyage took her from Plymouth to Ceylon, New Zealand and Australia to return troops and move some aircraft. She remained in this role until the end of the year when she was handed back to the United States Navy at Norfolk in December.

From January to August of 1945, Atheling was detached from the Royal Navy to the US Navy for ferrying duties, carrying aircraft from the United States to the South Pacific via Pearl Harbor. This photo from that time period shows her deck packed with Corsairs, most of which do not appear factory-fresh.
Atheling at anchor in December of 1945 in the harbour of Melbourne, Australia on a blustery day during her first trooping voyage. We can see the addition of life rafts on angled slides lining flight deck aft of the island. As well, we can see rafts along the edge of the forward flight deck round-down. Photo: Allan C. Green via NavSource.org
The ship that was once Atheling may never have had an illustrious combat career having been more of a ferryboat, but the life she was granted after being struck off charges far more glamorous than all the other Ruler-class carriers which, if they were lucky, got to live on as a cargo/passenger freighter. Atheling/Glacier Bay was sold to the Lauro Line and converted to the luxury liner S.S. Roma, working the Italy to Australia/New Zealand route. She did her new duty with typical Italian style and flair for twenty years before being scrapped in 1967 due to a diminished demand for ocean liner travel.

Atheling slides gracefully out of Valetta Harbour in Malta. On certain websites, this is attributed to her voyage from the United Kingdom to Ceylon via the Suez Canal in March of 1944. The problem here is that her paint scheme lacks the dazzle paint camouflage she had in 1944. The fact that she shows no aircraft on her decks and has extra life rafts tied along her flight deck clearly indicates that this image is postwar when she was committed to trooping duties, bringing service personnel and civilians back to the United Kingdom. Given that there are few sailors or passengers on the deck (there seems to be a group of sailors on parade just forward of the open elevator), this is possibly an outbound voyage from Plymouth to the Far East to collect passengers, after getting a fresh coat of paint. The previous photo shows that on her first trooping voyage, she was in rough shape in the paint department in December, so this image was likely taken in 1946. Photo: NavSource.org

A nice shot of Atheling after the war with her camouflage paint removed and in her trooping configuration.

Following her hand-off to the United States Navy, HMS Atheling (the former USS Glacier Bay) was added to the Reserve Fleet in Jacksonville, Florida, tied up and languishing until sold off in 1950 to the Italian Lauro Line along with the former HMS Fencer. Instead of being converted to mercantile use as a freighter, Atheling was converted to the beautiful luxury liner SS Roma (with Fencer becoming the identical SS Sydney). Roma (ex-Atheling) was broken up in Italy in 1967. Her sister ship Sydney was renamed Roma and served Lauro as a cruise ship for another two years, then sold off to various cruise lines until she met her end at the hands of Italian breakers in 1975. Photo: ssmaritime.com
HMS Begum (Pennant Number D38)

HMS Begum at Greenock on the Clyde on 6 February 1944, shortly after her first crossing of the Atlantic from New York City where she had taken on board 24 Corsair aircraft for use by 1837 and 1838 Squadrons. Following her arrival at Greenock, she had some conversion work done on the Clyde. Photo: Imperial War Museum
Most of the escort carriers of the United States and Royal Navies of the Second World War were built in America’s Northwest Coast. There were a number of shipyards participating in keel-up construction as well as post-launch fit up and finishing. Most of the meant-for-US Navy carriers that were then assigned to the Royal Navy through the Lend-Lease programs were further modified for Fleet Air Arm requirements in British Columbia, Canada.
One of the major shipbuilding enterprises in Washington was the city of Vancouver, across the Columbia River from Portland, Oregon, about 80 miles from the Pacific Ocean. In January of 1943, Vancouver’s Kaiser Shipyard laid down the keel for a Casablanca-class escort carrier, to be named HMS Chastiser. After her launch in April, her name was changed to HMS Begum, a Ruler-class carrier named for a Muslim female royal or aristocratic title from Central or South Asia—the wife of a “Bey” or “Beg”. At the last minute, the US Navy determined that Begum would remain in their service and she was commissioned as USS Natoma Bay.
Instead, the name Begum was transferred to an already completed Bogue-class escort carrier named USS Bolinas. On 2 August 1943, the day she was transferred to the Royal Navy, Bolinas was commissioned as HMS Begum, Royal Navy.
Upon completion of her acceptance trial, Begum made for Esquimalt, British Columbia for modifications for Royal Navy service. These were a large number of alterations, the largest of which was the lengthening of her flight deck. In late December of 1943, work was completed and she made revolutions for Panama, the Canal and eventually Norfolk, Virginia, where she took on a cargo of Lend-Lease Corsairs belonging to 1837 and 1838 Naval Air Squadrons. In addition, she embarked the pilots, other personnel and equipment of said squadrons, both of which had recently completed their work-ups at Naval Air Station Brunswick, Maine. From Norfolk, Begum made New York on 16 January 1944.
In New York, Begum embarked more stores and 194 military passengers as well as 45 civilians, including a group of British school children who had previously been evacuated to Canada for safety reasons and who were now going home. Begum crossed the Atlantic safely in the company of HMS Trumpeter and, after disembarking her passengers in Liverpool, sailed for Greenock, Scotland, dropping anchor in the Clyde, having flown off the aircraft of 1837 and 1838 Squadrons en route.
By the end of February, she was at Royal Naval Air Repair Yard in Belfast, Northern Ireland loading aircraft. Here she took aboard the aircraft of four squadrons—the Hellcats of 1839 and 1844 Squadrons and Fairey Barracudas of 815 and 817 Squadrons. While the pilots and personnel of these squadrons took passage aboard separate troopships, Begum set sail on 3 March 1944 for Trincomalee to join the swelling air ranks of the Eastern Fleet. She travelled in company with the escort carrier HMS Atheling, heavily escorted in convoy to Alexandria, Egypt.
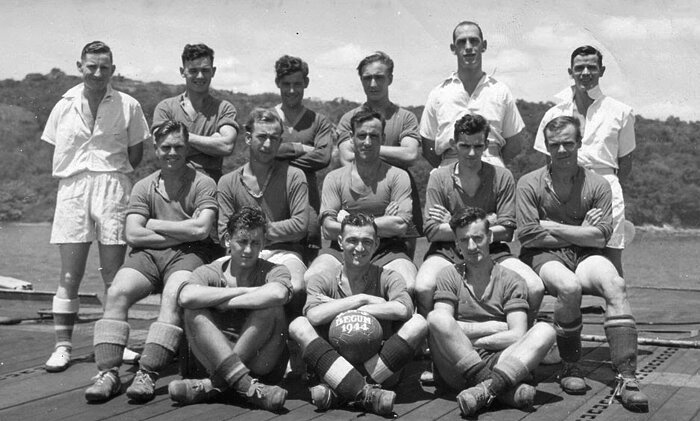
Inter-ship sports and rivalry were keys to keeping up morale in faraway places and under the stress of war. Hockey, boxing and football were favourites of the more sporting crew members like these young men from Begum’s soccer team, photographed in May of 1944, likely at Colombo, Ceylon. Photo: https://sites.google.com/site/leselevettcjx131840/indian-ocean
At the end of May 1944, Begum was joined by the Grumman Wildcats and Avengers of 832 Composite Naval Air Squadron. For most of June, Begum worked up her new air element which would be responsible for anti-submarine sweeps against German U-boats in the Indian Ocean, mainly in the area of the Seychelles and near Madagascar. She made five operation U-boat sweeps in the Indian Ocean, commencing in mid-June and lasting until the end of the year.

A Grumman Avenger of 832 Squadron, flown by Sub-Lieutenant J.E. Randall, misses the trap and strikes the first cables of the wire barrier aboard HMS Begum. This was one of three flying accidents that occurred with 832 Squadron on 1 June 1944. 832 Squadron, a composite squadron flying both Avengers and Wildcats and previously assigned to Illustrious for attacks on Surabaya, joined Begum in Colombo in late spring of 1944. Photo via MaritimeQuest.com

Begum’s deck crew work quickly to disentangle Sub-Lieutenant Randall’s Grumman Avenger (serial number JZ231) from the barrier wires on 1 June 1944. A second Avenger can be seen making an approach from the port beam in the background. Crews needed to clear away the snagged aircraft and reset or repair the barrier wires before attempting to take on another aircraft. Photo: MaritimeQuest.com

Scanning this photo, we see an identical weather situation and similarly dressed deck crew as in the previous image depicting Randall’s crash. It is likely that this was the same day (1 June 1944) and that this is possibly the Avenger piloted by Lieutenant F.L. Low, which had struck Begum’s round-down and broken its back—clearly the situation that befell this Avenger. Photo: MaritimeQuest.com

An 832 Squadron Grumman Avenger warms up on Begum’s flight deck, while another executes a high speed flypast for the photographer. 832 Squadron, first formed in 1941 at Lee-on-Solent, was a Wildcat/Avenger composite squadron that joined Begum in 1944 and served aboard her until its disbandment in February 1945 in the United Kingdom. Photo: MaritimeQuest.com
It was time for refit, and she was scheduled for work in the United Kingdom, so she sailed with passengers and the personnel of 832 Squadron, making her way to the Clyde, arriving in late February. Upon arrival, 832 Squadron was permanently disbanded and she went to the docks for conversion to ferry-specific duties. By the end of March, Begum was ready to shake down in the Irish Sea. Following certification she made for RNARY Belfast to take on board a small load of Vultee Vengeance TT.IVs and Supermarine Sea Otters (development of the Walrus) and sailed for Gibraltar and on to Colombo via the Suez Canal.
She was assigned ferry duty with the Pacific Fleet and offloaded her aircraft on the Admiralty Island of Ponam, off the coast of Manus. The former Japanese airfield took up half the total area of the sliver of an island. Following this, she sailed for Australian waters to offload the last of the Sea Otter flying boats in Sydney.
HMS Begum with two Grumman Avengers from 832 Squadron ranged on her flight deck. Photo: NavalHistory.net
After the single lengthy ferry mission, she was attached to the Pacific Fleet as a Deck Landing Training Carrier, landing on many types of carrier aircraft then in use with the British Pacific Fleet. Following this she sailed back to Trincomalee to join a carrier task force as part of Operation ZIPPER, the invasion of Malaya and the recapture of Singapore. Unfortunately, as Begum steamed from “Trinco”, she suffered serious structural damage when she struck a submerged object and was withdrawn from the operation.
She was given a temporary repair and sailed for Bombay for comprehensive repairs. It was while she was in Bombay that the Japanese surrendered. She was ordered to return to Great Britain upon completion of the work to be decommissioned. She took servicemen home with her as passengers, and was stripped of her Royal Navy equipment. She left the Clyde with a skeleton crew in mid-December 1945, sailing to Norfolk. The crossing was not without incident however. Heavy weather and high seas brought about the collapse of the forward flight deck’s structure and it came adrift. Her small ship’s crew made temporary repairs and she made Norfolk on Christmas Day, 1945
Begum was taken back by the US Navy and sold for conversion to mercantile service, becoming SS Raki in 1948 and remained in service until 1966 whence became SS I Yung. She was finally broken up in Taiwan in 1974.

In the summer of 1946, the carrier that had once been HMS Begum was sold off for conversion to mercantile service. The work was done and she was sold to the Netherlands Steamship Company and worked the cargo circuit as SS Raki (above, fully loaded) until 1966 when she was sold and renamed SS I Yung until 1974 when she met the breaker’s torch in Taiwan. Photo: home.knp.nl
HMS Emperor (Pennant Number D98)
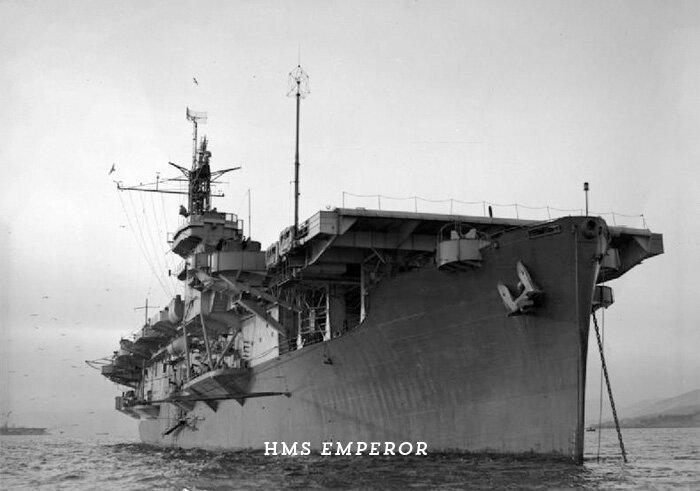
HMS Emperor lies in stately repose on the Clyde River with her long-range radio mast raised and safety rails up. Photo: Wikipedia
Like many of her sister escort carriers in service with the Royal Navy, HMS Emperor was laid down at the Seattle–Tacoma Shipbuilding yard and meant for service with the United States Navy. She was laid down as USS Pybus in June of 1942 and was launched in October. Pybus’ systems and finishing were completed by the beginning of June 1943 and she entered a short period of workup before sailing on her first voyage, to San Diego and then on to Pearl Harbor with a ferry cargo of aircraft.
By the time she left Pearl, it had been decided she would be transferred to the Royal Navy, so she transited the Panama Canal and headed north on the American East Coast to New York, where she quickly transferred to the Royal Navy and commissioned as HMS Emperor. In New York’s Brooklyn Navy Yard, she took on another load of aircraft to ferry to the Clyde and joined Fast Convoy HX 253 at Halifax for the crossing.

After USS Pybus was decommissioned and entered service with the Royal Navy as HMS Emperor, she left New York bound for Greenock, Scotland with a deck cargo of Grumman Hellcats. Forced to take a much more northerly route to avoid submarines, she ran into a blizzard, fog and pack ice off the coast of Newfoundland. Photo: Imperial War Museum
HMS Emperor rests at anchor at Greenock, Scotland in the Upper Firth of Clyde in January 1944. She had arrived in Great Britain and the Clyde in September 1943, whereupon she was then moved to Belfast for further modifications for Royal Navy Service. This photo was taken upon her return to the Clyde where and when she began workup for operational service as an escort carrier in the Western Approaches to Great Britain. I’ve always tried to see the purpose in what sometimes may seem random and abstract dazzle painting on ships of the Second World War. The darker silhouette shape on Emperor’s starboard side definitely brings to mind a freighter angled away from the viewer, possibly intentionally done this way to confuse U-boat captains in dodgy weather. Photo: Imperial War Museum
After making the Clyde at the beginning of September, Emperor was assigned to the Western Approaches Command and sent to Belfast, Northern Ireland to be modified to Royal Navy standards for service with Fleet Air Arm aircraft. By the middle of December 1943, she was working up in the Irish Sea with the aircraft of 804 and 800 Squadrons.
In January 1944, Emperor, with 800 and 804 Squadron’s Hellcats, steamed for Norfolk, Virginia, escorting a westbound convoy. She returned to England via Argentia, Newfoundland where she joined an eastbound convoy out of Halifax. Emperor departed the convoy at Ireland and arrived again on the Clyde where she disembarked her squadrons. She collected her squadrons again in early March 1944 and sailed for the Home Fleet anchorage at Scapa Flow.
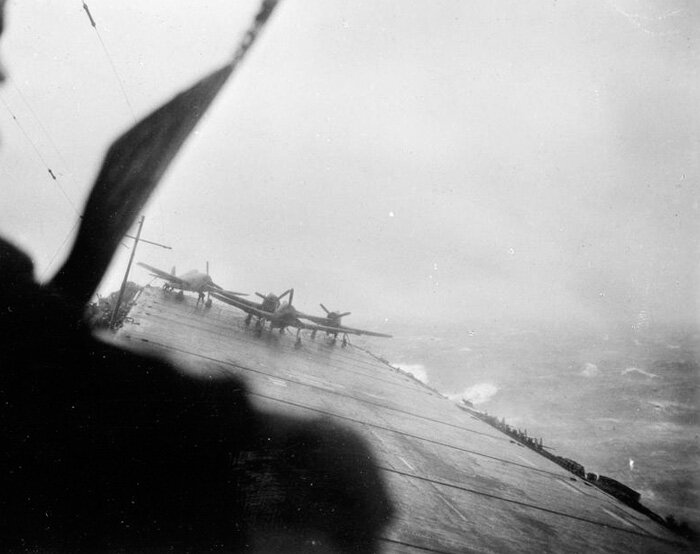
HMS Emperor rolls heavily in nasty North Atlantic Weather. Four Hellcats are lashed securely with their engines and cockpits covered in tarpaulins to avoid sea water getting into the important bits. This looks to be a right miserable scenario when no one in their right mind should be out on this slippery deck, yet a sailor can be seen checking tie downs on the Hellcat on the left, with possibly a second man at the tail of the fighter. Photo: Imperial War Museum

HMS Emperor’s destroyer escort, HMS Javelin, pitches heavily in frigid Norwegian waters as a blizzard descends on the task group. A fuelling hose can be seen draped over from her forecastle as she takes on oil from Emperor. The sailors tasked with getting this line aboard Javelin were surely at great risk. The date was 14 May 1944 and Emperor was in the company of 6 Home Fleet destroyers as well as the escort carrier HMS Striker, and the Royal Navy cruisers Sheffield and Royalist for attacks on shipping near the port of Rorvik, halfway up the coast of Norway. Photo: Imperial War Museum
In the spring, Emperor joined other fleet and escort carriers as part of Operation TUNGSTEN, to conduct strikes against the German battleship Tirpitz which was holed up deep in a Northern Norwegian fjord known as Kaafjord. Despite the massive effort to take out Tirpitz, little damage was done. Following a short break at Scapa Flow, she joined other Royal Navy elements of Operation PLANET, a second attempt to destroy Tirpitz, which fizzled because of inclement flying weather. When the weather improved, she was employed as part of Operation RIDGE ABLE attacking coastal shipping near Bodø and Rorvik, Norway. She continued on offensive operations until the middle of May when she was sent back to Western Approaches Command. Until the middle of the summer of 1944, Emperor conducted cover and escort duties with convoys transiting the Approaches as well as fighter cover for Operation NEPTUNE in support of D-Day.
HMS Emperor (left) and HMS Striker, seen from the hangar deck of HMS Puncher, plough though heavy seas off the northern coast of Norway and above the Arctic Circle during Operation TUNGSTEN in April of 1944. Life aboard a top-heavy, rolling escort carrier in freezing temperatures could be a misery. Within six months however, Emperor would be in the Mediterranean Sea and then the Indian Ocean. Photo: Imperial War Museum

During her short military career, HMS Emperor saw action in some seriously varied climates, from sweltering Ceylon to Arctic waters off the Norwegian and Barents Seas. She was deployed in March of 1944 along with sister carriers HMS Searcher, Pursuer and Fencer to defend a Russian convoy and to attack the German battleship Tirpitz holed up deep in a Norwegian fjord well above the Arctic Circle (Operation TUNGSTEN). Here we see Hellcats warmed up and ready to launch in some very inhospitable weather. Photo: Imperial War Museum
![A tradition since aerial bombing began, ground crews love to chalk a message for the enemy on bombs to be delivered on the next mission. It was a way for ordnance men and ground crews to feel part of the fight. Here, an armourer aboard HMS Emperor, possibly a Londoner, sends an ironic “An Instalment [sic] from London” message on an 800 Squadron Hellcat to the Germans who would soon be on the receiving end during Operation NEPTUNE, the D-Day invasions. Photo: Imperial War Museum](https://images.squarespace-cdn.com/content/v1/607892d0460d6f7768d704ef/1622053219033-OK7VV9U0TTHUHBSA8MNH/Emperor8.jpeg)
A tradition since aerial bombing began, ground crews love to chalk a message for the enemy on bombs to be delivered on the next mission. It was a way for ordnance men and ground crews to feel part of the fight. Here, an armourer aboard HMS Emperor, possibly a Londoner, sends an ironic “An Instalment [sic] from London” message on an 800 Squadron Hellcat to the Germans who would soon be on the receiving end during Operation NEPTUNE, the D-Day invasions. Photo: Imperial War Museum

Hellcats from HMS Emperor ready for launch off the coast of France during the Normandy invasions as part of Operation NEPTUNE (D-Day invasions). In the middle-ground, a deck hand chocks the next in line, while in the background, deck handling crews wrestle a Hellcat forward with its propeller turning. With so many sailors attending the Hellcat, one wonders if there is some sort of issue with the wing folding. Photo: Imperial War Museum

Royal Navy Fleet Air Arm Hellcats from HMS Tracker and Emperor fly across the Emperor’s wake to take up combat air patrol duties over convoys in the Southwestern Approaches (Bristol Channel, Celtic Sea and open water off southwest Ireland) in order to counter any U-boat attacks that may be launched from there against the Normandy invasion fleet (some of the aircraft have D-Day stripes). On deck, a second wave of “wasp-winged” Hellcats prepares for launch. On 18 June, 800 Squadron absorbed the Hellcats of 804 Squadron and shortly thereafter set sail for the Mediterranean Sea aboard Emperor. 804 Squadron would eventually reform in South Africa in September and board HMS Ameer. Photo: Imperial War Museum
She then sailed for the Mediterranean Sea for more offensive operations as part of Operation DRAGOON, the Allied invasion of the South of France. For the next few months she took part in offensive operations around the Mediterranean. By December, she was back in the UK getting a refit. In February of 1945, after her post-refit workup, Emperor shaped course for Trincomalee, Ceylon to join the Eastern Fleet’s 21st Aircraft Carrier Squadron along with her sister escorts Khedive, Begum, Empress, Shah, Slinger, and Speaker—a formidable Fleet Air Arm weapon if there ever was one. Emperor conducted extensive offensive operations with the squadron, including Operations SUNFISH, DRACULA, DUKEDOM, COLLIE, ZIPPER and JURIST

HMS Emperor steams slowly over the Bitter Lakes entry to the Suez Canal en route to Trincomalee, Ceylon in February of 1945 to join the 21st Aircraft Carrier Squadron of the Eastern Fleet. She is seen here beautifully framed by two twin 4.5 pound gun turrets on HMS Indomitable, a Royal Navy Illustrious-class fleet carrier. The 21st Aircraft Carrier Squadron would include His Majesty’s escort carriers Emperor, Begum, Empress, Shah, Ameer, Khedive, Slinger and Speaker. Photo: Imperial War Museum
Following the surrender of the Japanese, Emperor continued on with the Eastern Fleet until October when she sailed for the United Kingdom, stopping in at Colombo and Bombay on the way. She was paid off and sailed with a skeleton crew to Norfolk and handed over to the US Navy, sold for scrap and broken up by May of 1946
A United States Navy Hellcat takes off from the Royal Navy’s HMS Emperor during Operation DRAGOON, the Allied invasion of the South of France, two months after D-Day. The reason that the aircraft was even on Emperor is not known. It is possible the pilot was aboard for a conference or possibly had landed on Emperor mistakenly or in an emergency. The Hellcat was from VGF-1 assigned to USS Tulagi, an American escort carrier. Emperor was operating during DRAGOON with the escort carriers Attacker, Hunter, Khedive, Pursuer, Searcher, and Stalker as well as the American escort carriers Tulagi and Kasaan Bay. Photo: Imperial War Museum

At the end of the war, HMS Emperor enters Singapore harbour in style for the surrender of the Japanese with a neat row of 800 Squadron Hellcats, with propellers aligned to perfection, and flanked by a turnout of all hands in tropical whites. Emperor was part of Operation ZIPPER with her sister carriers Ameer, Empress, Hunter, Khedive and Stalker, tasked to reoccupy Singapore. The task force left the British Eastern Fleet home base at Trincomalee, Ceylon on 4 September 1945 and sailed into Singapore harbour two days later. After leaving Singapore, she sailed for India where she bid farewell to her 800 Squadron aircraft and pilots. Photo: RoyalNavyResearchArchive.org.uk
HMS Empress (Pennant Number D42)
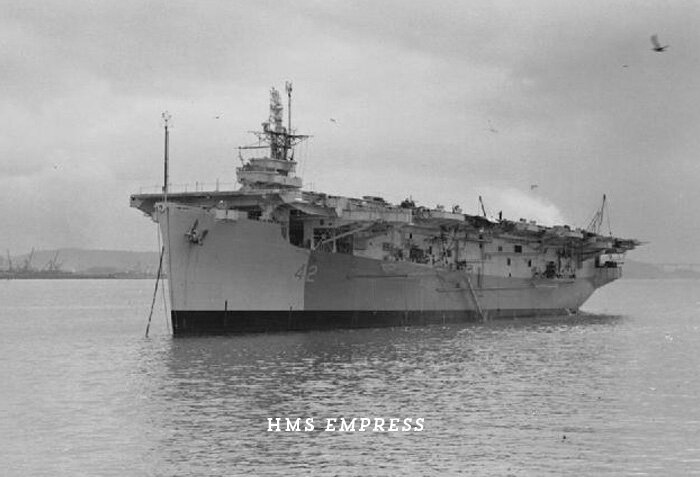
HMS Empress lies quietly at anchor at the Firth of Forth, with the Kincardine Bridge possibly in the right distance. She was here for nearly half a year, starting in May of 1944, undergoing repairs and modifications. Photo: Imperial War Museum
In September of 1942, the Seattle–Tacoma Shipbuilding Corporation laid down the keel for a mercantile ship based on the C3 hull design which was then requisitioned, and the hull completed and launched as the escort carrier USS Carnegie. Half a year later, her kitting out was completed and, after a short voyage to Vancouver, British Columbia, she was handed over to the Royal Navy to be commissioned as HMS Empress of the Ruler Class.
The work to modify her to Royal Navy standards was completed by Burrard Dry Dock Co. by the beginning of December 1943. During this long period of modification work, her crew came aboard and began working up with systems and procedures.
In January of 1944, Empress began training with the Avengers of 850 Naval Air Squadron, practicing deck landings and launches while the ship steamed up and down Georgia Strait. Finally, nearly a year and a half after her keel was laid, Empress left Vancouver with 850’s Avengers aboard, bound for the Clyde by way of San Francisco, San Diego, Panama Canal, Norfolk and New York—the traditional ports of call for a West Coast-built escort carrier of the Royal Navy on her maiden voyage.
After some turbine trouble that slowed her progress and then transiting the Panama Canal, she joined the escort carriers HMS Speaker and USS Tulagi and with a covey of both RCN and USN escort ships, sailed in convoy for Norfolk. After a brief stay in New York, where she picked up some UK-bound war children, she crossed in convoy with Speaker and made for the Clyde, flying off her 850 Squadron “Turkeys” on arrival and dropping anchor on 8 April 1944.

On her first transatlantic crossing from New York to the Clyde, Empress carried Avenger aircraft on her hangar deck, but a more precious cargo on the mess decks. At the outset of the war, many mothers and children were evacuated to America with Britain facing invasion. By 1944, many wanted to return. On her crossing, Empress brought home more than 50 women and children. Here, “foster father” officers aboard Empress check in on a cabin used by young boys going home to their parents. One can only imagine the excitement for these young lads crossing the ocean on a carrier. Photo: histarmar.com.ar
Her first assignment was with Western Approaches Command just three days later—a brief period of Deck Landing Training with 768 Deck Landing Training Squadron, a multi-type shore-based squadron used for deck training pilots of the Fleet Air Arm. Shortly thereafter, she took a berth at a Clyde dockyard and then on to a Rosyth dockyard for repairs, rectification and modification. This period of work took until late summer. Following this, Empress returned to deck landing training with 768 Squadron, which was then based in Royal Navy Air Station Ayr, south of Prestwick on the shores of the Firth of Clyde.

In November of 1944, off the west coast of Scotland, newly arrived Empress played host to several naval air squadrons looking for a deck to train on—Swordfish, Fireflys and Seafires. Here, a Seafire snags a wire and bounces high. As a carrier based fighter, the Seafire’s design was a compromise and suffered many losses through structural damage caused by heavy landings on carrier decks: a problem that continued even after strengthening introduced by the Mk II. The Seafire had a narrow undercarriage track, which meant that it was not well suited to deck operations. Photo: Imperial War Museum

Two days after O’Driscoll’s mishap (next photo), Sub-Lieutenant Bounce (appropriate name) ended up in the port catwalk when his Fairey Swordfish veered violently to the left on landing, coming to rest before hitting the barrier (wires in middle ground). In the foreground, deck crews scramble to run hoses out to the damaged Swordfish in case of fire. Photo: Imperial War Museum

Aboard HMS Empress, a Fairey Firefly has been seriously damaged in a landing accident during a training period. The Fleet Air Arm squadrons that were officially attached to Empress were either Hellcat squadrons (888, 804, and 896 Squadrons) or Avenger squadrons (850 and 845 Squadrons). In November of 1944, the flight deck of Empress was used to train the Firefly crews of 1772 Naval Air Squadron. On 25 November, Sub-Lieutenant I.T. O’Driscoll landed aboard, but his tail hook bounced over all the arrestor wires and his Firefly (Z2022) struck the barrier heavily. Photo: Imperial War Museum
During the last two months of 1944, she continued Landing Training with the Fireflies from 1772 Squadron and Fairey Swordfish from 766 Squadron, then ceased DLT duties and by Christmas was nominated for service with the 21st Aircraft Carrier Squadron of the Royal Navy’s East Indies Fleet. As 1945 began, she sailed in convoy to Gibraltar with a load of Grumman Hellcats. By late January, she was in Cochin, India offloading her Hellcats before making for Trincomalee and the home harbour of the British East Indies Fleet. She arrived at “Trinco” in early February, having landed on the Avengers of 845 Squadron before entering the harbour. Here she would join her sister escort carriers Khedive, Begum, Emperor, Shah, Ameer, Slinger and Speaker. She began operational activity almost immediately, embarking recce Hellcats from 888 Squadron and a Hellcat detachment from 804 to secure anti-submarine sweeps from 845’s Avengers.
Throughout 1945, Empress participated in a series of combat operations until September. First, it was Operation STACEY, a series of photo recce ops over Penang and the Kra Isthmus, in the company of Ameer and escort ships as part of Force 64. This lasted until the end of March 1945. In April, Empress joined Khedive and other escorts (including the French battleship Richelieu) in Operation SUNFISH, another recce operation, this time of Port Swettenham and Port Dickson in Malaya. During this operation, Empress had two near misses with kamikaze aircraft, one exploding only 200 metres from her port side.

Standing on the bridge of the HMS Empress, Lieutenant John Myerscough, Royal Naval Volunteer Reserve, waves to the photographer. He had just reported to Empress’ captain with the details of how he had shot down a Japanese Nakajima Ki-43 Oscar whilst leading his section of Hellcat fighters giving air protection to a Task Force of the East Indies Fleet. It was the first Japanese aircraft shot down by an Empress-based fighter and the ship’s artist wasted no time in recording the event by painting the Japanese Navy flag and an Oscar aircraft silhouette alongside. Photo: Imperial War Museum
In late April and May, it was Operation BISHOP, an air cover/naval decoy operation in support of Operation DRACULA, the invasion of Rangoon. The cover for DRACULA was provided by air attacks and gunfire bombardments on Car Nicobar, the northernmost of the Nicobar Islands group, and the harbour at Port Blair in the Andaman islands group. There were attacks on Car Nicobar and Fort Blair on 30 April, with a second bombardment of airstrips at Car Nicobar on the morning of 1 May, and at Port Blair on 2 May. On 6 May, after a short bombardment of the Japanese anti-aircraft defences, aircraft from Empress and Shah, which were part of the 21st Carrier Squadron and escorted by the destroyers Virago, Tartar and Nubian, attacked shipping in the harbour of Port Blair.
After the first week of May 1945, Empress joined Emperor, Hunter, Khedive and Shah in Operation DUKEDOM, the search for the Japanese heavy cruiser Haguro and the destroyer Kamikaze which had been acting as armed supply ships for the Japanese garrisons at Port Blair in the Andaman Islands. Getting wind that Empress and the others and their escorts had sailed from Trincomalee to intercept them, the Japanese Imperial Navy ordered the Haguro and her consorts to return to Singapore. Aircraft from Empress were the only ones to engage Haguro as she ran for home—a staggeringly long-range flight of 530 miles from launch to Haguro. When, on 14 May, Haguro and Kamikaze made a second attempt, they were spotted and, on 15 May were surrounded by a Royal Navy destroyer flotilla that sank Haguro in the now famous Battle of the Malacca Strait.

A nice shot of rocket projectile-equipped Grumman F6F Hellcat JX688 of 896 Squadron attached to the catapult aboard Empress in 1945. The catapult “bridle” was the cable that attached the aircraft to the catapult shuttle. When the shuttle reached the end of its travel, the aircraft and bridle (sometimes called a “strop”) continued on and parted ways. The bridle was sent flying overboard and was considered expendable. One can imagine the world’s ocean floors littered with hundreds of thousands of these heavy cable strops. Below the aircraft we see two angled rails (known as guide cleats) bolted to the deck for launch, which helped guide the aircraft to the exact centred position over the shuttle rail. In the summer of 1945, 896 Squadron embarked on Empress and worked with the 21st Aircraft Carrier Squadron. Photo via Pinterest
Empress suffered engine damage during DUKEDOM and returned to Trinco on 22 May and was fit for service before the end of the month. She would spend all of June working up various squadrons, then in July participated briefly and in some non-aviation support role in Operation COLLIE, the continued attacks and bombardments of Japanese installations on the Nicobar Islands group. On 19 July, she participated along with Ameer and the ships of Force 63 in Operation LIVERY, a British naval undertaking to clear mines from the waters round Phuket Island off the west coast of Japanese-occupied Thailand and to make air attacks on Japanese airfields on the Kra Isthmus. The flotilla came under kamikaze attack, and during the operation one Hellcat was lost for the score of 30 Japanese aircraft (including kamikazes). This would be the last offensive operation conducted by the British East Indies Fleet.
![Outward bound across the Indian Ocean from Trincomalee, Ceylon to attack enemy targets in Malaya as part of Operation LIVERY, Captain J.R.S. Brown, RN, Empress’ commander, explains the operation to his ship’s company with the aid of a chalked map under the island structure on the flight deck. Writers from the Royal Navy Research Archive explain: “Empress was deployed with Force 63 for Operation LIVERY on 19 July; the force comprised of battleship Nelson, cruiser Sussex, and CVEs Empress and Ameer with destroyers Paladin, Rotherham, Racehorse and Raider to cover minesweeping operations… and conduct strikes on targets in northern Malaya. The operation began on the 24th and was to last for three days. This was an intense flying period for the two CVEs, over a 3-day period. Hellcats from both carriers flew over 150 sorties and destroyed more than 30 Japanese aircraft on the ground, together with trains and road transport in attacks on Kra Isthmus. On 26 July, HMS Ameer was attacked by a kamikaze; a single “Sonia” [Mitsubishi Ki-51] attempted to dive onto Ameer, it was hit and successfully deflected by fire from the ship’s defensive armament, splashing into the sea some 500 yards out.” Photo: Imperial War Museum](https://images.squarespace-cdn.com/content/v1/607892d0460d6f7768d704ef/1622129852479-EPLWC7ZM1EYLJC7DPD6K/Empress6.jpeg)
Outward bound across the Indian Ocean from Trincomalee, Ceylon to attack enemy targets in Malaya as part of Operation LIVERY, Captain J.R.S. Brown, RN, Empress’ commander, explains the operation to his ship’s company with the aid of a chalked map under the island structure on the flight deck. Writers from the Royal Navy Research Archive explain: “Empress was deployed with Force 63 for Operation LIVERY on 19 July; the force comprised of battleship Nelson, cruiser Sussex, and CVEs Empress and Ameer with destroyers Paladin, Rotherham, Racehorse and Raider to cover minesweeping operations… and conduct strikes on targets in northern Malaya. The operation began on the 24th and was to last for three days. This was an intense flying period for the two CVEs, over a 3-day period. Hellcats from both carriers flew over 150 sorties and destroyed more than 30 Japanese aircraft on the ground, together with trains and road transport in attacks on Kra Isthmus. On 26 July, HMS Ameer was attacked by a kamikaze; a single “Sonia” [Mitsubishi Ki-51] attempted to dive onto Ameer, it was hit and successfully deflected by fire from the ship’s defensive armament, splashing into the sea some 500 yards out.” Photo: Imperial War Museum
She would join other Royal Navy elements for Operation CARSON to attack Penang and Medan in Malaya, but the war ended and they were withdrawn. In September of 1945, Empress joined Ameer, Emperor, Hunter, Khedive and Stalker in Operation ZIPPER, the military re-occupation/ liberation of Singapore. She was one of 90 Allied ships anchored in the Singapore Roads for the surrender. Following this she returned to Trincomalee.
Empress was used to return servicemen and women from Colombo to Australia and New Zealand in October and November, then she left for the United Kingdom, dropping anchor in the Clyde on 19 December. After de-storing and the removal of Royal Navy equipment, she sailed to Norfolk with a skeleton crew, arriving on 20 January 1946. By the summer she had been sold for scrap.
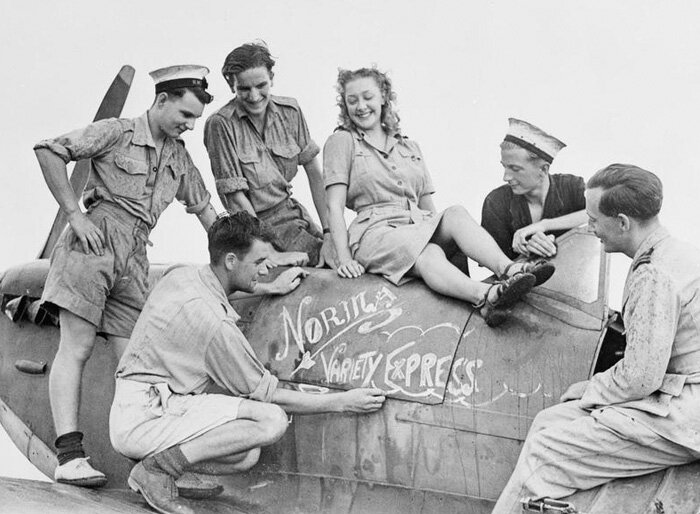
Norma Tulee, a young Walthamstow actress touring units and ships of the Southeast Asian Command with the ENSA show ‘Variety Express’, made a great hit with Empress’ company at Colombo, Ceylon. Sailors and possibly a pilot (right) enjoy chalking her name on a Seafire. One sailor in the gob hat at the back seems interested in more than the chalk. ENSA (Entertainments National Service Association) was an organization set up in 1939 to provide entertainment for British servicemen and women during the Second World War. While ENSA’s list of luminaries included Terry Thomas, Josephine Baker, Gracie Fields, Noël Coward, John Gielgud, Stewart Granger, Jack Hawkins, Vivian Leigh, Vera Lynn, Spike Milligan and Alastair Sim, I could not find a single reference to a woman named Norma Tulee anywhere on the web. Photo: Imperial War Museum

How wonderful would it have been to be aboard one of His Majesty’s Ships in Trincomalee harbour when news that the Japanese had surrendered was received? The night sky is alive and aflame with flares and star shells, and no doubt the ships’ horns are blasting away while the men cheer from every rail. The elation of knowing that they had survived the war and did not have to fight the Japanese on their home islands must have been euphoric for the sailors. VJ-Day is a term that refers to the day that the Japanese signed the “instruments of surrender” aboard the battleship USS Missouri (2 September 1945), but it is also used to define the day that the Japanese initially surrendered and stopped fighting (15 August 1945). This particular photograph, taken from the deck of HMS Empress in Trincomalee harbour, was shot on the latter day. Empress was in Trincomalee until 15 August, getting ready to sail to support a planned British landing (Operation ZIPPER) on the Malayan Peninsula. Despite the news of the surrender, Empress and her task force sailed for Penang in Malaya, where she was when the Japanese signed the surrender documents in Tokyo Harbour. Photo: Imperial War Museum

A terrific shot of HMS Empress at Wellington, New Zealand in November of 1945 with a large turnout of her crew and perhaps passengers being brought home at the port edge of the flight deck. From here, she sailed back to Colombo and thence to the Clyde in December. In January, she sailed for Norfolk, Virginia and was handed over to the United States Navy. Photo: histarmar.com.ar
HMS Khedive (Pennant Number D62)

The caption accompanying this photo of HMS Khedive in the Imperial War Museum archive simply states “Underway, coastal waters”, but the sloping land form in the distance tells us that this was on the Clyde near Greenock, Scotland. Photo: Imperial War Museum
HMS Khedive started her life as a C3 Mercantile hull form laid down at the Seattle–Tacoma Shipbuilding Corporation. Her keel was laid down in September 1942 and after she was requisitioned by the US Navy as USS Cordova, she was nominated for Royal Navy service under the Lend-Lease program. After her launch and completion, Cordova was handed over to the United Kingdom and commissioned as HMS Khedive, named for the title given the viceroy of Egypt under Turkish rule.
As with her sister ships, Khedive sailed for Vancouver Canada following sea trials to be modified for specific Royal Navy operations. She then sailed for Norfolk via the Panama Canal. In Norfolk, Khedive embarked 12 Avengers and 10 Corsairs (from 1834 Squadron) and crossed the Atlantic Ocean, arriving in Liverpool mid-November of 1943 and disembarking her aircraft at Speke.
Following the same process that many of her sister escort carriers undertook, Khedive then went in to another period of conversion to assault carrier, this carried out at His Majesty’s Dockyard in Rosyth, Scotland. This modification work kept Khedive out of service until the middle of March. At this time, whilst carrying out post-refit trials, she collided with a commercial vessel called Stuart Queen. This put her back in dry dock for another month. Finally, on 15 May 1944, she arrived at Scapa Flow, the anchorage of the Home Fleet in Scotland, ready for duty.

Like nearly all the Ruler-class escort carriers, HMS Khedive (her pennant number 62 is not yet applied to her sides) would be photographed in late March 1944 at anchor at Greenock after her arrival there, following Royal Navy modifications at His Majesty’s Dockyard Rosyth near Liverpool. En route to the Clyde from Rosyth, she sustained structural damage following a collision with the cargo ship SS Stuart Queen, requiring repairs that kept her on the Clyde until May. Photo: Imperial War Museum
Then, in June, she joined Task Group 88, working up to participate in the coming invasion of the south of France, known as Operation DRAGOON. She embarked 26 Supermarine Seafire aircraft of 808 Squadron and took passage to Malta to join the other carriers of Task Group 88.1, including Attacker, Emperor, Searcher, and Pursuer. In Task Group 88.2 were HMS Hunter, Stalker and the American escort carriers Tulagi and Kasaan Bay.

An 808 Squadron Seafire III with a centreline 500-pound bomb flies off HMS Khedive in August 1944 during invasion operations on the French coast. Throughout the middle of August, 808 Squadron completed dive bombing attacks on targets on the coast of France and the Rhone Valley during Operation DRAGOON, the Allied invasion of the South of France. Photo: Imperial War Museum
In mid-August, Khedive and Task Group 88 were off the coast of Provence, providing air support during the assault. Her Seafires were actively involved in attacks throughout the rest of the month. Within a week, she was in need of fuel and stores, and she repaired to La Maddalena, on the north coast of Sardinia, returning to the combat area and resuming flying operations by the 21st. By the 27th, she was released along with her sister carriers from Operation DRAGOON, joining the British Aegean Force.
Khedive sailed for Alexandria and, after a week of replenishment and rest, joined elements of Force V in combat activities in and around Crete, Scarpanto and Rhodes. During this time, she had another, less serious, collision with a mercantile, the cargo vessel SS Ocean Messenger. Her Seafires were active in the Aegean until the end of September when she returned to Belfast where she put off her aircraft ashore. She then sailed around the south coast of Great Britain and up the Thames to a London commercial yard for refit, which took a couple of months.

In September of 1944, HMS Khedive operated in the Aegean Sea in consort with a number of escort carriers, carrying out air attacks on shipping and shore targets in Crete and the Dodecanese Islands of Rhodes and Scarpanto. Here she leads Stalker, Emperor, Hunter, Searcher and Pursuer in line astern. Photo: Imperial War Museum
During this work, 808 Squadron had transitioned to the Grumman Hellcat, and joined Khedive following her refit. Together they were assigned to the 21st Aircraft Carrier Squadron at Trincomalee, Ceylon and took passage there, arriving on 11 February 1945. Throughout the rest of February and March, she did transport duty, moving aircraft between Ceylon and Cochin, India.

Pilots of 808 Squadron aboard HMS Khedive pose one after another with one of their Hellcats. Top row, left to right: Sub-Lieutenant (A) Joseph Eric Jackson, RNVR; Sub-Lieutenant (A) Donald William Barraclough; Lieutenant (A) Sanford James Kingsley Edwards, RNR. Middle row: Sub-Lieutenant (A) Charles Ford, RNVR; Chief Petty Officer Samuel Mason; Sub-Lieutenant Roger Joseph Foxley, RNZNVR. Bottom row: Sub-Lieutenant (A) Glyn Games Elger, RNVR; Sub-Lieutenant Bernard Curtis White, RNZNVR; Chief Petty Officer (A) John Trevor Lloyd. Photos: Imperial War Museum
At the beginning of April, she re-embarked the Hellcats of 808 Squadron and sailed to participate in Operation SUNFISH, a recce operation over enemy-held Malaya as well as air attacks against Padang, Sumatra. This was followed quickly by Operation DRACULA and Operation DUKEDOM (see previous reference). In June, Khedive took part, along with HMS Ameer and Stalker of Force 63, in Operation BALSAM II, a British naval programme of carrier-borne photo-recce and attack missions flown in preparation for Operation ZIPPER and other operations planned for this period against the Japanese occupying forces in Malaya and the Netherlands East Indies.

The crew of a carrier at sea was always looking for some sort of entertainment, so when HMS Khedive needed to test her catapult equipment, her sailors turned out en masse to watch “Flying Flossie”, the catapult test cart, fly off and crash into the waters off Ceylon in April 1945. The cart was a steel box wagon that contained compartments that could be filled with water to simulate the weight and balance of various aircraft types. A strop connected her to the catapult which shot her off the deck. Photo: Imperial War Museum

Weeeeee! “Flying Flossie” is fired off in another test shot. HMS Khedive had one catapult and seven arrestor wires. The car is recovered by divers and hoisted aboard after each shot. Photo: Imperial War Museum
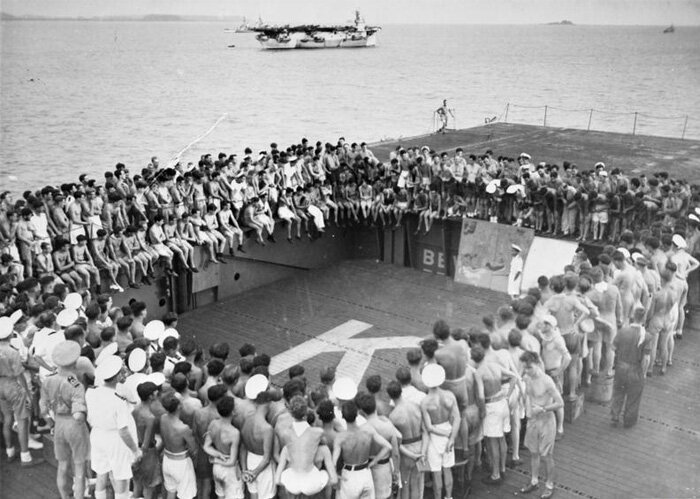
In order that every member of the ship’s company, whether their duties are on deck, where they can see, or below decks where they can’t, understands the operation on which the ship is engaged, it is the custom in the Royal Navy for the Commanding Officer to tell them about it before the ship reaches the scene of operation. Here, with large maps to illustrate his remarks, Captain G.M. Magnay is telling Khedive’s company that they are about to take part in the seaborne assault on Rangoon, known as Operation DRACULA. Subsequently, as the operation develops, the ship’s company are kept informed as to progress made by announcements over the system of loudspeakers which can be heard all over the ship. Note the large letter “K” painted on the elevator—Khedive’s deck code—which gave pilots an additional clue as the ship’s identity. Often, there would be two and as many as four Ruler-class carriers operating in the same task force and in the same area, and it was not uncommon for aircraft to line up for a landing on the wrong carrier. Photo: Imperial War Museum
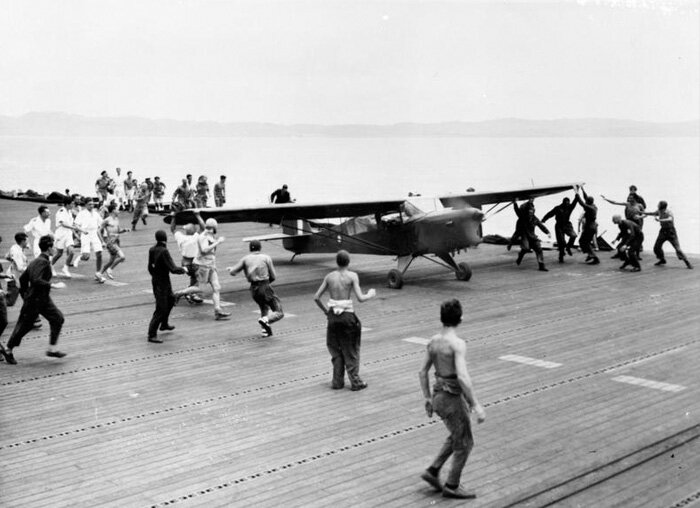
In the first few days of May 1945, HMS Khedive operated with three other escort carriers (Emperor, Hunter and Stalker) of the 21st Aircraft Carrier Squadron in support of Operation DRACULA, the assault on Burma to take back Rangoon from the Japanese. During this time, Khedive’s aircraft worked in concert with Auster spotting aircraft of the Royal Artillery to hit targets on land. During this time, the ship was visited by pilot Captain R.J. Hutt of Stratford-upon-Avon for discussions to coordinate attacks. While the Auster could easily land unarrested aboard Khedive, the ship’s deck crew and officers scramble to give assistance. Photo: Imperial War Museum

In advance of Operation DRACULA, HMS Khedive embarked a Supermarine Walrus flying boat for rescue duties. Here we see her Walrus flying off to rescue the crew of a ditched bomber that had been spotted by aircraft some 30 miles away. The white recognition panels on her wings were meant to prevent friendly fire incidents from both below when flying and above when on the water rescuing downed crews. Photo: Imperial War Museum
Khedive remained in deployment in the Indian Ocean, preparing for the coming Operations JURIST and ZIPPER, the retaking of the Malayan Peninsula. Though the war had ended, the operations were carried out as planned with no resistance. Khedive was in Singapore harbour with Emperor, Hunter and Stalker to witness the surrender ceremonies on 12 September.
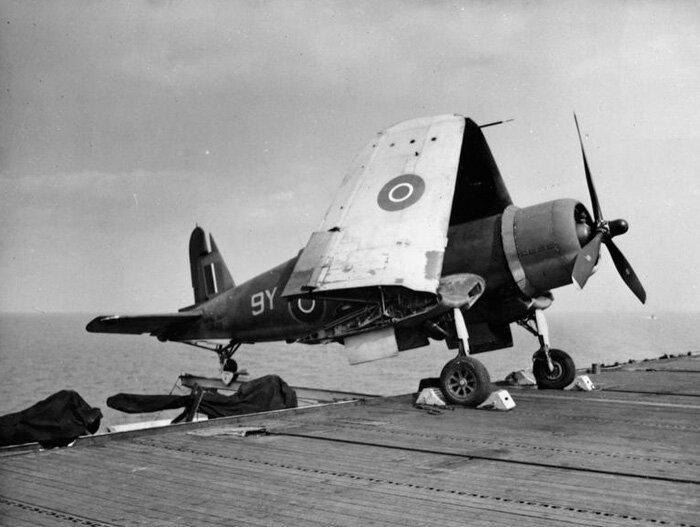
In order to save deck space for operations, the smaller escort carriers like HMS Khedive used outriggers. The tail wheel is first affixed and locked to the rigger trolley and then the aircraft is pushed outwards and the wheels heavily chocked fore and aft of the wheels. Here one of Khedive’s Corsairs demonstrates the concept perfectly. Note that the Corsair has Type C roundels, indicating it is in the European theatre of operations. Photo: Imperial War Museum

One of Khedive’s 808 Squadron Hellcats is positioned at the catapult. In mid-April of 1945, HMS Khedive was part of the 21st Aircraft Carrier Squadron which was comprised of escort carriers Khedive, Hunter, Stalker and Emperor as well as the Dido-class cruiser HMS Royalist acting as flagship, the cruiser HMS Phoebe as fighter director and the destroyers Saumarez, Vigilant, Virago and Venus. The squadron took passage with the company of the French battleship Richelieu which can be seen in the background as well as a number of British capital ships. Photo: Imperial War Museum
Khedive sailed for the United Kingdom with her 808 Squadron Hellcats embarked aboard, arriving in Belfast in early December to say goodbye to the personnel of 808 Squadron flying off their Hellcats. Shortly thereafter, she was on the Clyde for removal of Royal Navy gear and de-storing before sailing for America. En route to Norfolk, she called at Halifax, Nova Scotia. She was decommissioned and returned to the US Navy in late January of 1946. The US Navy employed her for trooping duties until 1947, then sold her for conversion to mercantile service. In 1948 she became the cargo vessel SS Rempang, sailing as such for twenty years before becoming SS Daphne. After another seven years, her tired hulk was sold for scrap and broken up in Spain in 1976.

Following her Royal Navy service, HMS Khedive was decommissioned on the Clyde and then sailed for America where she was prepared for trooping duties, bringing home American servicemen and women, a duty she carried out until 1947. Following discharge from the US Navy, she was sold and converted to mercantile service as the Dutchman SS Rempang (above). Rempang was sold and became Daphne in 1968. She was sold for scrap in 1975. Photo: histarmar.com.ar
HMS Nabob (Pennant Number D77)
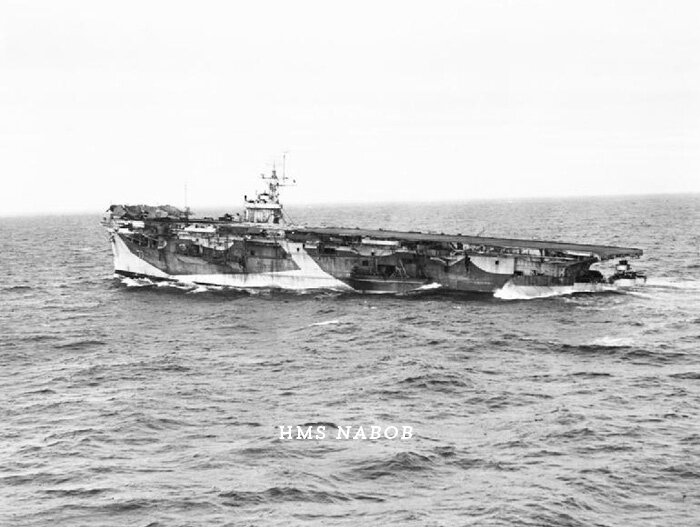
Down at the stern, the doughty HMS Nabob and her largely Canadian crew make their long way home from the Arctic after being torpedoed during Operation GOODWOOD. Photo: Imperial War Museum
After being laid down on October of 1942 as a general purpose cargo vessel, the hull that would become HMS Nabob was requisitioned from the Seattle–Tacoma Shipbuilding Corporation and built out as a future escort carrier destined to be USS Edisto. She was launched on 9 March 1943 and towed dockside for completion as a Bogue-class carrier by early September 1943. During this build-out period, it was decided that she would be handed over to the Royal Navy and a RN captain oversaw her completion. On the day she was completed, she was renamed Nabob and commissioned into His Majesty’s Royal Navy. Shortly thereafter, she left for Vancouver, British Columbia to be modified to meet RN air operations standards.
Whilst here, she was turned over to her new Royal Canadian Navy commander, Captain Horatio Nelson Lay, a naval name if there ever was one. Lay would oversee her mods and the embarkation and training of her largely Canadian crew. Of 750 men aboard, 450 were Canadian. Lend-Lease contracts do not allow equipment to be turned over to a third party, so her Canuck captain and crew worked under Royal Navy command.
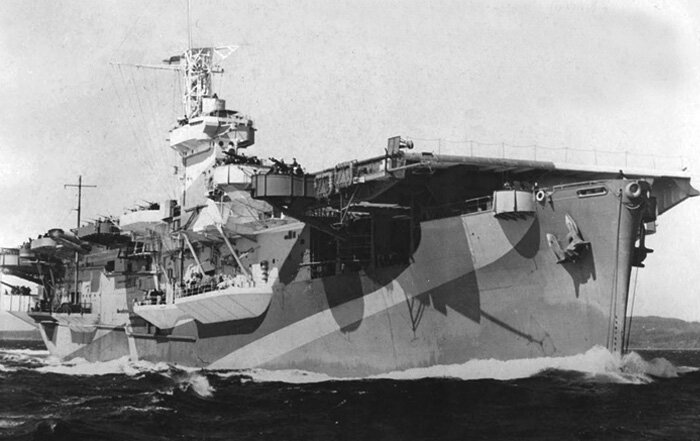
HMS Nabob may have been a Royal Navy escort carrier, but Canadians like to think of her as Canada’s first carrier in that more than half of her ship’s complement of sailors, officers and aircrew were Canadians. Of the 750 men aboard, 450 were Canadians. With a name like Captain Horatio Nelson Lay, RCN, her first operational commander seemed destined since birth to command such a ship. Photo: Canadian War Museum

A fine view of HMS Nabob with her elevator down on the hangar deck preparing to bring up another Avenger. Photo: HazeGrey.org
By 21 December, Nabob’s work was complete and she moved the short distance from Burrard Dry Dock in Vancouver to Esquimalt near Victoria to begin working up her new equipment and crew. At the end of January 1944, Nabob ran aground at speed while conducting deck landing training in Georgia Strait with the Avengers of 850 Squadron. In order to float free of the underwater obstruction, stores, fuel, ammunition and people had to be taken off. It took three days to get her afloat, though the damage was actually minimal.
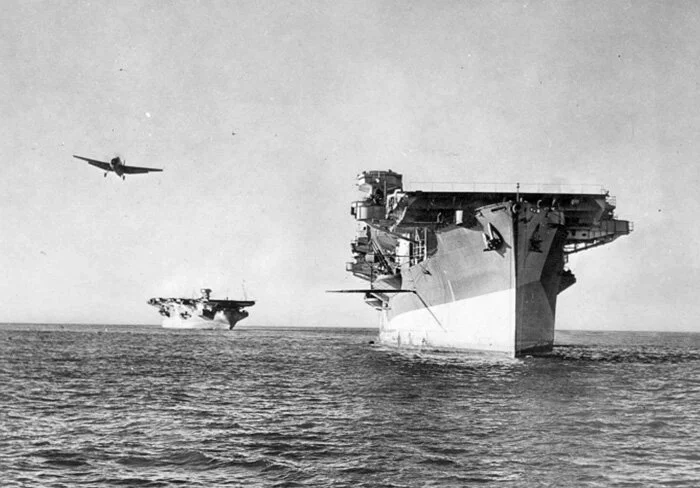
While practicing the recovery of aircraft during sea trials near Vancouver Island on 25 January 1944, HMS Nabob struck a hidden sand bar at the mouth of the Fraser River, known as Roberts Bank, at high speed and stuck fast. She is seen here fetched up with HMS Ranee in the background lending assistance. She was in the act of taking on Sea Island-based Avengers from 850 Squadron at the time of the accident—one of 850 Squadron’s Grumman Avengers flies slowly past in landing configuration. In this photograph, the censor has expunged the radar arrays on both ships. Ranee made two attempts to tow her off at two high tides, but to no avail. Nabob was finally refloated three days later with the assistance of two salvage tugs and without serious damage. Photo: Library and Archives Canada
A week later, Nabob sailed for San Francisco, where she embarked Avenger aircraft from 852 Squadron, which had flown from Massachusetts to join them. From Frisco, she steamed for Norfolk and New York via the Panama Canal. In New York, she hoisted aboard dozens of P-51 Mustangs for the Royal Air Force and sailed in fast convoy to Liverpool where she disembarked her RAF aircraft. A few days later, on 6 April, she dropped anchor in the Clyde and flew off the remaining aircraft (852 Squadron Avengers).
Nabob was then nominated for service with Western Approaches Command and went to a Clyde shipyard for further work, rectifying deficiencies and making some additional modifications. She was to remain in repair until late June 1944. When the work was done, she landed on the Avengers and a new Wildcat flight from 852 Squadron. Nabob then sailed for the coast off Belfast to work up her air unit and deck crews.

Aboard Nabob, an 852 Squadron Avenger misses the wires and strikes the barrier cables, pitching up onto its nose. A superb action shot with deck crew scrambling to get out of the way while a propeller blade on the Avenger strikes the steel deck with a shriek and a puff of smoke. Photo: NavSource.org
Nabob was then offered to the Home Fleet at Scapa Flow, where she joined the fleet carrier Indefatigable and her sister escort carrier HMS Trumpeter in Operation OFFSPRING, as they laid mines and attacked targets in coastal Norway.
Following OFFSPRING, Nabob participated in Operation GOODWOOD, her last combat operation, one of a British series of four carrier-based and relatively unsuccessful attacks on the German battleship Tirpitz, held up deep in the Kaaffjord in Arctic Norway.
In the afternoon of 22 August, Nabob and her sister escort carrier Trumpeter were detached from the main task force, and tasked with refuelling some escort vessels—refuelling was an important function of escort carriers in addition to flying operations. In the course of this activity, Nabob was struck on her starboard flank by a single torpedo from a spread fired by U-354. She immediately began taking on water, settling by the stern and listing to starboard.
Dead in the water, she was a sitting duck for the coup de grace by U-354. Lucky for her, but unfortunate for one of her escorts, the frigate HMS Bickerton got in the way of the second single homing torpedo and took the hit. It was deemed too dangerous in light of a lurking U-boat to take the time to take Bickerton in tow as she had lost her propeller shafts. Her remaining crew was taken off and it took three torpedoes from the destroyer HMS Vigilant to send her to the bottom. Nabob lost 30 men and 40 were injured, while Bickerton suffered 38 dead and many severely injured.

A photograph of HMS Nabob taken on 22 August 1944, minutes after she was struck by a torpedo fired from U-354 in the Arctic waters of the Barents Sea during Operation GOODWOOD, an attempt to take out the German battleship Tirpitz once and for all in her Norwegian Altenfjord hideaway. Behind her, the escort carrier HMS Trumpeter stands by to offer assistance, while the Canadian “V”-class destroyer HMCS Algonquin comes alongside to take off crew. U-354 fired a second torpedo which was meant to be the coup de grace, but it struck the Royal Navy Frigate HMS Bickerton. Bickerton’s surviving crew were taken off and she was scuttled by three torpedoes fired from HMS Vigilant. U-354, a Type VIIC submarine under the command of Kapitänleutnant Karl-Heinz Herbschleb, suffered a far worse fate than her two targets—just two days later she was hounded by Royal Navy frigates and destroyers and sunk with the loss of her entire crew. Photo: Imperial War Museum

A superb shot of HMS Nabob just minutes after she was hit by the torpedo from U-354. She’s beginning to list heavily and she’s down at the stern. Her flight deck is crowded with sailors with no critical job to execute and she has already lowered scramble nets on her port side. Inside the ship however, damage repair crews, engine room crew and the bridge crew are not yet ready to abandon ship. Somewhere below the surface a few miles off, the crew of U-354 is celebrating and perhaps watching through their periscope, but their joy will be short-lived indeed. I like this photo for we can truly see how broad of beam the Ruler-class escort carriers were. Photo: NavSource.org

The caption with this photograph of HMS Nabob on the Imperial War Museum website states: “HMS NABOB down by the stern with a skeleton crew making her own way to base after she had been torpedoed.” Sometimes even the IWM can get things wrong. First of all, the photo was reversed on their site, an obvious mistake when one knows that the island superstructure should be on the starboard side of the ship. As well, the hundreds of sailors lining the port side of the flight deck tell us this ain’t no skeleton crew, but rather the full complement awaiting transfer to HMCS Algonquin. Meanwhile, the engine room crew and damage control parties struggle to get the situation in hand. Given the angle of this photograph, it is likely that is was taken from an aircraft. Photo: Imperial War Museum

Hoping for the best, planning for the worst. Nabob’s crew lashed pre-inflated life rafts and wooden rafts to the flight deck for quick release should Nabob’s situation worsen or she be attacked by a submarine. In the background, she is escorted by HMS Trumpeter, which likely had aircraft in the air patrolling for submarines during the journey. U-354’s euphoria for nearly sinking an Allied carrier did not last long—she was hunted down and sunk with all hands just two days after torpedoing Nabob. Photo from the Collection of Richard Mallory Allnutt

HMS Nabob, in the distance and down in the stern, limps the 1,070 miles home to Scapa Flow and eventually Rosyth for repairs at a steady 10 knots. In the foreground on the deck of HMS Trumpeter we see a pair of 848 Squadron Grumman Avengers and a Martlet. Despite her list, Nabob managed to launch two Avengers for a night patrol on 23 August. Photo: Imperial War Museum
Nabob sent a good number of her crew to HMCS Algonquin and managed to get power re-established. She then began her long journey home to Scapa Flow for emergency repairs—down at the stern and moving very slowly. Life rafts were inflated and lashed to the flight deck as were wooden life rafts—in case Nabob began to sink rapidly. She made Scapa Flow without further incident and, after a quick-fix repair, steamed for a dry dock at Rosyth.

Though HMS Nabob was torpedoed on 22 August, she did not make Rosyth dockyards on the east coast of Scotland until 18 September, nearly a month later, having stopped at Scapa Flow for emergency repairs on 27 August. Here we see her tying up at a dry dock at Rosyth, with her balance having been restored at Scapa Flow. Photo: Imperial War Museum

On a sunny late summer day, an honorary firing party from Rosyth’s shore establishment known as HMS Cochrane marches through Douglas Bank Cemetery for the burial of 21 of the 30 sailors who were killed in the torpedo attack on HMS Nabob. The other nine fatalities were likely shipped home to their families, but those Canadians and other non British killed could not go home. Photo: Imperial War Museum

HMS Nabob sits high and dry in a Rosyth dry dock with her massive wound exposed. It demonstrates how resilient the design of these escort carriers is, and how large they were. We often think of these ships as “baby flattops”, but this image shows us just how large they were. After assessing the damage, the Royal Navy decided that it would be uneconomical to repair her. She was decommissioned and handed back to the US Navy which sold the hulk for scrap. Photo: Library and Archives Canada
On close inspection, Nabob was damaged beyond economical repair and she was struck from service on 30 September 1944. Her machinery and radar equipment was stripped for use on other Royal Navy escort carriers. The remaining hulk was returned to the US Navy at Rosyth and readied for scrapping. She was resold by the scrapyard and later converted to mercantile use. Ironically, she became a German cargo vessel, the only mercantile-from-escort-carrier to retain its military name—MV Nabob. Nabob was a German merchant navy training ship, moving cargoes, but at the same time teaching the skills of merchant service to aspiring merchants officers.
In 1967, Nabob was sold to a Panamanian concern and renamed SS Glory. She sailed for ten more years before going to the breakers in Taiwan.

At the end of the war, the hulk of Nabob, now struck off charge but still wearing her pennant number (77) was sailed to Rotterdam for breaking. In this photo, citizens of Rotterdam come down to the waterfront to see her as she makes her way up the Maas River to the scrappers. She did not get scrapped, instead was sold to a German shipyard for conversion to a mercantile. Photo: Wim Grund, via NavSource.org

The hulk that was HMS Nabob was sold to Holland for scrap after the war but, in an ironic twist, was resold and converted to a general cargo training ship for the German merchant marine service. She kept her historic name however—MV (Motor Vessel) Nabob. Later, she was resold in 1968 and renamed Gloria, finally being scrapped in 1977. Photo: ShipSpotting.com

A rare colour photograph of the bow of MV Nabob, taken in 1959. The key on the crest on the prow is part of the logo of the North German Lloyd Line, the owner of Nabob. Though Nabob spent time in Vancouver harbour for modification at the outset of her wartime career, she also called at there many times during her mercantile career . Since 1896, "Nabob" was a major Vancouver-based brand of tea and coffee, and the Nabob company would host the Captain and officers whenever the freighter was in port. Photo: Wikipedia
HMS Premier (Pennant Number D23)
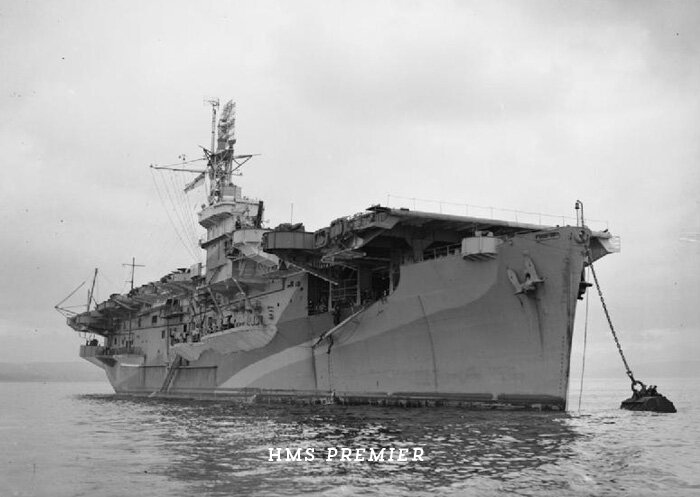
HMS Premier moored to a buoy on the Clyde after her first crossing of the Atlantic. The first arrival of each escort carrier on the Clyde was sure to bring forth a launch with a Royal Navy assigned photographer to capture a portrait of the latest ship-of-the-line for historical purposes. Photo: Imperial War Museum
HMS Premier, named after the first minister or head of government in some countries and provinces of Canada, was laid down at the Seattle–Tacoma Shipbuilding Corporation in October of 1942 as a C3 mercantile hull. Shortly thereafter, the United States Navy requisitioned to hull and contracted to convert it from its intended merchant ship use to become USS Estero, an escort carrier. She was launched in late March of 1943 and towed to Portland, Oregon for completion.
The post launch completion phase of aircraft carrier construction was as lengthy as building one from the keel to the flight deck and Estero was completed in late October of 1943 and then signed over to the Royal Navy under the Lend-Lease program in November. Following her successful sea trials, she steamed for Vancouver to undergo the standard set of modifications to get her ready for service with the Royal Navy. This work and trials were completed by January of 1944 and Premier made ready to sail to Norfolk and New York before crossing the Atlantic. She entered the Panama Canal on 17 February and made Norfolk, Virginia on the 25th.
At Norfolk, she embarked a number of Lend-Lease aircraft and sailed for New York to wait for an eastbound convoy. She joined Convoy CU-17, a 23-ship convoy sailing on 10 March, arriving on 20 March at Liverpool. She immediately was assigned ferry carrier duty and turned back for Norfolk on 26 March. Before she left, she loaded British aircraft and sailed for the Azores with a load of Spitfires, Miles Martinets and Walrus flying boats, arriving on 4 April 1944. All of the aircraft were flown off, even though their pilots had no previous experience flying from carriers. Continuing on to Norfolk, Premier loaded more aircraft, then sailed for New York where she joined Convoy CU-21, which sailed for Great Britain on the 15th of April, making Liverpool on the 26th.

HMS Premier steaming with a load of 42 Lend-Lease Corsairs on her deck for Great Britain, likely during her first crossing as her paint is fresh and her pennant number is not yet applied. Likely there are more aircraft in her hangar deck. When these carriers made their first transit of the Atlantic, they would carry a load of aircraft to Great Britain (often Liverpool) before being assigned to duties. Photo: RoyalNavyResearchArchive.org.uk
Premier then joined Convoy CU-21 westbound for New York on 2 May for the crossing, detaching for Hampton Roads, Norfolk where she arrived on 12 May. Here, she took on more aircraft for the UK, sailed for New York where she joined Convoy CU-25, making Liverpool on 31 May. It is interesting to note that in researching Premier’s crossings in convoy that certain ships like the freighters SS Bennington and SS Manassas and others were always listed, leading this author to ponder their immense contribution to the war effort… labouring convoy after convoy in U-boat infested waters.
Following this, Premier entered Liverpool’s Alexandra Dock for a lengthy period of refit, starting the first week of June and lasting until September. Mid-September found Premier off the coast of Northern Ireland embarking her first operational squadron—the 12 Avengers of 856 Squadron. For the next couple of months, Premier worked up both the squadron and its still-inexperienced flight deck crews. Once operationally ready, she sailed for Scapa Flow to join the Home Fleet.

HMS Premier, like most of the Royal Navy escort carriers of the Ruler Class, transited the Atlantic from the American East Coast ferrying a deck full of aircraft for the war effort, then moved on to Greenock on the Clyde for work up to operational status. Here we see Premier moored at the Tail o’ the Bank anchorage on the Firth of Clyde, where she worked up with Grumman Avengers from 856 Squadron. It is likely that this photograph was taken at around the same time as the previous photo. Photo: Imperial War Museum

A Grumman Avenger of 856 Squadron from the period when the squadron operated from the deck of HMS Premier. Photo: Britmodeller.com
Premier then participated in a series of naval operations off the coast of Norway. First was Operation HANDFAST, an aerial minelaying operation on the Norwegian coast in company with HMS Pursuer and escorts. This was followed by Operation PROVIDENT, an operation involving a large force including the fleet carrier HMS Implacable and Pursuer, conducting attacks on Norwegian coastal shipping. Unfortunately, this was late November and the armada ran into extreme weather, with both escort carriers suffering heavy damage to their flight decks. Unable to continue, they detached from the operation and returned to Scapa Flow.
After a quick repair, Premier was back at sea for Operation URBANE in early December. Along with HMS Trumpeter and Implacable, laying mines and attacking coastal shipping on the Norwegian coast. Mid-December saw Premier participating in Operation LACERATE, another minelaying operation with 856 Squadron’s Avengers laying mines while their new Wildcat flight offered top cover. After some success, they were forced by gale-force winds to return to Scapa Flow.
Upon her return, she was sent to a Clyde shipyard for repairs with a deck full of damaged aircraft for Royal Naval Aircraft Repair Yard Donibristle in the Firth of Fife. After this delivery, she sailed around Scotland and entered the dockyard at the end of December 1944. The work was completed in two weeks.
On 11 January 1945, Premier set course, along with a large force that included Trumpeter, for the Norwegian coast with Avengers as well as Grumman Wildcats from 881 Squadron aboard to offer cover for a minelaying operation called SPELLBINDER. Wildcats from the two escort carriers managed to drive off attacking German forces whilst ships laid mines under cover of a smoke screen.

HMS Premier (foreground) operating with HMS Trumpeter in January 1945 as part of Operation SPELLBINDER, protecting the Norwegian coast minelaying force with their combined Wildcats and Avengers. Photo: Imperial War Museum

HMS Premier steams at high speed on a sunny day in 1944, likely shortly after arriving at Greenock as she does not yet wear her pennant number (D23) on her sides. Her forward elevator is open and the Royal Navy ensign snaps crisply in the breeze. When these carriers arrived at Greenock, they were all visited by a Royal Navy photographer who shot them in repose at a moorage in the Firth of Clyde as well as from the air during sea trials. Photo: Imperial War Museum

HMS Premier in port somewhere during her military career. She is busy taking on stores from a lighter using an A-frame hoist near her stern. A couple of her whale boats are at the ready for shore parties and she has hoisted her long-range radio mast. Photo: NavSource.com
By mid-month, after another minelaying operation named GRATIS, they were back in Scapa Flow’s deep protected harbour. Here Premier, in company with the escort carrier Campania, conducted flying training in preparation for Operation WINDED, a night attack on shipping followed by more minelaying off the coast of Norway. Throughout the next month, Premier participated in a series of similar anti-shipping or minelaying operations along the northern coast of Norway. These included Operations WINDED II, SELENIUM I and II, SHRED, GROUNDSHEET, and CUPOLA. This busy period of combat operations took her to late March when she entered the yards at Greenock for repair damage from continuous operations. By mid-April, Premier was anchored again in Scapa.
Immediately she was assigned escort duty as part of Operation ROUNDEL with the escort carrier Vindex shepherding Russia-bound convoy JW66 over the Kola Peninsula and then covering the returning Convoy RA66. Premier was back at the Home Fleet Anchorage on 7 May. 856 Squadron, which had been with Premier since the outset, disembarked their Wildcats and Avengers which flew to RNAS Hatson where, within weeks, they were disbanded, the war in Europe having ended. At the end of May, Premier entered repair dockyards at Greenock where she was to spend five weeks.
For the next six months following her repair work, Premier carried out deck landing training duties in waters near the Clyde. This period ended in February of 1946.
Premier’s last duty was to repatriate 460 Canadian officers, enlisted men and civilians on her way to Norfolk, Virginia after all of her Royal Navy equipment had been removed. Also on board were 60 damaged airframes destined to be dumped overboard at sea. Had this been wartime, the metal would have been precious, but the fastest way to dispose of unwanted aircraft at that time was disposal at sea. She heaved them overside a day out of the Clyde en route to Halifax. After disembarking her passengers at Halifax, Premier steamed south along the coast, arriving at Norfolk on 3 April 1946.

With the war over, HMS Premier would be refit at the Clyde for continued Royal Navy service, but the navy had a change of mind in April 1946. She was reactivated after 6 months of inactivity and sailed for Norfolk, Virginia where she was handed over to the US Navy. This photograph was taken in the spring of 1946, shortly after her arrival at Norfolk. Photo: Dale Magnus via NavSource
She was returned to the US Navy, which sold her for conversion at Mobile, Alabama to mercantile service as SS Rhodesia Star of the Blue Star Line.

SS Rhodesia Star moving up the Weser River in Bremen, Germany in 1966. After her Royal Navy service, Premier was returned to the US Navy in April of 1946 and then discharged and sold to the Blue Star Line for conversion to a cargo liner in Mobile, Alabama. However, following her rebuild, she went to work as Rhodesia Star for the Lampart and Holt Line from 1948 to 1959, when finally she was purchased again by the Blue Star Line. In 1967, she was sold to International Export Line and became Hong Kong Knight. She was broken up in Taiwan in 1974. Photo: NavSource.com
HMS Queen (Pennant Number D19)

HMS Queen is photographed at her mooring at Scapa Flow in 1945. She first arrived at the well-secured Royal Navy anchorage of the Home Fleet in early March and continued operating from here on minelaying operations with her Avengers, shipping strikes and liberation operations until the end of the war. Photo: Imperial War Museum
It seems that every Royal Navy escort carrier of the Second World War began with at least two identities before becoming a Ruler-class carrier of His Majesty’s Royal Navy. This was so in the case of HMS Queen, built on the keel that was laid down as a C3 mercantile freighter hull in March of 1943 at the Seattle–Tacoma Shipbuilding Corporation. As this C3 hull was being built, her future changed when the United States Navy purchased the hull for conversion to a Bogue-class escort carrier to be named USS St. Andrews. Her hull was launched on 31 July, and completed dockside and delivered to the US Navy on 7 December 1943, the second anniversary of the attack on Pearl Harbor. On the same day, she was handed over to the Royal Navy and became HMS Queen.
Following her sea trials, she left for Vancouver and the Burrard Dry Dock to receive further modifications to meet Royal Standards for strike carriers. Following this work, Queen made for the Panama Canal, arriving at Miami for a two week visit before sailing for Norfolk where she embarked Avenger aircraft from 855 Squadron. She sailed for the UK, arriving in the Clyde on 23 May 1944. After offloading her cargo of Avengers, she was assigned a return trip to New York where she picked up American aircraft for delivery to Casablanca. These were delivered on 27 June, after which Queen steamed to Freetown, Sierra Leone and then back home to the Clyde via Gibraltar, arriving there at the beginning of August. It was then decided she needed some repair and rectification work done, so she shaped course around Scotland to Dundee where she entered the yard for work.
She remained in the yard until close to Christmas 1944, then put to sea for trials and shook down en route to Rosyth on the Firth of Forth. Queen was assigned duty with the Home Fleet and sailed back around Scotland to the Clyde to embark the Avengers and Wildcats of 853, a composite Naval Air Squadron. Over the next month, in the relative safety of the Clyde, the crew of Queen worked the pilots of 853 up to operational readiness before departing for Scapa Flow.
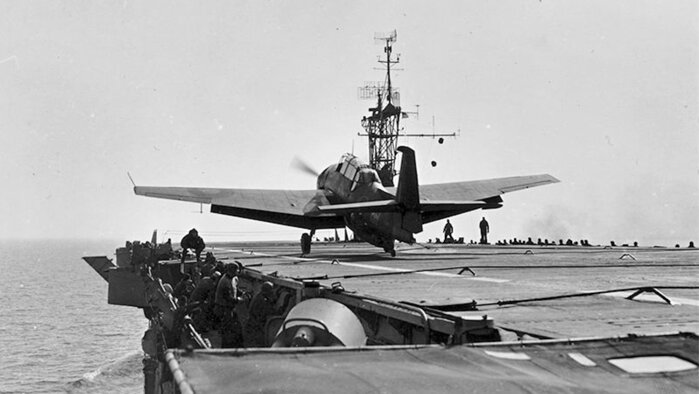
An 853 Naval Air Squadron Grumman Avenger traps aboard HMS Queen as deck crew duck under her wing. 853 Squadron operated both Grumman Avengers and Wildcats simultaneously from Queen’s flight deck. They flew aboard for the first time on 27 January 1945 and remained with the ship until the end of the war. Photo: RoyalNavyResearchArchive.org.uk

In May of 1945, while moored at Scapa Flow, Queen was visited by a Royal Navy photographer who captured some of the shipboard life, including this image of cooks serving up dinner cafeteria-style. Judging by the looks on the sailors’ faces, the dining was not particularly fine. Also obvious in this photograph is the youth of the sailors aboard the ship with the two at right looking like teenagers. Photo: Imperial War Museum

A mess full of sailors share a big laugh during a comedy and variety show put on for their entertainment when they were at Scapa Flow in May of 1945. The crowded mess likely challenged the capacity of the air movement system as most of the sailors are down to their undershirts. Photo: Imperial War Museum
Queen, in company with Premier and Searcher, and escort ships (including Tribal-class destroyers HMCS Haida and HMCS Iroquois) took part in Operation CUPOLA, a minelaying operation near Askevold, in Norway’s most westerly region. Following this, Queen and Searcher made anti-shipping attacks as part of Operation PREFIX, before making Scapa Flow at the end of March 1945.
In April, Queen joined a larger attacking force during Operation NEWMARKET that included sister carriers Puncher, Searcher and Trumpeter tasked with taking out German U-boat depot vessels and facilities at Kilbotn, Norway, near Narvik, far above the Arctic Circle. Bad weather that far north caused the cancellation of the operation and the return to Scapa Flow.

HMS Queen at flank speed on a blustery sunny day in 1945. She has her long-range radio mast up near the forward edge of the flight deck, so does not expect to land or launch aircraft. Photo: Imperial War Museum
In May, with the war winding down, she joined Searcher and Trumpeter in Operation JUDGEMENT which carried out the final destruction of the Kilbotn-based depot ship Black Watch and U-711 (the last U-boat to be destroyed in the Second World War by the Royal Navy’s Fleet Air Arm). The U-boat base at Narvik also came under attack from the aircraft of Queen and her sister ships.

In early May of 1945, HMS Queen and the Avengers and Wildcats of 853 Squadron participated in Operation JUDGEMENT, a Norwegian Coast shipping strike, along with aircraft from the escort carriers Trumpeter and Searcher. Here we see explosions from bombs dropped by the Avengers on the U-Boat base at Kilbotn Harbour in the Norwegian Lofoten Islands. Each Avenger carried four 500-pound bombs. The German U-Boat supply ship Black Watch, the Norwegian supply ship Senja and U-711 were all sunk. Photo: Imperial War Museum
By the end of May, with the war now over, she took part in Operation CLEAVER, sailing to Copenhagen to assist in liberation. Not long after VE-Day, she joined the last Kola/Murmansk-bound convoy to provide cover in case some U-boat captains did not know of the war’s end or chose to ignore it. The convoy arrived safely and she escorted a return convoy home to the Clyde, whereupon she detached and rejoined the Home Fleet.
With hostilities done, Queen was nominated for trooping duties and refitted for such. She made one return voyage to Australia returning personnel and aircraft in both directions. In September of 1946, she left for Norfolk, Virginia where, as with so many of her sister carriers, Queen was sold for mercantile conversion, becoming SS Roebiah of Stoomvaart Maatschappii Nederland (the Netherlands Steamship Company). Twenty years later, she was sold off to the Philippines President Lines as SS President Marcos, where she sailed on for another five years. She met the scrappers’ torch in Taiwan in the summer of 1972.
![HMS Queen seen at Sydney Harbour in January of 1946. Following the war in Europe, Queen was deployed to Australia on a single return voyage as a troopship carrying New Zealanders home to the antipodes as well as some sailors from the Royal Australian Navy. The Sydney Harbour Bridge can just be seen in the right distance. On her return from Australia, she visited Freemantle in Western Australia and then Colombo, Ceylon. In Colombo, she was loaded, according to the Royal Navy Research Archive [one of the finest resources on the internet] “with boxed torpedoes, unwanted aircraft, aircraft engines and other spares for ditching at sea off the Ceylonese Coast.” Photo: RoyalNavyResearchArchive.org.uk](https://images.squarespace-cdn.com/content/v1/607892d0460d6f7768d704ef/1624562574953-1Z97JGAKWPPR55NUM84M/Queen01.jpeg)
HMS Queen seen at Sydney Harbour in January of 1946. Following the war in Europe, Queen was deployed to Australia on a single return voyage as a troopship carrying New Zealanders home to the antipodes as well as some sailors from the Royal Australian Navy. The Sydney Harbour Bridge can just be seen in the right distance. On her return from Australia, she visited Freemantle in Western Australia and then Colombo, Ceylon. In Colombo, she was loaded, according to the Royal Navy Research Archive [one of the finest resources on the internet] “with boxed torpedoes, unwanted aircraft, aircraft engines and other spares for ditching at sea off the Ceylonese Coast.” Photo: RoyalNavyResearchArchive.org.uk

The cannibalized fuselage of a Fairey Barracuda is lifted on the stern A-frame hoist aboard HMS Queen in Colombo harbour in late January of 1946. This airframe along with many more, as well as engines, parts and armaments were pushed overside along on the journey back to Great Britain and rests today at the bottom of the Indian Ocean. Photo: RoyalNavyResearchArchive.org.uk

Following her service with the Royal Navy, Queen returned to Norfolk, Virginia in late 1946 where she was struck off charge with the USN and added to the Sale List. She was sold and converted like so many of her sister ships to cargo and passenger configuration and then relaunched as SS Roebiah. She sailed as Roebiah until 1967 and then was sold to the Philippine President Shipping Line and became President Marcos. In 1972, she was sold for scrap and renamed Lucky One for her last voyage to a Taiwanese ship breaker. Photo: Maritiemdigitaal.nl
HMS Rajah (Pennant Number D10)
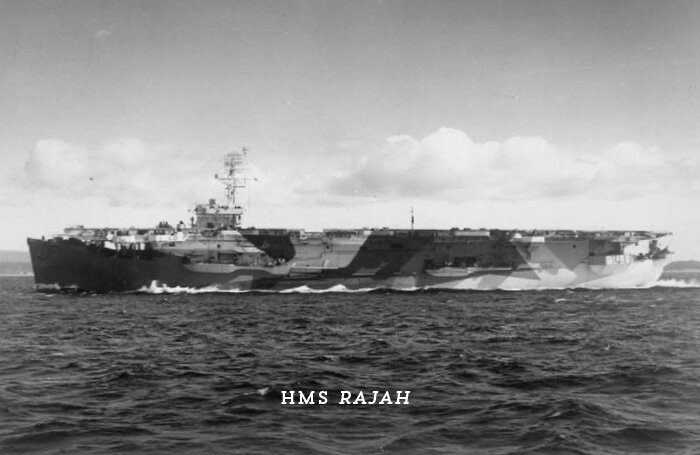
HMS Rajah looking lean, clean and purposeful, steams at speed along a coastline that is quite possibly the Firth of Forth. This photograph was likely taken at the same time as the following photograph. Photo: Imperial War Museum
Just before Christmas of 1942, dockyard cranes at the Seattle–Tacoma Shipbuilding Corporation lowered steel keel components onto the timber cradle of one of their launching ways in Tacoma, Washington to begin construction of a C3 mercantile hull known simply as Number 40. The project was purchased by the United States Navy with new plans to build her as USS McClure, a Prince William-class escort carrier. Five months later, she was launched and towed around Cape Flattery and down the Washington coastline to Portland via the Columbia River, where she was completed as an aircraft carrier. Upon completion in October 1943, she was handed over to the Royal Navy under the Lend-Lease program in January of 1944, being commissioned as HMS Rajah—after the title for a monarch or ruler in South and Southeast Asia.
Following a time-worn route, Rajah sailed to Vancouver following her sea trials to receive further modifications to meet Royal Navy standards. I say time-worn because North Vancouver’s Burrard Dry Dock Co. had modified to Fleet Air Arm standard eleven previous carriers. By 17 March 1944, the work in Vancouver was complete and she moved through Georgia Strait to Esquimalt navy base near Victoria for additional work.
Following a short round trip voyage south to Bremerton, Washington, for ammunitioning of the ship, Rajah sailed for New York via the Panama Canal, arriving on 26 June. In Norfolk, Virginia en route, Rajah received the assigned Corsairs of 1842 Squadron and the Avengers of 857 Squadron, who had just completed their training and formation.
She then moved north to New York, where she awaited an eastbound convoy to form up. On 2 July 1944, she departed New York in the large and fast trooping Convoy TCU-30 with troopships SS Scythia, SS Colombie, SS Dominion Monarch, SS Monticello, SS John Ericsson, SS Thomas H. Barry, SS Edmund B. Alexander, SS Santa Margarita, SS Uruguay and SS Brazil.

HMS Rajah in fresh paint and looking marvelous gets up to speed for the Royal Navy photographer in a launch along a coastline that is likely the Clyde. Photo: Imperial War Museum
Ten days later, the convoy made Liverpool safely, with Rajah offloading her Corsairs before sailing to Belfast where she offloaded the Avengers before crossing back over to the Clyde. Here, she was repaired and then assigned to Deck Landing Training duties on Scotland’s west coast. She continued in this duty through the middle of August, training up various types of aircraft from 768 Deck Landing Training Squadron at Naval Air Station Ayr. This was an intensive period of training with numerous landing accidents, particularly with Barracudas

In July 1944, during a training period, a Fairey Barracuda slams hard onto Rajah’s flight deck round-down and bounces into the air with its tail wheel flying off and the arrestor hook leaping over wires. The pilot elected to throttle up and go around, but when told his tail wheel had come off and with his rudder jammed, he could not land. The pilot executed a successful ditching and was picked up unhurt. In the background we can see another Barracuda carving a final approach less than a minute behind. Photo: Imperial War Museum

There is any number of ways to hurt an airplane or oneself in aircraft carrier operations. In August 1944, this Barracuda landed safely on HMS Rajah but when taxiing forward of the barrier, the pilot lost control and his aircraft rolled over the edge of the flight deck and crashed down onto the forepeak, striking the windlass. Photo: Imperial War Museum
A Fleet Air Arm Corsair, with its propeller tip forming a spiral contrail, begins its takeoff roll aboard HMS Rajah during Deck Landing Training in July of 1944. Rajah’s tour on the west coast of Great Britain as a Deck Landing Training Carrier saw her recovering a wide variety of aircraft from Royal Naval Air Station Ayr. Photo: Imperial War Museum
In September, Rajah was nominated for additional ferrying duty, collecting the men and 33 Avenger aircraft of 849 and 857 Squadrons as well as 6 Grumman Hellcats for 888 Squadron, and shaping a course through the Mediterranean and the Suez for India and Ceylon. She dropped 849 Squadron off at Cochin, India and 857 Squadron at Coimbatore before reaching Trincomalee on the eastern coast of Ceylon in early October. Here, the Hellcats of 888 Squadron departed and she made ready to return to Great Britain. On 10 November, her anchor chains rattled and her anchors splashed into the tidal waters of the Clyde estuary. After unloading, she entered the yard for repairs.
After this, Rajah was loaned to the United States Navy for the ferrying of aircraft. She crossed the Atlantic in convoy, then sailed down the East Coast to the Panama Canal and on to San Diego by early January 1945. For the next half year, she ferried American Naval aircraft from San Diego to such places as Pearl Harbor and Guam. In July, her work with the US Navy was completed and she sailed through the Panama Canal the opposite way and collected Royal Navy Corsair and personnel at Norfolk before crossing the Atlantic. The war in Europe was long over by this time and she anticipated no threats as she crossed to the Clyde.

Allied for Victory. In January of 1945, Rajah passed through the Panama Canal en route to San Diego, where she took on a deck load of Grumman Hellcats for Pearl Harbor. At this time, she was loaned to the US Navy and commenced a period of ferrying aircraft and personnel to and from the Pacific—fresh aircraft to the war and wounded back home. Photo: Imperial War Museum
Following her arrival in early August, she was converted to trooping duty, with bunks, heads and messing for up to 600 passengers—all fitted into the hangar deck. Modified in this way, Queen carried out three return trooping voyages to the East Indies and Australia.
At the end of the war, many of the escort carriers of the Royal Navy were employed in repatriating servicemen and women or moving others to new garrisons recently vacated by the Japanese. Rajah was converted into a troopship in Glasgow in November of 1945 and in February of 1946, she was used to deliver Royal Marines and all their equipment to Colombo, Ceylon where they were disembarked and sent on to reinforce the garrison at Hong Kong. Photo: Imperial War Museum

The flight deck of HMS Rajah is covered in lorries, jeeps, trailers and fuel tankers of the 45th Commando of the Royal Marines on their way to reinforce the garrison at Hong Kong. Photo: Imperial War Museum
Queen crossed the Atlantic one more time, with war brides and their children, arriving in Norfolk in mid-December 1946. She was sold for conversion to mercantile service, becoming SS Drenthe, a Dutch cargo vessel that plied the seas for nearly 20 years before being sold and renamed Lambros and then Ulisse. She fell to the ship-breaker torches in Italy in 1975.

Sport was an important form of entertainment aboard ship—for morale and for physical fitness. Here, a serious boxing ring has been set up on top of Rajah’s forward elevator in Colombo harbour. The match is watched by many of the ship’s complement as well as Royal Navy dignitaries and the Governor of Ceylon, Sir Andrew Caldecott (in the light suit and hat). If a boxer was knocked out in this ring, he wouldn’t have the luxury of bouncing off a sprung canvas mat, but would hit the steel deck hard. Photo: Imperial War Museum

HMS Rajah was returned to Norfolk, Virginia and the United States Navy, where she was sold for mercantile service in 1948. Following her conversion, she sailed as SS Drente, a passenger cargo ship with the Dutch shipping company Koninklijke Rotterdamsche Lloyd. She would be sold in 1965 to a Panamanian company and renamed Lambros. In 1969, she was sold again and named SS Ulisse. She laboured there until 1975 when she was sold for scrap and broken up at Savona, Italy. Photo: Koninklijke Rotterdamsche Lloyd Museum
HMS Ranee (Pennant Number D03)
The keel for C3 Mercantile Hull Number 41 was laid down in the launching ways of the Seattle–Tacoma Shipbuilding Corporation in the first week of January 1943. By now, it was known that this freighter hull would be built to support a flight deck and the ship was to become a Prince William-class escort carrier with the commissioned name of USS Niantic, named after the Niantic River and Bay near Groton, Connecticut. With her flight deck’s underlying structure nearly complete, she slid down the ways six months later on 2 June 1943 and was towed to a completion berth for the addition of her flight deck, island and aircraft carrier systems.

In June of 1943, USS Niantic is prepared for launch. Though there is much to be done still to her hangar and flight decks, Niantic needs to vacate the dry dock for the next escort carrier in the sequence. The ship will be finished quayside and then handed over to the Royal Navy and renamed HMS Ranee. Niantic was named for the Niantic River and Niantic Bay near the USN submarine bases at Groton and New London. Photo: National Archives via NavSource.org

While shipyard workers and naval officers watch, USS Niantic slides down the ways and is supported by water for the first time. She rides high as she is still missing the weight of her flight deck, superstructure and other fit-up elements, not to mention fuel and aircraft. By the time she is fully kitted out, she will have become HMS Ranee. Photo: National Archives via NavSource.org
Upon delivery to the United States Navy on 8 November, she was transferred to the Royal Navy under the Lend-Lease program and commissioned as HMS Ranee, named for the female equivalent of a Rajah or the wife of one. The carrier that came out of C3 Hull Number 40 would be Rajah, so Ranee was a logical name choice for the next one build coming down the ways.
A short period of sea trials ensued as well as repairs to eliminate defects. Ranee sailed for Vancouver and the Burrard Dry Dock Company yard, where she underwent modification to the standards used by the Royal Navy. Ranee was the 13th of 19 escort carriers to go through this work at the Burrard Dry Dock facilities in North Vancouver. She spent two months here and then was assigned ferry duties.
Ranee’s maiden voyage took her first to San Francisco where she embarked 60 aircraft for delivery to Cochin in the south of India and then took passage across the Pacific Ocean. She paid a visit to Wellington, New Zealand and then dropped off a number of passengers in Fremantle before continuing on to Cochin where she unloaded her cargo of aircraft. Following this, she returned to Vancouver, British Columbia by way of Melbourne, Australia, arriving in Canada on 8 May 1944.

On a bright but windy day in September of 1944, Ranee steams across the southern Atlantic from Norfolk with a deck full of Fleet Air Arm Grumman Hellcats (60 in all) bound for the Royal Navy Aircraft Repair Yard at the Wingfield Aerodrome in Cape Town. From RNARY Wingfield, the aircraft will be dispensed to FAA Hellcat squadrons in the South East Asia Command. Photo: Imperial War Museum
In Vancouver and later Esquimalt, she underwent additional work to bring her to full operation status, since she had been modified originally in Vancouver as simply a ferry carrier. Two months later, she left Vancouver for Norfolk, Virginia. For the purposes of this voyage, Ranee was given an obsolete Blackburn Shark aircraft by the Royal Canadian Navy with which to practice deck handling en route. When the crew was finished training with the Shark, they simply pushed it overboard instead of having to deal with it when they made Norfolk.
At Norfolk, Ranee embarked another very large consignment of aircraft—60 new Hellcats destined for Cape Town, South Africa. Leaving Norfolk with her charges, she made Cape Town on 23 September after 18 days at sea. After disembarking her 60 “Cats”, she promptly turned about and headed back to Norfolk for another load, this time for the United Kingdom.
At Norfolk, she took aboard a total of 36 Corsair fighters assigned to 1846 and 1858 Squadrons as well as a hangar deck full of Lend-Lease aircraft. She moved on to New York to await the assembly of Convoy CU-44, bound for Liverpool, England. The 46 ships of CU-44, including HMS Trouncer and 14 ships carrying troops, moved out on 22 October, arriving ten days later with Ranee, detaching for Belfast where she offloaded the Corsairs. She crossed to the Clyde and was allocated to the Western Approaches Command as a Deck Landing Training Carrier.

Ranee steams at high speed with a deck load of Corsairs and Avengers during a ferrying voyage. Photo: histarmar.com.ar
Throughout November and much of December, Ranee recovered and launched aircraft from 768 Deck Landing Training Squadron at Royal Navy Air Station Arbroath—nearly 2,000 landings in all. At the end of December, she underwent a brief repair period and boiler cleaning, prior to being loaned back to the United States Navy’s Carrier Transport Squadron in the Pacific Theatre.

Black and white photography does not do justice to a display of cakes prepared by the chief cook aboard HMS Ranee in preparation for celebrations for Christmas and New Year’s Eve 1944. Having a good cook on your carrier most certainly helped to allay homesickness. Photo: Imperial War Museum

Cooks aboard Ranee decorate festive cakes while young crew members crowd the passageway to have a look at the delicious concoctions that they will soon enjoy at Christmas dinner 1944. At the time (November 1944 to January 1945), Ranee was acting as a deck landing training carrier from Greenock, Scotland. Shortly after these cakes were served at Christmas, Ranee tied up at Rosyth for a short period of maintenance. Photo: Imperial War Museum
On crossing the Atlantic, she met with severe storms and suffered damage to her flight and hangar decks and her crew suffered from heavy rolling as she proceeded down the East Coast to the Caribbean Sea. Once through the Panama Canal, Ranee headed north to San Diego to load aircraft for the Pacific—but only after repairing the damage she suffered in the Atlantic crossing. In the last week of February, she raised anchor and shaped a course across the Pacific to Hawaii and then Guam. After delivering her aircraft she returned to Hawaii, after which she made another trip back to Guam and the big moorage at Enewetak Atoll in the Marshall Islands. After all these sea miles, she was ordered back to the United Kingdom via San Diego and then the Panama Canal.
Arriving in New York with a ferry load of aircraft that she had picked up in Norfolk, Ranee took on board many passengers—service men as well as women and children returning to Great Britain. Joining the 22 cargo ships of the eastbound Convoy CU-72, she made Glasgow, Scotland on the 4th of June 1945, with the war now over in Europe.
Ranee was then nominated for duty as a fleet replenishment carrier with the British Pacific Fleet and began conversion and tropicalization work on the Tyne. This work was underway when, in August, Ranee’s duties were changed to that of a trooping ship. This was considerable more work which required her stay in the yard until November of 1945. The work entailed providing accommodations, toilets and messing for up to 1,000 passengers in addition to her now reduced crew.
For the next year, Ranee sailed to the South Asia and Australasia three times before ending her Royal Navy career at Norfolk in November of 1946 where she was handed back to the US Navy. She was sold in the summer of 1947 for conversion to a merchantman in Mobile, Alabama and was relaunched as the rather beautiful SS Friesland of the Rotterdam Lloyd Line. She sailed on for twenty years before being resold to a Panamanian concern and renamed SS Pacific Breeze. She went to the scrappers’ yard in 1974.

A lovely bright photo of HMS Ranee being positioned by harbour tugs, after her conversion to trooping duty Tyneside. The photographers are listed on the Imperial War Museum site as Frank and Sons, South Shields, which is located near Newcastle-on-Tyne in the north of England. Ranee seems to have made just one visit to the Tyneside shipyard and that was after the war in September 1945 where she underwent refit as a troop carrier. Her hangar deck area was modified to provide accommodation to passengers. Photo: Imperial War Museum
Ranee’s engines belch heavy black smoke as she gets underway from Portsmouth harbour during her postwar trooping duties. Her flight deck is lined with life rafts to supplement the boats as she carries them home from the war. Ruler-class escort carriers (American Bogue Class) had two exhaust stacks—one on each side of the flight deck that were below the level of the flight deck. Photo: RoyalNavyResearchArchive.org.uk

HMS Ranee, with her crew turned out along the edges of her flight deck, slides majestically into Valetta Harbour in December of 1945 en route to Southeast Asia for trooping duties—her first voyage in this new role. Photo: NavSource.org

A photographer stands at the bottom of a dry dock in Portsmouth, England to capture this unique view of Ranee’s flight deck, sponsons and gun tubs. The ship was in for repairs and modification for trooping duties from 27 February to 27 March 1946 and in-between her first and second trooping voyage. Photo: NavSource.org

The elevators that brought up aircraft from the hangar deck to the flight deck were not just the focal point of flight operations, but it seems social activity as well. Here Ranee’s crew members keep active with an indoor volleyball game on the forward elevator floor at the hangar deck level. This would prevent the loss of precious volleyballs overboard. The sign “Beware of Propellers” is there to remind plane handlers about the dangers topside as they ascend to Ranee’s flight deck. Just visible at the edge of the elevator shaft above, we can see crewmen (or Royal Marines?) marching with rifles shouldered. Photo: RoyalNavyResearchArchive.org.uk
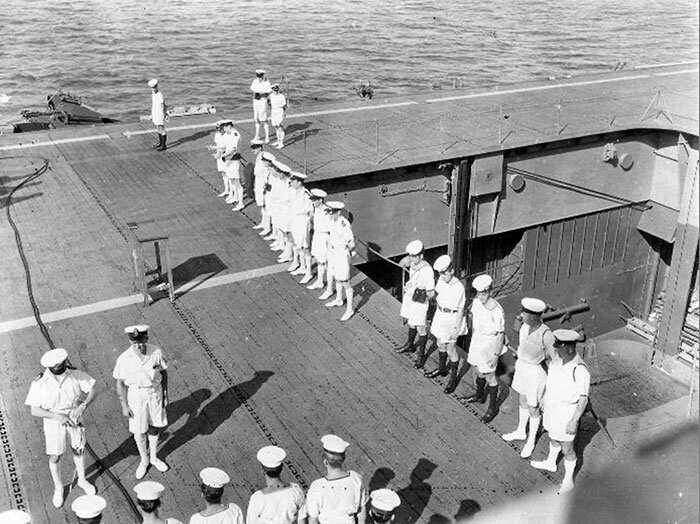
Officers and sailors line the edge of Ranee’s forward elevator shaft during Sunday Divisions somewhere in the warm Pacific. The elevator is lowered and the shaft wide open to cool off the hangar deck and the opening is ringed with a removable rail. Photo: RoyalNavyResearchArchive.org.u

After the end of the war, Ranee carried out trooping duties then was sold for conversion to a cargo ship. She was renamed S.S Friesland (pictured top) and sailed with the Dutch shipping company Koninklijke Rotterdamsche Lloyd. She was a fine looking ship. Later, she was sold to a Panamanian concern called the Orient Overseas Line under the name S.S. Pacific Breeze (pictured bottom) and still quite handsome. She went for scrap in 1974 in Taiwan. Photos: Top: Delcampe.net; Bottom: histarmar.com.ar
HMS Ruler (Pennant Number D72)
There is no doubt that, for a while at least, every C3 mercantile keel laid down at the Seattle–Tacoma Shipbuilding Corporation in Tacoma, Washington was being requisitioned by the United States Navy for conversion to an escort carrier of the Bogue or Prince William Classes. War was hell and business was brisk. On 25 March 1943, a new C3 keel being laid down was claimed by the US Navy and work began to convert it from freighter to an escort carrier with the proposed name of USS St. Joseph.
The newly completed hull was launched five months later, and after completion work was done dockside, she was handed over to the Royal Navy four months later on 22 December. She was commissioned as HMS Ruler and, following sea trials off the coast of Washington, steamed for Vancouver where she underwent the standard modifications to bring her up to the standards then in use by the Royal Navy.
Normally, a new class of ship is named after the first completed example, such as the ships of the Iowa-class battleships of the US Navy. Iowa was first, so her sister ships (New Jersey, Wisconsin, and Missouri) were grouped under her name. I had assumed that Ruler was the first of the many escort carriers with names of royal title… but it was only one of many examples and not the first by any means.
With her work completed and her crew just beginning to be comfortable, she sailed for the Panama Canal and eventually Norfolk, Virginia, arriving there on 8 April 1944. Here she craned on a full load of Lend-Lease Hellcats, Avengers and Corsairs for Great Britain. Ruler weighed anchor and sailed for New York to await the assembly of eastbound Convoy CU-22, a 31-ship armada of mostly general cargo and tankers. They departed on 22 April and arrived in Liverpool twelve days later.

An unfortunately-cropped photo of Ruler on one of her ferry runs with a deck load of Corsairs, Avengers and Hellcats (at stern). It is very likely that this was taken at Norfolk or New York before she crossed the Atlantic the first time for her paint seems very fresh. Photo: FleetAirArmArchive.net
Having just crossed the Atlantic, she was sent back three days later to collect more aircraft in New York, this time Hellcats and Avengers. She awaited the assembly of the 34 ships of Convoy CU-26, finally departing again for Liverpool on 31 May and completing the crossing in the typical 12 days. Arriving at Liverpool, she was taken into the yard for a refit. Following this, Ruler re-crossed the Atlantic and arrived at Norfolk in the middle of October to collect yet another load of Hellcats and Corsairs, bound for the UK. She joined the ships of Convoy CU-46, arriving in Liverpool on 18 November 1943. She had crossed the Atlantic six times, but had yet to launch an aircraft or join the shootin’ fight.
Finally, in December of 1944, she got the long-awaited nomination for combat service with the British Pacific Fleet and commenced a period of training with her deck crews and the Hellcats and Avengers of 885 Naval Air Squadron in the Clyde area. This period took her until late January when she provisioned and weighed anchor, bound for Sydney, Australia to take up a new role as a replenishment carrier for the Pacific Fleet. This meant that she would carry spare aircraft in her hangar deck to replace losses in the fleet due to operational activities. These aircraft would be flown off Ruler by her pilot to the carrier needing new airframes. This would mean she would carry aircraft of every type flown in theatre—Corsairs, Hellcats, Avengers and Barracudas. She would also be required to refuel escort vessels from her reserves.
Ruler took with her to Australia her 885 Squadron aircraft as well as the Fairey Fireflys of 1772 Naval Air Squadron, arriving in Sydney’s picturesque harbour in the middle of March, flying off the aircraft of both squadrons to Royal Naval Air Station Schofields on the outskirts of Sydney.

In a cold and numbing scene, HMS Ruler’s flight deck is crowded with snow-covered Grumman Avengers and Fairey Fireflys. The caption with this posting on the Imperial War Museum’s Collection site says little, but it does give the date as 21 January 1945. In late January, according to Naval-History.net, Ruler had embarked the Fireflys of 1772 Squadron at Royal Navy Aircraft Replenishment Yard Belfast and then was making ready on the Clyde to sail for Sydney to join the Pacific Fleet as a replenishment carrier. In her hangar decks she also had Hellcats from 885 Squadron which had been working up with the carrier since December. This photograph was likely taken on the Clyde with her taking on additional aircraft for the Far East. Photo: Imperial War Museum
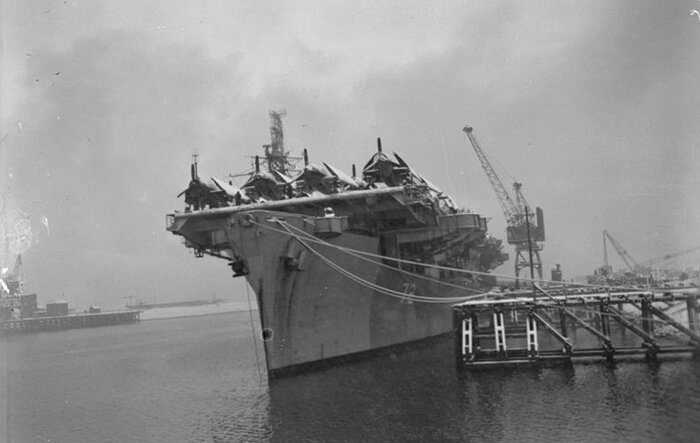
Another angle on the previous wintry view of HMS Ruler dockside with a full deck of aircraft. With her deck crowded from stem to stern, it’s clear that Ruler is ferrying aircraft. Photo: Imperial War Museum
Ruler joined the Pacific Fleet at Leyte, Philippines working as a replenishment carrier with Task Force 57 until the beginning of June 1945 as part of Operation ICEBERG. Following this, she returned briefly to Sydney, then took part in Operation INMATE along with other ships of the 4th Cruiser Squadron of Task Force 111.2, which included the Fleet Carrier HMS Implacable and the Canadian light cruiser HMCS Uganda. Ruler provided air cover for Implacable with the Hellcats of 885 Squadron.

Four Grumman Wildcats of 885 Squadron, Fleet Air Arm, execute a tight formation as they overfly HMS Ruler. Three of the Hellcats wear South East Asia Command camouflage while one is painted in the shipyard blue used in the Pacific theatre. All four carry the SEAC roundels with the red central circle removed. Photo: NavSource.org

A photographer aboard HMAS Nepal captures the choreography as the destroyer closes in on HMS Ruler, underway in Japanese waters in mid-July of 1945 and acting as a replenishment ship. Watching the refuelling of escort ships was an interesting diversion for sailors and airmen lining the flight deck. In this photo, we see how the island superstructure is cantilevered over the water and does not obstruct deck operations. Photo: Australian War Memorial
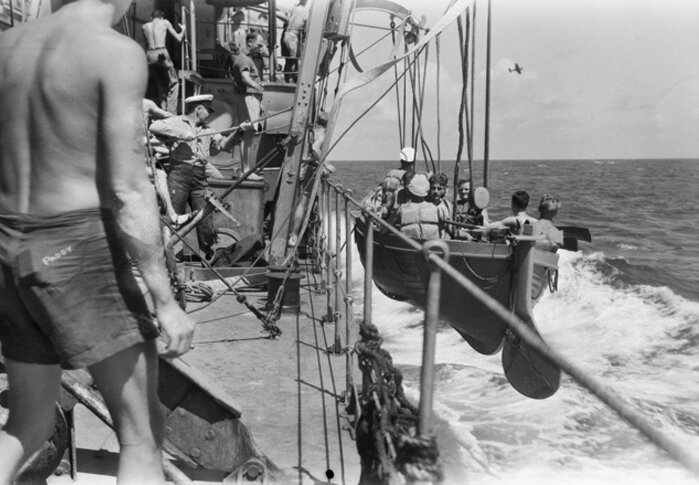
A lifeboat and its crew are hoisted aboard the Royal Australian Navy destroyer HMAS Nepal, one of HMS Ruler’s picket ships during operations with the Pacific Fleet in July of 1945 in Japanese waters. Also aboard the boat is a pilot from Ruler, who had ditched during operations. The destroyer escorts that accompanied aircraft carriers of any size had dual responsibilities—providing a defensive perimeter and standing by to rescue pilots and aircrew that were forced to ditch or bail out or who went overside during takeoffs or landings. So as not to come to a stop and risk being torpedoed, the boat and crew were lowered and hauled aboard underway. Photo: Australian War Memorial
Until the end of the war, Ruler continued to supply fresh airframes to fleet carriers as well as launching her own attacks with a detachment of aircraft from 885 Squadron. In preparation for the signing of “the instrument of surrender” aboard Missouri, HMS Ruler entered Tokyo Bay and her crew were witness to the amassed armada of ships and the flypast of thousands of aircraft of the US Navy and the United States Army Air Force. During this time, Ruler embarked 445 Allied POWs from Japanese camps and civilian internees.
In late October of 1945, Ruler sailed for the Firth of Clyde one more time, arriving there on 3 December. Tied up dockside, her Royal Navy equipment, stores and ammunition were stripped and in the first week of 1946, she crossed the Atlantic for the seventh time, letting drop her anchor in the Hampton Roads of Norfolk. After being handed back to the US Navy and then struck off charge, she did not get a chance at a second life like so many of her sisters. Later in 1946, she went straight to an appointment with the ship breaker’s torches.

At the end of the war, HMS Ruler was present in Tokyo Bay when the unconditional surrender of the Japanese was signed aboard USS Missouri. She then took on 450 civilian and military POWs at Yokohama (also on Tokyo Bay) for transport back to Sydney, Australia. This grouping of POWs, posing with one of Ruler’s 885 Squadron Grumman Avengers en route to Australia, look in fair condition. These men, who were members of the Hong Kong Volunteer Defence Force, came from the Innoshima POW Camp which was located on an island in the Japanese Inland Sea. They had been at the camp since January 1943. Photo: Imperial War Museum

When Ruler brought prisoners of war home to Sydney, Australia, there were children among them, many of them born as prisoners. The ship’s carpenters made wooden toys for the kids to make the trip home more fun, but for some of these kids it must have been a very exciting voyage regardless, with the big aircraft carrier and her hangar deck full of aircraft as playgrounds. The carpenters also made swings and seesaws for the children to play with on deck. Photo: Imperial War Museum
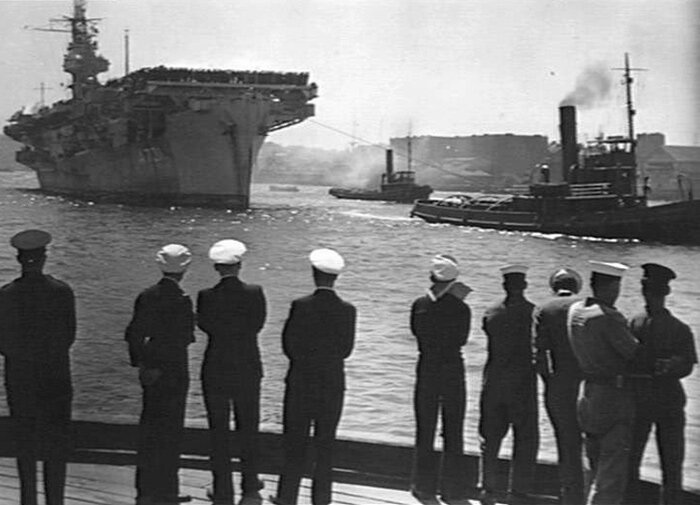
27 September 1945—officers and ratings on a dock watch as Sydney Harbour tugs manœuvre HMS Ruler to a berth in the Pyrmont area of the city. Lining her flight deck edges are members of her crew as well as 450 former prisoners of war, including 52 Australians (the rest were British). One can only imagine how happy they were to see iconic Sydney Harbour Bridge and the sunny skyline of that magnificent city. Photo: Australian War Memorial

HMS Ruler at rest in Sydney Harbour after the war, while a sailing yacht motors past in peaceful times. Photo: NavSource.org
HMS Shah (Pennant Number D21)
Sailors and naval officers are a superstitious lot if there ever was one, yet, on Friday, 13 November 1942, cranes at the Seattle–Tacoma Shipbuilding Corporation, swung steel over the launching ways and lowered to the timber cradle, thus beginning the keel of a new C3 merchant hull that was to be requisitioned by the United States Navy for conversion in situ to a Prince William-class escort carrier to be named USS Jamaica. Five months later, her sponsor, Mrs. C.T. Simard cracked a bottle of champagne on her prow and below, yard workers with sledges knocked out the last chocks as she slid down the greased ways and into the water. After launch, she was towed dockside for completion, and when this was finished five months later, she was handed over to the Royal Navy and commissioned as HMS Shah, named for the title given kings and princes in Iran.
Following her completion and sea trials, Shah’s new Royal Navy crew took her to Vancouver for the standard modifications to make her suitable for service with Fleet Air Arm aircraft. It was a busy time at the Burrard Dry Dock Co. with Shah sharing the various dock positions with Ameer, Atheling, Begum and Empress. This must have been a dramatic sight along the north shore of Burrard Inlet. The modifications were many. The Royal Navy Research Archive states: “… this work totalled 150 separate modifications and included lengthening of the flight deck, fitting redesigned flying controls and fighter direction layout, modifications to hangar, accommodation and store rooms, installing extra safety measures including major changes to the aviation fuel stowage and oiling at sea arrangements, modifying gunnery and other internal communications, adding extra W/T and R/T sets, and improved darken ship arrangements.” This work would take two months.
The following two weeks were spent shaking down the ship, its systems and crews. Unlike most of the Royal Navy escort carriers built on the West Coast, Shah did not make a maiden voyage to Norfolk on the East Coast, but rather was impressed into immediate service as a ferry carrier. She sailed for San Francisco where she loaded the 12 Avengers of 851 Naval Air Squadron, as well as a large ferry load of airframes destined for the East Indies—32 Wildcats and 22 P-40 Warhawks. This long first voyage would take her to Cochin, India via Melbourne, Australia. She left San Francisco on 15 January and reached Cochin on 15 February, making Cochin on the 23rd of February.

Nearly all of the Royal Navy’s escort carriers began their careers sailing from Vancouver, through the Panama Canal and on to an eastern American port where they took on aircraft to ferry to Great Britain. Shah was one of the few exceptions, sailing to San Francisco, where she took on the Avengers of 851 Squadron as well as 32 Wildcats and 22 P-40 Warhawks for service in the Southeast Asian Theatre of Operations. This photo was taken after she left San Francisco, en route to Melbourne, Australia. Photo via RoyalNavyResearchArchive.org.uk

After leaving Melbourne on her maiden voyage, Shah sailed for Cochin (also known as Kochi) on the Southwest coast of India via Freemantle, Australia. At Cochin (above), she offloaded her cargo. Here we see some of the 22 P-40s on the dock with two of the Wildcats still on her deck waiting to be pushed aft to the A-frame hoist by deck aircraft handlers. Photo: NavSource.com
At Cochin, she hoisted the Warhawks and Wildcats from her deck and then proceeded south to Colombo where the Avengers of 851 flew off to the Royal Naval Air Station at the Colombo Racecourse at Cinnamon Gardens. Shah put to sea to train 851’s pilots as required until the middle of April.
At the beginning of May, Shah returned to Colombo from a ferry trip to Bombay, embarked the Avengers of her 851 Squadron which now had a fighter cover flight of 6 Wildcats, and spent some weeks training up her new aviation section for trade protection/convoy duty. By mid-June she had sailed round to Trincomalee, where she was assigned anti-submarine patrol in the Indian Ocean. The aircraft of 851 Squadron and Shah then patrolled the eastern approaches to Trinco and Ceylon.
For the next month or so, Shah patrolled off the Seychelles and in the Indian Ocean along the important shipping route between Cochin, India and Colombo, Ceylon, and in the northern Indian Ocean. Many of these patrols were done in concert with HMS Begum. Her final anti-submarine patrol, in the first week of August, involved the search for U-198, a U-boat that had for the past while played havoc in the area to the east of the African coast, sinking two large coal-carrying cargo vessels. 851’s Avengers and those of Begum’s 832 Squadron both managed attacks on U-198, but were unable to sink her. They were, however, able to vector surface ships to the submarine’s position, which subsequently managed to sink her with depth charges
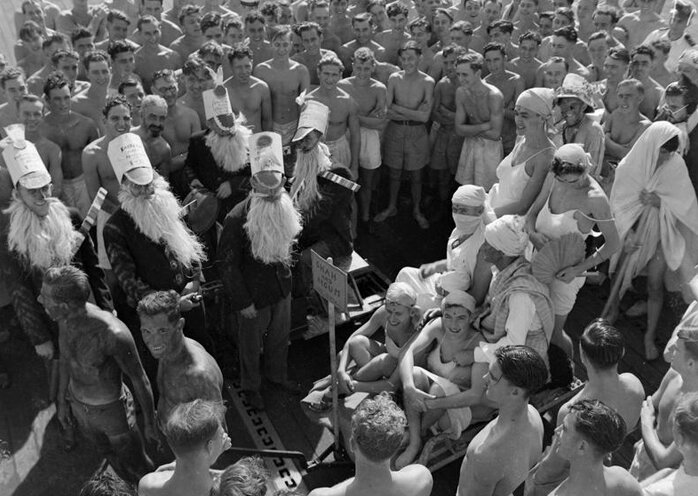
In February of 1945, the crew of HMS Shah conducted a “fancy dress parade” with members of her crew dressed as The Ancient Mariners (possibly the hatted and bearded men) and some lovely ladies being drawn on a bomb cart by sailors in black face and body. One wonders where the sailors got the white gowns and how they chose the men who would become women—they seem to be enjoying the role. At first I thought that this was the “Crossing the Line” drama that happens when a ship of the Royal Navy crosses the equator (with virgin equatorians called polliwogs and experienced ones called shellbacks) but other photos in this sequence show that Shah is anchored in a harbour. The Imperial War Museum entry for this photograph indicates the date as February 1945. I question this as the sign in the photograph says “Shah and Begum”. If it was indeed February as the caption states, Begum was well on her way back to the United Kingdom. I suspect this is perhaps around the time they were operating together off the East African coast—possibly Mombasa—for that is the area of the Equator, Ceylon and India being much farther north. Photo: Imperial War Museum
The middle of August found Shah in Kilindini Harbour in the port city of Mombasa, Kenya, provisioning for a convoy escort trip to Aden, Yemen. Shah was back in Mombasa by 21 September 1944. In early October, she sailed for Cochin, all the while conducting anti-submarine patrols en route. Before reaching Cochin, she flew off her 851 Aircraft at Colombo, not returning until late November and not collecting her squadron until 10 January 1945. While steaming for Trinco, Shah’s air group worked up, but lost three Avengers to damage en route.
At Trincomalee, Shah welcomed aboard 851 Squadron once again and set a course for Durban, South Africa for work in the yard. En route, she conducted trade protection patrols and anti-submarine work in the area east of Diego-Suarez, Madagascar (now the city of Antsiranana). She arrived at Durban in the last week of February, flew off her aircraft and entered the yard for six weeks. In the first week of April, she landed on her Avengers and Wildcats, shook down off the coast, and then sailed for Mombasa and then on to Trinco.

A calm scene aboard HMS Shah in the Indian Ocean. Two Grumman Avengers (which appear factory fresh) are being refuelled from hoses brought from the catwalk. The Avenger at right is “stropped” to the starboard hydraulic catapult. Photo: Imperial War Museum

An armourer aboard HMS Shah works on the starboard machine guns of a Grumman Wildcat in February of 1945 while Shah makes her way to Durban, South Africa from Trincomalee, Ceylon. Photo: Imperial War Museum

A Grumman Avenger drops down on the flight deck of HMS Shah in February of 1945 in Indian Ocean waters while the batsman bats him down. In the foreground, the wires of the barrier await the mass of the Avenger should it fail to catch a wire with its arrestor hook. The Avenger is possibly returning from an anti-submarine patrol during a passage to Durban, something done to reduce the risk of being torpedoed. Photo: Imperial War Museum
In Trincomalee, Shah embarked 10 Hellcats from two other squadrons, as part of her participation in Operation BISHOP. This operation involved diversionary attacks on the Nicobar and Andaman Islands in support of the larger Operation DRACULA, the invasion and liberation of Rangoon, Burma. She joined capital ships such as Queen Elizabeth, Cumberland and the Frenchman Richelieu along with destroyer escorts, oilers and her sister HMS Empress. After the success of this operation and a short break to celebrate VE-Day, Shah was back in Trinco on 9 May 1945.
After the first week of May 1945, Shah joined Emperor, Hunter, Khedive and Empress in Operation DUKEDOM, the search for the Japanese heavy cruiser Haguro and the destroyer Kamikaze which had been acting as armed supply ships for the Japanese garrisons at Port Blair in the Andaman Islands. Getting wind that Shah and the others with their escorts had sailed from Trincomalee to intercept them, the Japanese Imperial Navy ordered the Haguro and her consorts to return to Singapore. Aircraft from Empress were the only ones to engage Haguro as she ran for home—a staggeringly long-range flight of 530 miles from launch to Haguro. When, on 14 May, Haguro and Kamikaze made a second attempt, they were spotted and, on 15 May, were surrounded by a Royal Navy destroyer flotilla that sank Haguro in the now famous Battle of the Malacca Strait.
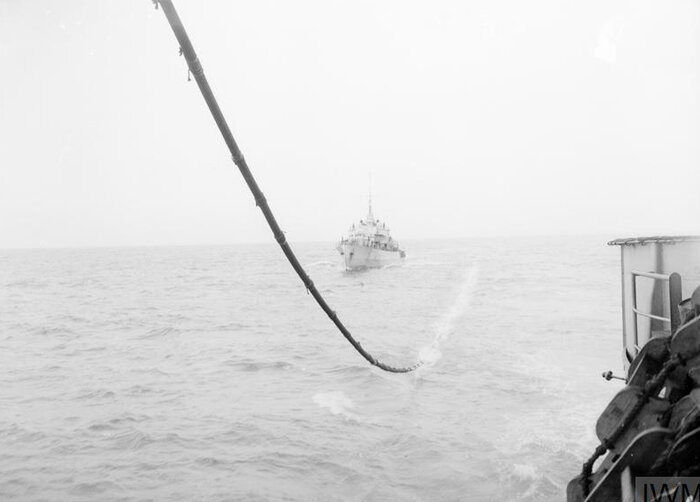
One of the additional duties of an escort carrier was fuel replenishment. HMS Shah carried additional fuel to top up her escort ships. Here, a buoyant hose is paid out behind a steaming Shah as a frigate moves up to collect it and take on fuel. Photo: Imperial War Museum
Sub-Lieutenant Murray Gordon White, Royal Navy Volunteer Reserve, one of the batsmen aboard HMS Shah, eyes an incoming aircraft from his position on the port side. White, a qualified Fairey Swordfish pilot, bats on a landing Grumman Avenger after strikes in the Andaman Islands in the Bay of Bengal in August 1945. Photo: Imperial War Museum
Mid-May found Shah back at Trincomalee for some brief repair work, then sailing to Bombay, India for two weeks. In the first weeks of June, Shah was back in Trincomalee’s China Bay. From here she spent a period of Deck Landing Practice with several squadrons in anticipation of joining the fleet in Operation ZIPPER. This continued through the first two weeks of August, but when the Americans dropped their bombs on Hiroshima and Nagasaki, Shah’s role in ZIPPER was eliminated, even though the operation went ahead

Sailors, marines and officers bow their heads in prayer during Shah’s Sunday Divisions whilst in harbour—possibly at Trincomalee or Colombo, Ceylon. Photo: Imperial War Museum

A lovely artistic shot from beneath a Grumman Avenger of HMS Shah at sea in the Indian Ocean at the time of the Japanese surrender. Crew members celebrate with a day of sports and relaxation. Here, they play a game of deck hockey (with what appears to be ice hockey sticks vs. field hockey). On the distance, a destroyer escort keeps vigil off her port beam. Photo: Imperial War Museum
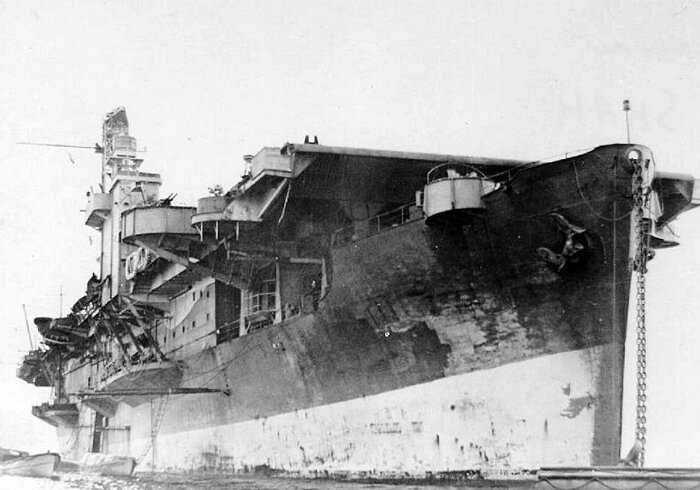
HMS Shah looking a little worse for wear—date and place unknown. Photo: histarmar.com.ar
By the beginning of September, Shah had embarked 851 and 845 Squadron personnel sans aircraft and worked up steam, bound for the Clyde via the Suez Canal. She arrived there in the first week of October, the very first time she had been in her United Kingdom home. The war was over and her squadrons were disbanded, her store rooms emptied and her gear stripped before she set sail for Norfolk, Virginia where she was soon decommissioned and struck off charge. She sailed one last time to Newport News, Rhode Island where she began her long conversion to a passenger vessel. She was relaunched as SS Salta and operated under the Argentinean flag until boiler damage caused her to return in 1964. Two years later she was cut up for scrap in Buenos Aires.

After her return to the United States Navy, Shah was sold for conversion to mercantile use and became the passenger liner S.S. Salta with the Compañia Argentina de Navegación Dodero S.A. (known more succinctly as the Dodero Line). As Salta, she was the sister ship to S.S. Corrientes which was a similar conversion from HMS Tracker, and other Royal Navy escort carrier, but of the Attacker Class. Photo via ssmaritime.com
HMS Thane (Pennant Number D83)
Of all the names of the Ruler-class escort carriers of the Royal Navy, it is the name of His Majesty’s Ship Thane that made me smile the most, bringing to mind the lines spoken by the three witches over their cauldron “All hail, Macbeth! Hail to thee, thane of Glamis! … All hail, Macbeth! Hail to thee, thane of Cawdor! … All hail, Macbeth, that shalt be king hereafter!” Thane was the title given to a local royal official in medieval eastern Scotland, equivalent in rank to the son of an earl, who was at the head of an administrative and socio-economic unit known as a shire or thanage.
As did all carriers of this class, Thane rose from the launching ways cradle (starting in February 1943) as a C3-class merchant hull that was requisitioned by the United States Navy and set on a course of conversion to a Bogue-class escort carrier with the rather gentle name of USS Sunset. Less than five months later, Sunset slid smoothly into the waters of Commencement Bay, and was towed to a dock for completion. It took another four months to complete her and, never commissioned in the United States Navy, Sunset was transferred to the Royal Navy under Lend-Lease on 19 November 1943 and renamed the more regal Thane.
Following sea trials and a shakedown cruise, Thane then steamed with a small crew to Vancouver for further Royal Navy tweaks to her systems and structure, arriving there in the first week of December. While in Vancouver, her full crew began arriving and she was moved to the Burrard terminal to act as an accommodation ship—rows and stacks of bunks lining her hangar deck, accommodating arriving sailors for three other carriers (Arbiter, Queen and Speaker) that were undergoing the modification process. She carried out this duty for four months. Finally, in early April, Thane moved to a berth where her own modification work could begin.

An informative photograph of HMS Thane (background) and HMS Patroller in the Burrard Dry Dock Company’s docks getting the standard lengthening of their flight decks (among 150 different modifications) by the addition of a round-down at the stern. The size of the yard worker crouching on Patroller’s new round-down tells us just how large these “baby flattops” really were. Photo: RoyalNavyResearchArchive.org.uk
Two months later, the modifications made (some in Esquimalt), she made a short return voyage back south to Bremerton, Washington for ammunitioning. Following several days of provisioning in Vancouver, she was set to sail on her maiden voyage, but not before a dedication ceremony on Dominion Day 1944 and, a week later, a big dance party held on the flight deck, featuring the vocal delights of Lester Coles’ Debutantes backed by the Sandy DeSantis Band.

Her Majesty’s Ship Thane steams, well… majestically… into Vancouver Harbour after passing under Lions Gate Bridge on 28 June 1944 with her Royal Navy crew lining the flight deck edges. She was returning from a round trip to Bremerton, Washington where she took on ammunition and conducted sea trials. After Thane tied up in Burrard Inlet, a Blackburn Shark was delivered to the ship on a barge and hoisted aboard. This obsolete RCAF aircraft would give deck handling crews an airframe to push around the deck and train with. Photo: NavSource.org


I absolutely love these wonderful photographs of HMS Thane’s farewell dance dockside in Vancouver on 8 July, the day before her crew cast off and sailed for Panama. According to the Royal Navy Research Archive, the officers and guests were treated to the soothing sounds of the Lester Coles’ Debutantes backed by the swinging sound of the Sandy DeSantis Band. From the long shadows and sunny deck, it was a sublimely beautiful evening. In the bottom photo, her newly acquired Blackburn Shark graces the head table—the only aircraft ever to be officially assigned to Thane. Photo: RoyalNavyResearchArchive.org.uk
Thane let go lines the very next day and began her long voyage to Norfolk via the Panama Canal. Three days later she tied up in San Francisco to have additional communication equipment installed. She put to sea again on 14 July, sailing down the coast of California. She did a lot of training as she went, her aircraft handling crew moving their Blackburn Shark about on deck until they didn’t need it anymore, when they pushed her overside as they approached Panama. En route, Thane’s crews worked up radar and other equipment with participating B-24 Liberators as well as a Navy blimp and a Consolidated PB2Y Coronado.
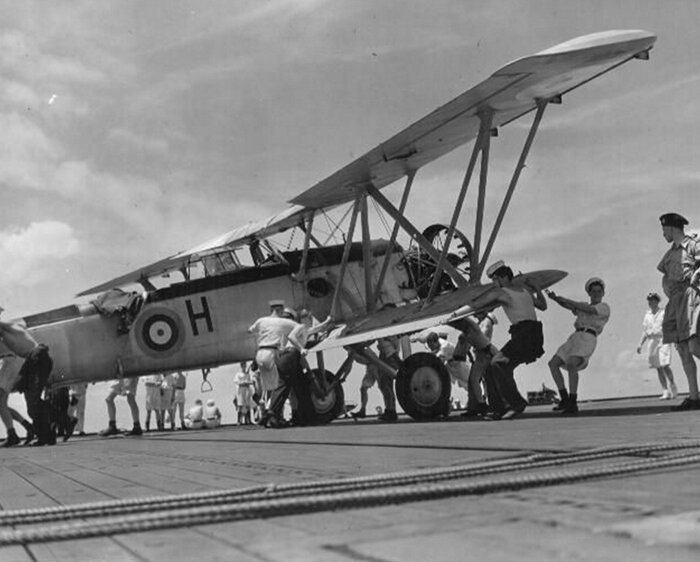
An ex-Royal Canadian Air Force Blackburn Shark biplane torpedo bomber is manhandled by crews from HMS Thane as they learn the new trade of moving heavy aircraft on deck while at sea. The aircraft was deemed obsolete by the RCAF and the crew was told to ditch the Shark when no longer needed. The RCAF purchased seven Blackburn Shark IIs in 1936 for service with No. 6 (Torpedo Bomber) Squadron, later operating as No. 6 (Bombing and Reconnaissance) Squadron on shipping patrols off the Canadian west coast. Two Blackburn Shark IIIs were supplied to the RCAF by Blackburn in 1939 as forerunners/templates for 17 similar aircraft built by Boeing Aircraft of Canada at Vancouver, with 840 hp (630 kW) Pegasus IX and used by Nos. 6 and 4 (BR) Squadrons. RCAF Blackburn Sharks, some of which operated as floatplanes, were withdrawn from service in August 1944 and five were then transferred to the RN Air Observers’ School in Trinidad. Photo: RoyalNavyResearchArchive.org.uk

En route to Panama, the crew pushed their old Blackburn Shark overboard, and then used it for gunnery practice for the aft Oerlikon tubs at the stern as they left it in their wake. A sad end to an aircraft that filled the gap between the wars. Photo: RoyalNavyResearchArchive.org.uk

While on her way to Great Britain where she would operate with heavier-than-air aircraft, HMS Thane was met by a lighter-than-air K-class blimp of the United States Navy which practiced approaches to her flight deck. These blimps were powered by two Pratt & Whitney Wasp nine-cylinder radial air-cooled engines, each mounted on twin-strut outriggers, one per side of the control car that hung under the envelope. Before and during World War II, 134 K-class blimps were built, configured for patrol and anti-submarine warfare operations and were extensively used in the Navy’s anti-submarine efforts in the Atlantic and Pacific Ocean areas. Photo: RoyalNavyResearchArchive.org.uk

While Thane’s officers and men watch, a multi-engine patrol bomber of the Panama defence force makes a simulated attack run on the ship—on the West Coast of the United States. The photo, from the excellent Royal Navy Research Archive, comes with a caption that states this is a Consolidated B-24 Liberator, but the profile and tail form hint at a Consolidated PB2Y Coronado flying boat. On the flight deck we see Blackburn Shark 548 with her undercart removed to simulate a crashed aircraft on the deck. Photo: RoyalNavyResearchArchive.org.uk
Thane transited the Panama Canal mid-July, but engine turbine problems kept her at Colón (Cristóbal docks) on the Caribbean side. She made Norfolk at the end of the month. While at Norfolk, Thane loaded no less than 85 Grumman Hellcats to be delivered to Cape Town, South Africa. She crossed the South Atlantic Ocean and arrived at Cape Town at the beginning of September. She offloaded her charges and turned around and set a course for Norfolk again.
By the first week of October, Thane was back at Norfolk, and loading more aircraft. It was just a few days before she crossed the Atlantic once again, this time bound for the Clyde with another large consignment of Hellcats. Thane arrived in the Clyde in the middle of the month. Having offloaded her Hellcats, she was given a cargo of Jeeps, trucks and other military equipment for delivery to Belfast. Having done this, she returned to the Clyde to prepare for a much longer voyage to Egypt via Gibraltar.
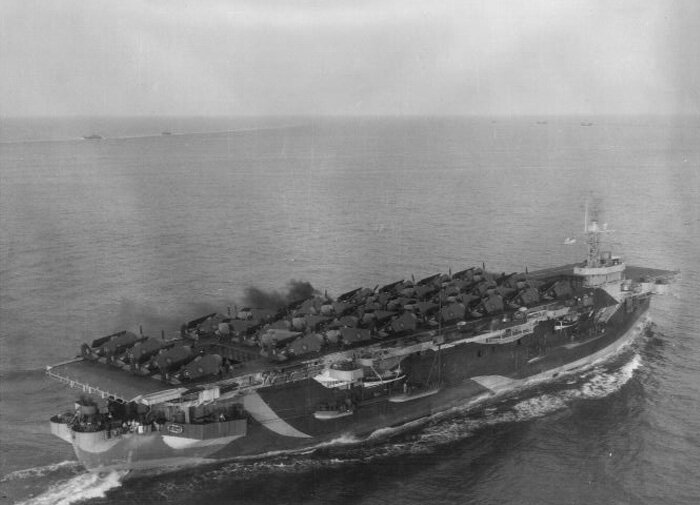
HMS Thane with her flight deck covered in Hellcat aircraft, increases speed in convoy on Chesapeake Bay, setting course for the Clyde to deliver her load of Lend-Lease aircraft. It was her second crossing of the Atlantic, her first being in August on another ferry trip to Cape Town, South Africa. Photo: Navsource.org
At the beginning of November, Thane sailed with Convoy KMF.36, a massive troop convoy heading to Gibraltar, the Mediterranean and Alexandria with 18 troopships carrying a total of nearly 42,000 men. After reaching Alexandria, Thane detached from the convoy and continued on to Port Said, where she offloaded her cargo of Hellcats and Avengers then took aboard the personnel and aircraft from 831 and 834 Squadrons for the voyage back to the Clyde. She was back in the Firth of Clyde by the end of the first week of December 1944. Ten days later, she was crossing the Atlantic again to pick up the men and aircraft of the newly formed 1851 Squadron, whose 18 Corsairs came with them.
At the end of December in Norfolk, Thane took delivery of aircraft to be ferried including nine Sikorsky R-4B Hoverfly helicopters, the first for the Royal Navy. These were flown on board and stowed in the hangar spaces. In all, Thane carried 84 aircraft and left for New York on New Year’s Eve, arriving there the following day and joining the assembly of Convoy CU-53, a 33-ship group with general cargo and troopships, bound for Le Havre and destinations in Great Britain. With her in the crossing was the carrier HMS Trouncer. It was a particularly rough passage, and the entire convoy spent some time hove to. As the convoy approached Great Britain, Thane detached and moved on to Belfast to offload her cargo of aircraft and squadron personnel, then on to the Clyde where she was to repair damage from the crossing.
On the short voyage from Belfast, across the North Channel to the Firth of Clyde, Thane was torpedoed by U-1172 under the command of Kaptainleutnant Jürgen Kehlmann. She was in the swept channel at the time, just approaching the Clyde Light Ship, an area where she would have felt very safe. The torpedo hit her starboard aft quarter, just below the gun sponson. The explosion tore the sponson and perhaps its crew clean off the side of the ship and damaged the hull severely. Ten men were killed as well as 25 injured. She was dead in the water and had to be towed inside the submarine nets by the frigate HMS Loring.
Her aircraft were craned off (except most of the helicopters which were flown off), her ammunition removed (a huge and dangerous task), sailors given shore leave and marine engineers came to assess the damage after she was put in dry dock. Thane was deemed too damaged to be worthwhile repairing and was towed to Faslane at the top of the Gare Loch where she was stored awaiting her future. She never flew off or landed a single aircraft during her service life, unless the helicopters are included.
By the end of 1945, HMS Thane had been handed back to the United States Navy and then sold for the scrap value of her steel. It was not a sublime sunset for the carrier that once carried that name.
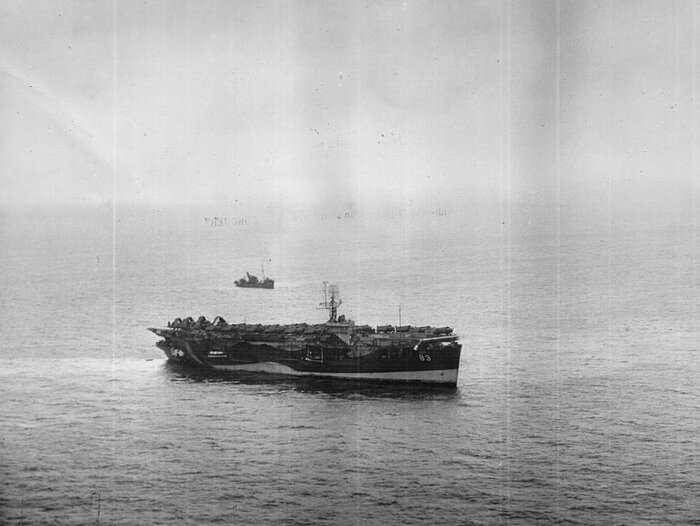
A particularly interesting aerial photograph of HMS Thane, shortly after she was torpedoed near the Clyde Light Ship/Casualty buoy, which can be seen in the distance. She is dead in the water and oil is leaking from damage near the stern. We can see the light-coloured scar left by the loss of the aft starboard sponson. While she suffered the loss of ten men, she was taken under tow by the Royal Navy frigate HMS Loring and taken to Greenock to offload her large cargo of aircraft and assess the damage. While she did not sink, the U-boat’s captain Jürgen Kuhlmann was credited with the loss of the ship because it was written off. It was the only loss he was credited with. He and the entire crew of U-1172 were lost just twelve days after the Thane torpedoing, sunk by the Royal Navy frigates Tyler, Keats and Bligh. Photo: NavSource.org

A revealing photo of heavy damage sustained by HMS Thane when she was struck by a German torpedo on 15 January 1944. She was operating unescorted in sight of the Clyde Light Ship/Casualty buoy when she was struck in the starboard flank by a single torpedo from U-1172 under the command of 25-year-old Oberleutnant zur See Jürgen Kuhlmann. The explosion blew the starboard sponson clear off the hull, buckled the flight deck and killed 10 members of the ship’s crew. It was Kuhlmann’s first and only war patrol. He had been in command of U-1172 since the previous April, overseeing its construction and fitting up—a practice that allowed U-boat commanders and key crew members to become familiar with every component of the boat. The carrier was ferrying aircraft at the time of the attack, approaching Greenoch after disembarking some of her aircraft at Belfast and was likely feeling home free. Photo: NavSource.org

HMS Thane, looking a tad forlorn and tied up at a dock at the Royal Navy base at Faslane. Most, if not all of the Ruler-class Lend-Lease escort carriers of the Royal Navy were handed back to the United States Navy in America (Norfolk), but Thane was retired early in 1945 due to her extensive damage after the torpedo attack in home waters. Deemed not worth repairing, she lingered at Faslane with her armaments removed. She was handed back to the USN there in early December of 1945 and sold for salvage. Photo: NavSource.org
It was my intention when I set out to do this piece that I would write something on all the escort carriers of this Royal Navy class. There are in fact 25 carriers that are considered part of this class of ship, though only 15 of them have names of rulers such as Thane, Atheling, Rajah or Shah. There is another group that carry names that are more like those of the Attacker or Avenger Classes. These are Patroller, Puncher, Ravager, Reaper, Searcher, Slinger, Smiter (my favourite), Speaker, Trouncer (another favourite) and Trumpeter. This story is already far too long, so I have limited my detailed chapters to those carriers with names of a royal or noble nature. However, each of the second group deserves at least a couple of photographs and a bit of a story so that the entire class is represented. Here then, are the remaining ships of the Ruler Class of the Royal Navy in the Second World War.
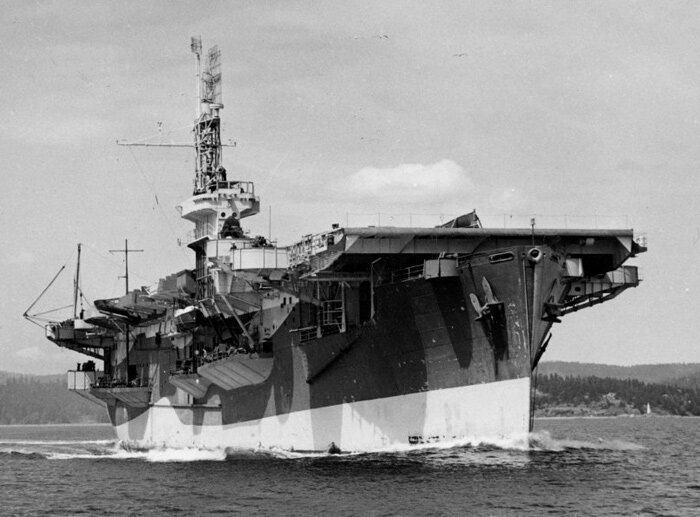

HMS Patroller began life as USS Keweenaw, named for the uppermost peninsula of Michigan. First launched in May 1943, she was handed over to the Royal Navy and commissioned as Patroller in October. She spent her war primarily as a ferry carrier, ending her service as a trooping ship. She was converted to a mercantile ship after being struck from the register and continued on as the freighter SS Almkerk (bottom photo, transiting the Panama Canal) and subsequently SS Pacific Alliance. She was broken up in 1974 at Kaoshing, Taiwan. Photos: Top: NavSource.org; Bottom: vns-voe.nl


HMS Puncher was first laid down as a mercantile ship by the Seattle–Tacoma Shipbuilding Corporation. She was subsequently requisitioned by the US Navy for conversion to an escort carrier. She was launched in November 1943 as USS Willapa, named for Willapa Bay on Washington’s Pacific Coast. In February 1944, she was transferred to the Royal Navy and named HMS Puncher. Other than her air group, Puncher was manned by members of the Royal Canadian Navy and as such, along with Nabob, is considered Canada’s first foray into aircraft carrier operations. Initially she worked ferrying aircraft, then served with the Home Fleet at Scapa Flow, from which she and her air group carried out operations in Arctic waters. Following a brief period of trooping duties at war’s end, she was sold for conversion to mercantile service as SS Muncaster Castle (bottom photo in California), then SS Bardic and SS Ben Nevis. She was finally broken up in Taiwan in 1973. Photos: Top: NavSource.org; Bottom: Dick Markell Photography
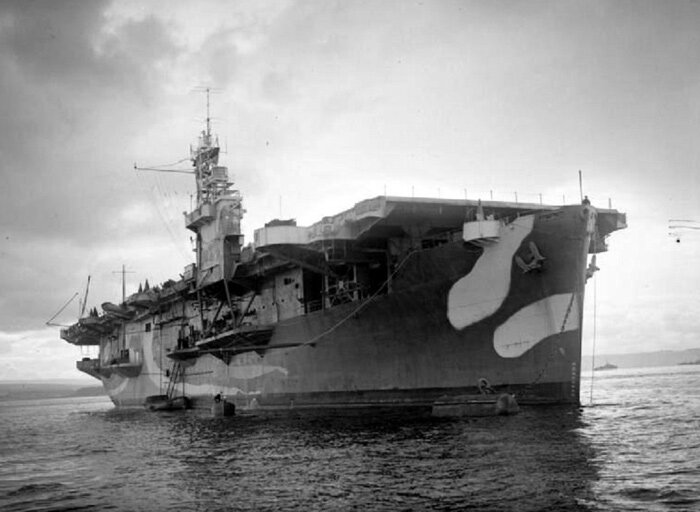

HMS Ravager was launched at the Seattle–Tacoma Shipbuilding yards in July of 1942. Originally meant to be named Charger to replace a Royal Navy ship of that name that went to the US Navy instead, she became Ravager and was commissioned in April 1943. She was used for deck landing training on the Clyde and then spent a long period ferrying aircraft from America. In her career, she sustained damage from two collisions with other ships. She was damaged when she collided with the aircraft test carrier HMS Pretoria Castle in November 1943 as well as in a collision with the mercantile Ben Lomond a year later. Her very distinctive dazzle paint, with two vitiligoid white patches on her prow, disappeared during her service… likely due to repaint after repairs. She ended her service as a deck landing training carrier, before being sold off for conversion to mercantile service. Following conversion, she became SS Robin Trent (bottom photo), then SS Trent, before she was broken up at Taiwan in 1973. Photos: Top: NavSource.org; Bottom: Pitwateronlinenews.com
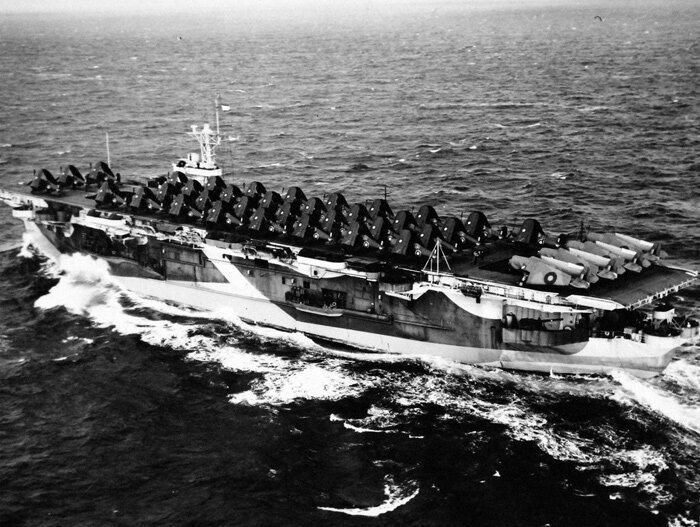
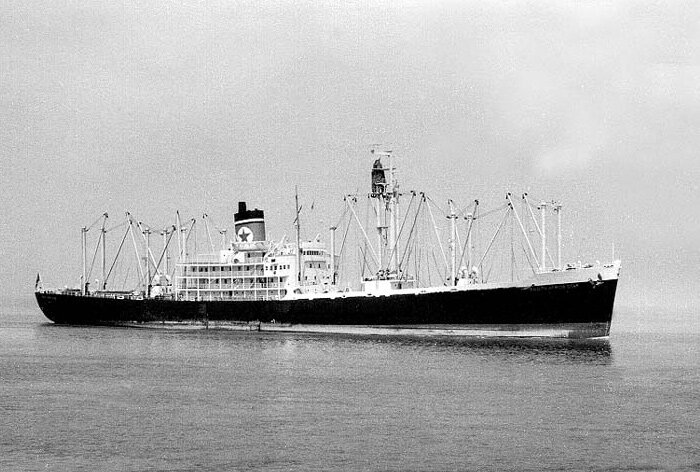
First laid down and launched as USS Winjah (possibly named for Winyah Bay, South Carolina), HMS Reaper was taken on strength with the Royal Navy in February of 1944. She served primarily as a ferry carrier (including bringing war trophy German jet aircraft back to the US). She ended her war in the Pacific as both a ferry carrier and a transport for civilians imprisoned by the Japanese, bringing them to Australia from Hong Kong. She was converted to passenger-cargo service as SS South Africa Star and soldiered on until she was broken up in Japan in 1967. Photos: Top: NavSource.org; Bottom: BlueStarLine.org
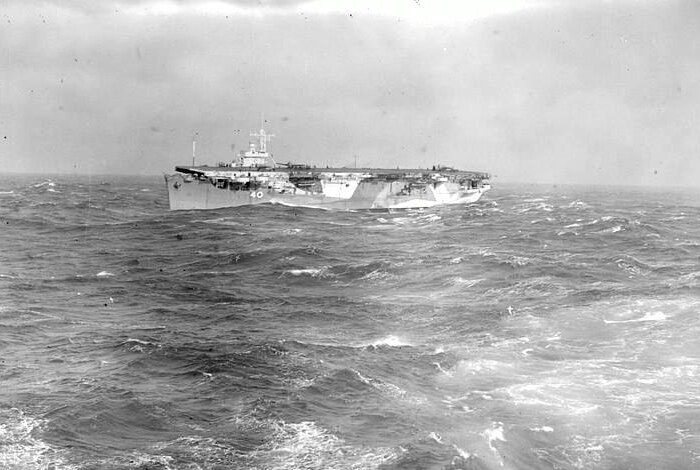
The hull that would become HMS Searcher was initially laid down as a merchant vessel at the Seattle–Tacoma Shipbuilding yard and launched seven months after Pearl Harbor. It was requisitioned by the United States Navy and sent to Portland, Oregon for conversion to an escort carrier. Just days before the conversion was completed, the new carrier was transferred to the Royal Navy and commissioned as His Majesty’s Ship Searcher at Tacoma. En route to New York via the Panama Canal, she was heavily damaged in weather, forcing her into Norfolk, Virginia for repairs. Her war service began as all the Ruler-class carriers began, with a ferry load of aircraft (crated in this case) to the war zone. She was further modified in Great Britain for service on Atlantic convoys, which duties she carried out until March 1944 when she took part in Operation TUNGSTEN, the attack on the German battleship Tirpitz in Norwegian waters. Searcher would see plenty of combat operations (TUNGSTEN, DRAGOON, and JUDGEMENT among many) in the Arctic as well as in the Mediterranean Sea. Her only other ferry trip was to bring 24 Wildcats to Trincomalee in July of 1945. Once there however, her operational career ended and she took passage back to the UK for decommissioning and thence to Norfolk. She was sold for mercantile conversion and operated as SS Captain Theo (bottom photo in Vancouver) from 1947 until 1964 when she became SS Oriental Banker. She was sold for scrap in 1967 and broken up in Taiwan. Photos: Top: NavSource.org; Bottom: SeaArchives.vancouver.ca

The Ruler-class aircraft carrier so dramatically portrayed in the opening image of this story is HMS Searcher. No other image so powerfully demonstrates the ruggedness and determination of these baby flattops and their doughty crews during the Battle of the Atlantic. She is captured here during rough weather in the North Atlantic Ocean. We see that a censor has crudely attempted to erase the long range radio mast in front of the island superstructure. In the opening image, through the use of Photoshop, I made it look right after 75 years. Photo via Pinterest


As with many Ruler-class carriers, HMS Slinger began life as a hull destined for mercantile service, but was requisitioned in the yard by the US Navy and converted to a flattop to be named USS Chatham. Though she was launched in September of 1943, her build-out was not completed until almost a year later. Upon completion, she was transferred directly to the Royal Navy and named Slinger (during the First World War, another Royal Navy ship had been named Slinger—very appropriately for a ship designed specifically to catapult floatplane aircraft of the Royal Naval Air Service!) Following her seemingly mandatory ferry crossing of the Atlantic, she delivered her Corsair cargo and was tied up at Sheerness with modifications for bomb stowage. En route to Clyde following the work, she struck a mine on 5 February 1944 and was under repair until late September. She was chosen for service as a replenishment carrier (with various stowed and operational aircraft aboard) and made a trip to Colombo, Ceylon. She then saw service in the Pacific Theatre as a replenishment carrier to the British Pacific Fleet. She remained in the Far East after the end of the war and was present at Hong Kong for the surrender of the Japanese there. Slinger was handed back to the US Navy in Norfolk in February 1946, where she was placed on the Disposal List. She was then converted back to a cargo ship and renamed SS Robin Mowbray (bottom photo), eventually being broken up in 1970. Photos: Top: NavSource.org; Bottom: SeaArchives.vancouver.ca

HMS Smiter was a Ruler-class escort carrier built originally as a type C3 cargo vessel hull as were most of the Bogue/Ruler-class escort carriers. The Type C3 hull is described by Wikipedia as follows: “Type C3-class ships were the third type of cargo ship designed by the United States Maritime Commission (MARCOM) in the late 1930s. As it had done with the Type C1 ships and Type C2 ships, MARCOM circulated preliminary plans for comment. The design presented was not specific to any service or trade route, but was a general purpose ship that could be modified for specific uses.” She was converted to a Bogue-class carrier during her build and was launched in September of 1943 as USS Vermillion, named for Vermillion Bay, Louisiana on the Gulf of Mexico. She was transferred to the Royal Navy in mid-January 1944 and renamed HMS Smiter—one of my favourite names! An interesting bit of trivia—there are 133 instances of the word smite in the Bible (e.g.: “Vex the Midianites, and smite them!” (Book of Numbers)). After arriving in Great Britain, she was selected for ferry carrier duties. She made only one more crossing before she was taken in hand for repairs. This lasted until October 1944 when she was nominated for aircraft landing training duties in the Clyde, which she carried out until December, when she went in for more repair work and refit for convoy escort duty and sent to South East Asia, arriving at Trincomalee at war’s end. In April 1946, she was back in Norfolk and in the hands of the US Navy. She was sold and converted to commercial use as SS Artillero (bottom photo). In 1965 she was sold again and became SS President Garcia with the Philippine President Line. In 1967, she ran aground at Saints Bay on the Isle of Guernsey, and was heavily damaged structurally, written off and salvaged for scrap. Photos: Top: NavSource.org; Bottom: ShipSpotting.com

A wonderful shot of the once-proud HMS Smiter, upon the rocks at Saints Bay, Guernsey in 1967. The cargo vessel struck the rocks at 12 knots on the night of the 13th of July and though she looks intact in this photo, she suffered serious internal structural damage. President Garcia was pulled from the rocks by three Dutch salvage tugs (the Dutch are the best in the world at this) a week after she fetched up. She was towed eventually (stern first) to Rotterdam to discharge her cargo of copra (dried coconut meat) and to determine her fate. She was scrapped. Photo: Emma196789 on Flickr.com
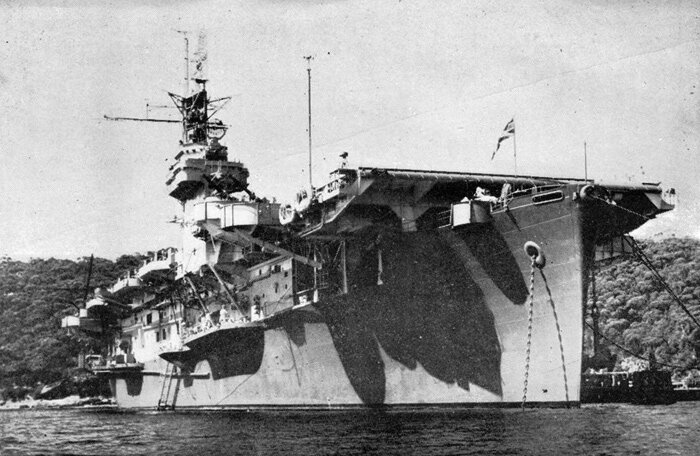

Another C3-class mercantile hull requisitioned during construction for conversion to a Bogue-class escort carrier with the future name of USS Delgada, she was transferred instead to the Royal Navy and commissioned as HMS Speaker following her completion in November 1943 at Portland, Oregon. During her passage to Norfolk, Virginia via the Panama Canal, she exercised in the Caribbean Sea with escort carriers HMS Empress and USS Tulagi. She sailed from New York in March 1944 for the Clyde with passengers and aircraft. After one more crossing of the Atlantic as a ferry carrier, she was in the yard to be modified as an assault carrier. Following this, she became a deck landing training carrier for a time, then sailed for Colombo via Gibraltar and the Suez Canal. Speaker then sailed to Sydney, Australia to join the Pacific Fleet and take part in Operation ICEBERG, the Battle of Okinawa. She provided air cover during replenishment operations until May 1945 when she became a replenishment carrier herself. Following her replenishment and combat duties, Speaker was nominated for the repatriation of Allied POWs and civilian internees. Speaker was the first Allied aircraft carrier to enter Tokyo Bay. She made several trips (from Tokyo, Nagasaki, Hong Kong and Manila) to repatriate or transport personnel. She was handed back to the US Navy at Norfolk in July 1946 and was subsequently sold for conversion to mercantile service and renamed as SS Lancero, then President Osmeña (bottom photo) and finally Lucky Three on her way to the scrapper’s yard in Taiwan. Photos: Top: NavSource.org; Bottom: ShipSpotting.com
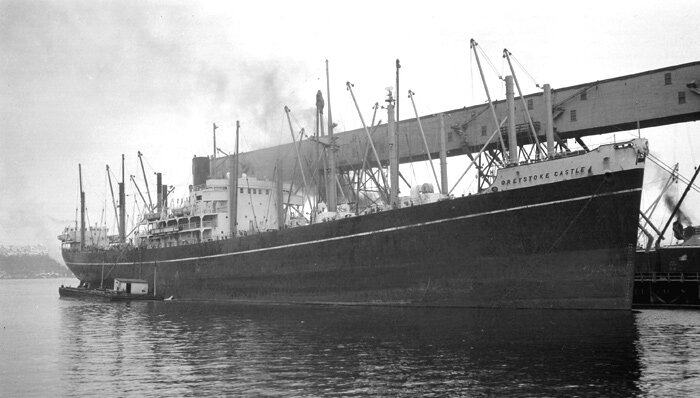

A great photo of HMS Trouncer at Portland, Oregon showing her freshly applied and distinctive dazzle paint scheme. Trouncer began life as USS Perdido, a Bogue-class escort carrier. Following her launch, Perdido (named after Perdido Bay, Florida) was built out at Portland, Oregon and then transferred to the Royal Navy and commissioned in January of 1944 as Trouncer. Her first duty was to deliver aircraft from Norfolk to Casablanca. Several more crossings of the Atlantic ensued, with Trouncer ferrying aircraft until February 1945 (except for one brief period as a deck landing training carrier in the Clyde). After a brief postwar voyage to Southeast Asia, she returned to the Clyde and eventually Norfolk where she was handed back to the Americans. It was during this voyage to Colombo in September of 1945 that Trouncer took part in the rescue of Greek survivors from the burning wreck of the passenger vessel SS Empire Patrol. She was sold for merchant marine service and converted to a freighter with the name SS Greystoke Castle (bottom photo), then SS Gallic and SS Benrinnes. She was broken up in Taiwan (Formosa) in 1973. Photos: Top: NavSource.org; Bottom: SeaArchives.vancouver.ca

The famous and dramatic photo of HMS Trouncer attempting to take terrified Greek refugee passengers directly from the aft deck of SS Empire Patrol near Port Said, Egypt in September 1945. With sailors and officers crowding the forecastle of Trouncer, the Captain edges close to the stern of the burning ship. This proved to be almost fatal to both ships, and Trouncer was forced to back off and lower boats and boarding nets. Of the 510 survivors of the sinking, Trouncer rescued 420. Photo: EmpirePatrol.com


HMS Trumpeter began life at the Seattle–Tacoma Shipbuilding yard as a cargo ship called SS Lucifer. She was requisitioned by the US Navy during construction and built out as an escort carrier, launched and named USS Bastion in December 1942. Following her completion post-launch, she was transferred to the Royal Navy and commissioned as HMS Trumpeter. Her first duties were a pair of ferry crossings of the Atlantic with Lend-Lease aircraft for Europe. She then was attached to the Home Fleet at Scapa Flow where, from August 1944 to February 1945, she participated in many combat operations. Following a refit in the Clyde in early 1945, she continued with Scapa Flow-based Home Fleet operations in northern waters—one of the most combat experienced escort carriers in Royal Navy service during the Second World War. In July of 1945, the European war having ended, Trumpeter sailed for Colombo, joining the 21st Aircraft Carrier Squadron, where she was to participate in the landings of Malaya. She was sold back to mercantile service by the US Navy in 1948 and converted to become the cargo vessel SS Alblasserdijk. This vessel was renamed Irene Valmas in 1966 and finally broken up in Spain in 1971. Photos: Top: NavSource.org; Bottom Arendnet.com